Appendix A: Frame-based editing – the basics
A.1. Basic editing
The Strype editor allows the creation and manipulation of Python programs using the mouse or keyboard. All editing can be achieved with keyboard commands.
Frames
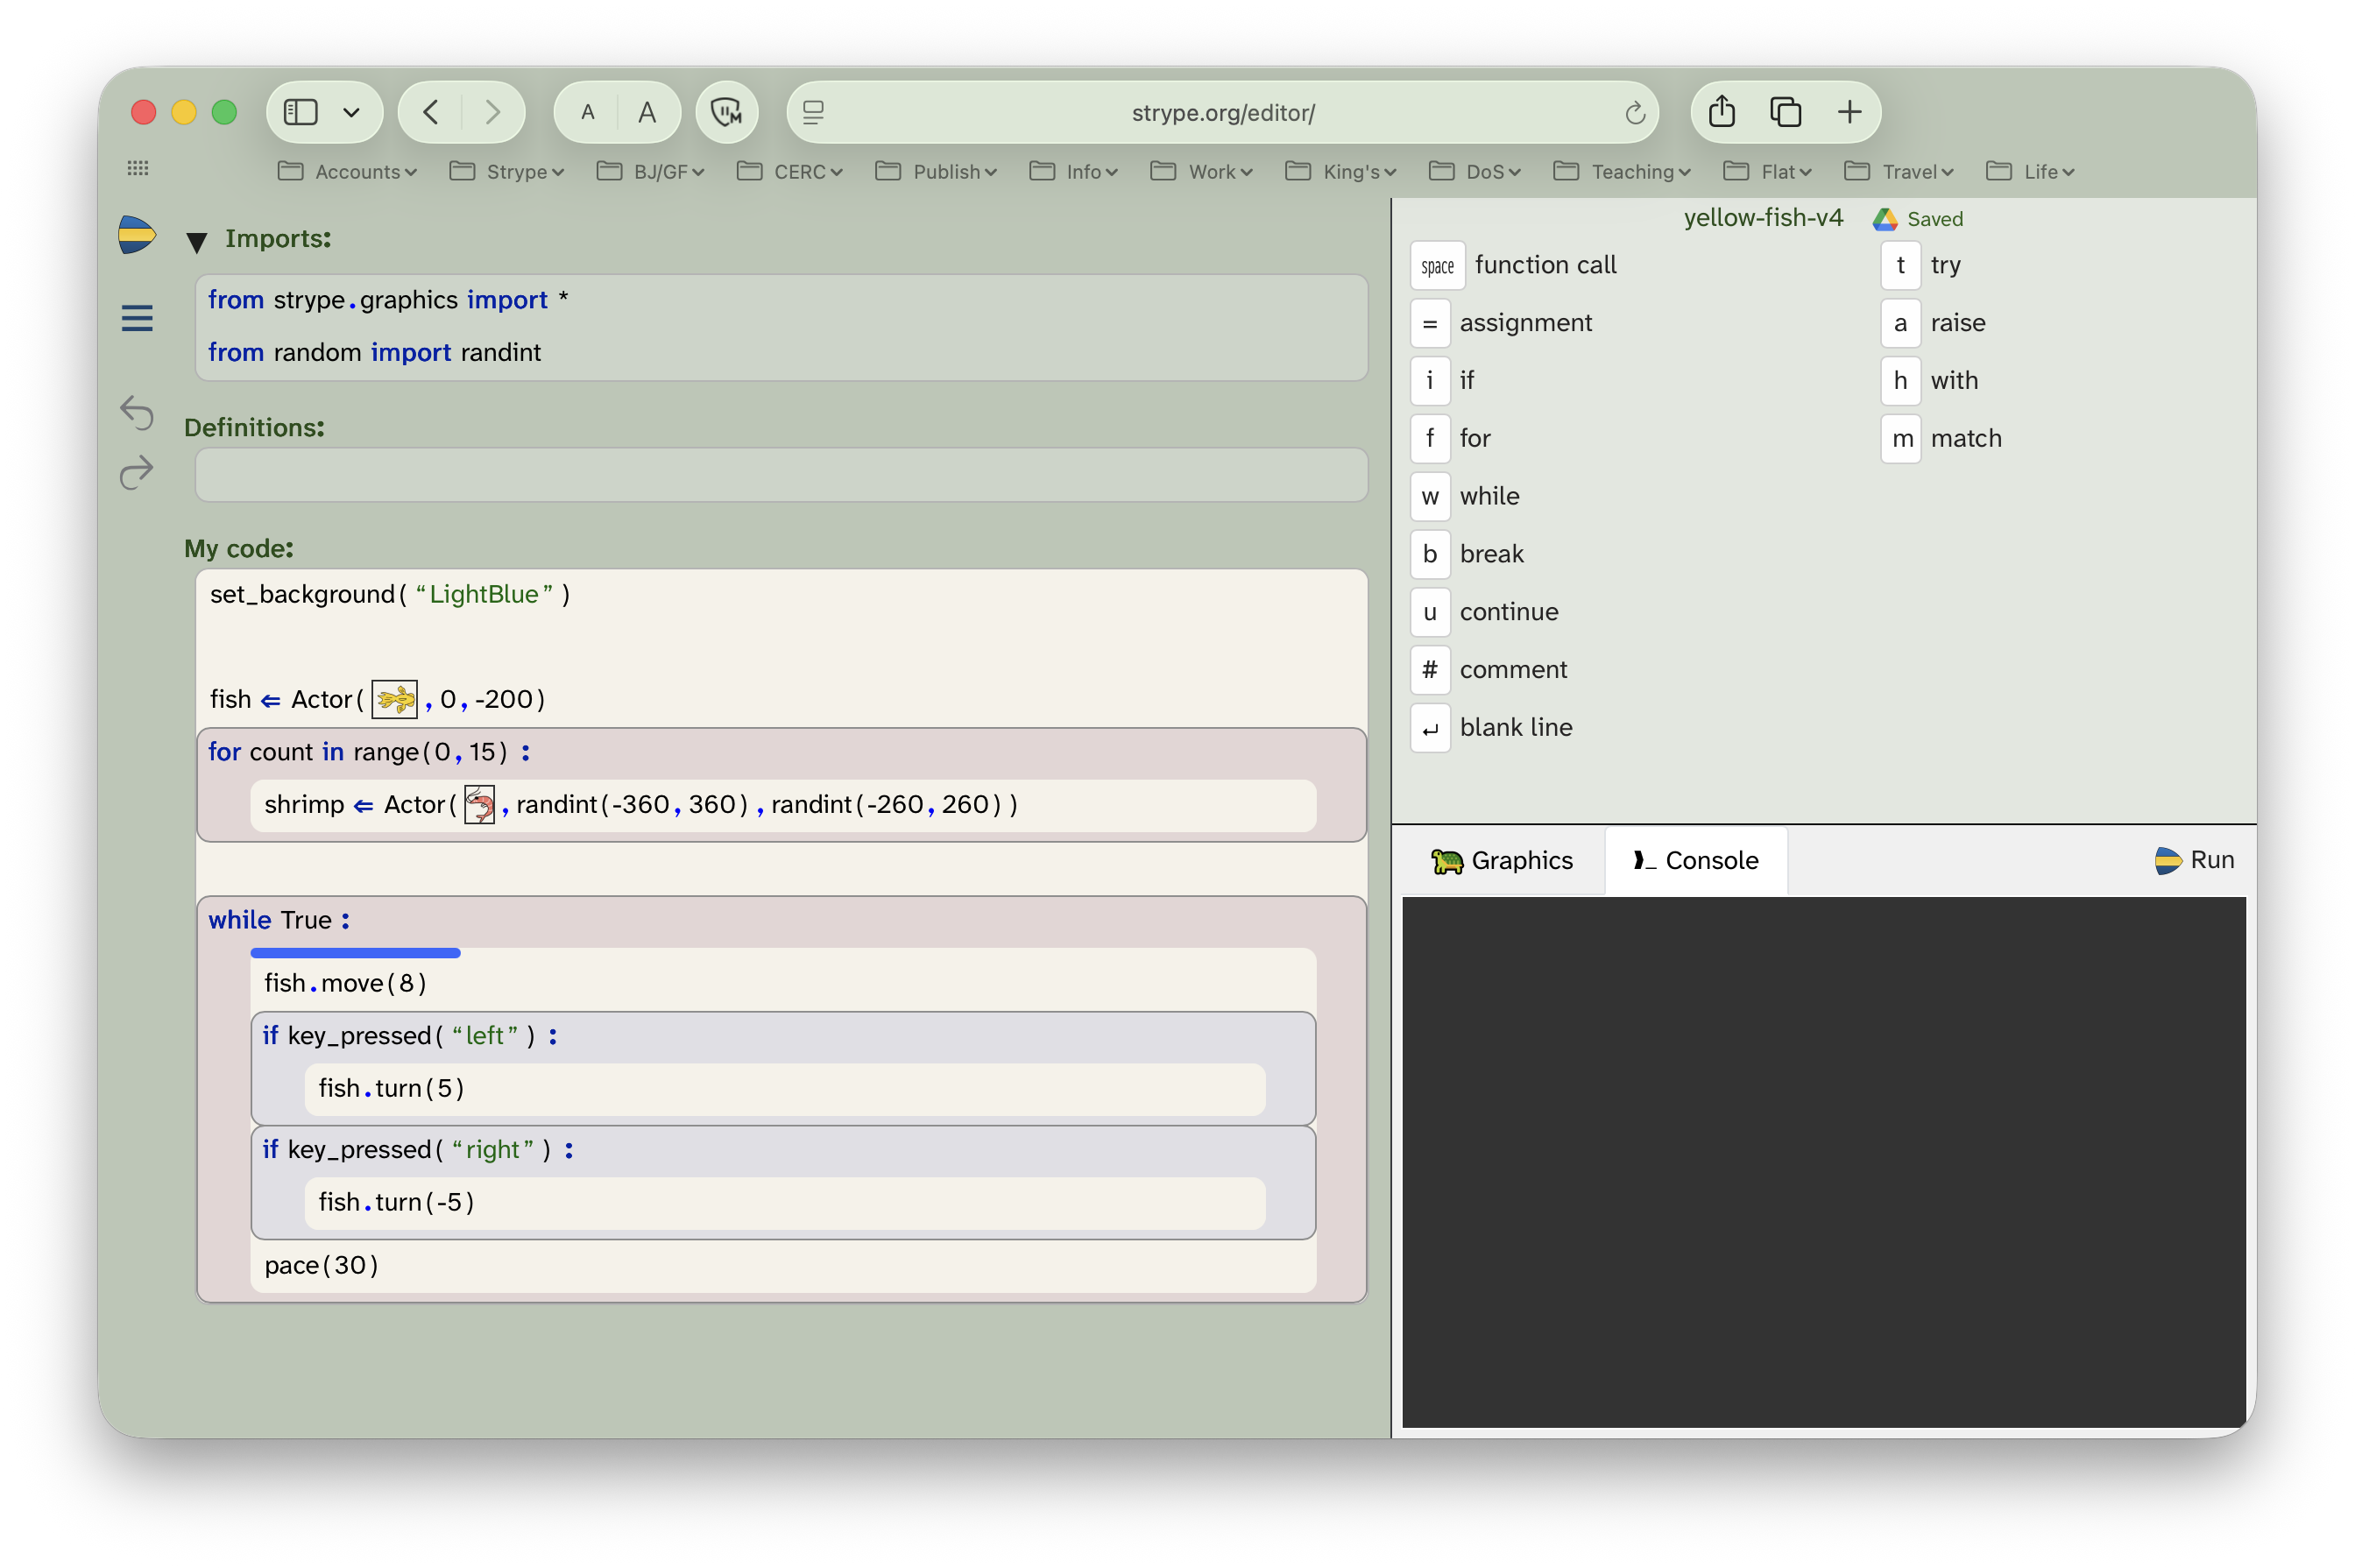
In Strype, program statements are represented by frames – coloured boxes which may be nested within each other (shown under the "My code" heading in Figure A.1). Each Python statement is represented by a frame.
Some frames have a distinctive background colour. Simple frames (such as assignments or function calls) have the same colour as the code background, and no visible outline. They are still frames, and can be manipulated like all other frames.
Frames have slots – areas that must be filled in to complete the frame. Text slots are used for expressions and accept textual input. Frame slots hold nested frames. In an if-statement, for example, the condition is held in a text slot, while the body is held in a frame slot.
Inserting frames
Strype has a frame cursor (the blue bar in Figure A.1) that indicates the current editing position.
A panel in the top right of the main interface (the frame palette) shows all available frames which may be inserted at the current cursor position (see Figure A.1).
A frame is inserted at the current position by either clicking the frame in the frame palette or by pressing the keyboard shortcut shown there. For example, pressing ``i'' will insert an if-statement, or space bar will insert a function call.
Cursor movement and selection
The frame cursor is moved using the cursor keys, which can also be used to select one of more frames.
| Key | Function |
|---|---|
|
Move the frame cursor one line up or down. |
|
Enter the next/previous text slot. |
|
Select text in the current text slot. |
|
Move the frame cursor up/down at the current frame level (MacOS). |
|
Move the frame cursor up/down at the current frame level (Windows). |
|
Select the frame(s) above/below the cursor. Use repeatedly to select multiple frames. |
Surrounding frames
You can wrap existing frames in a surrounding control frame (such as a loop or conditional), by selecting the intended body frame(s), and then inserting the control frame.
For example, try selecting a few frames, and then press i to insert an if-frame. This will place the selected frames inside an if-statement.
The context menu
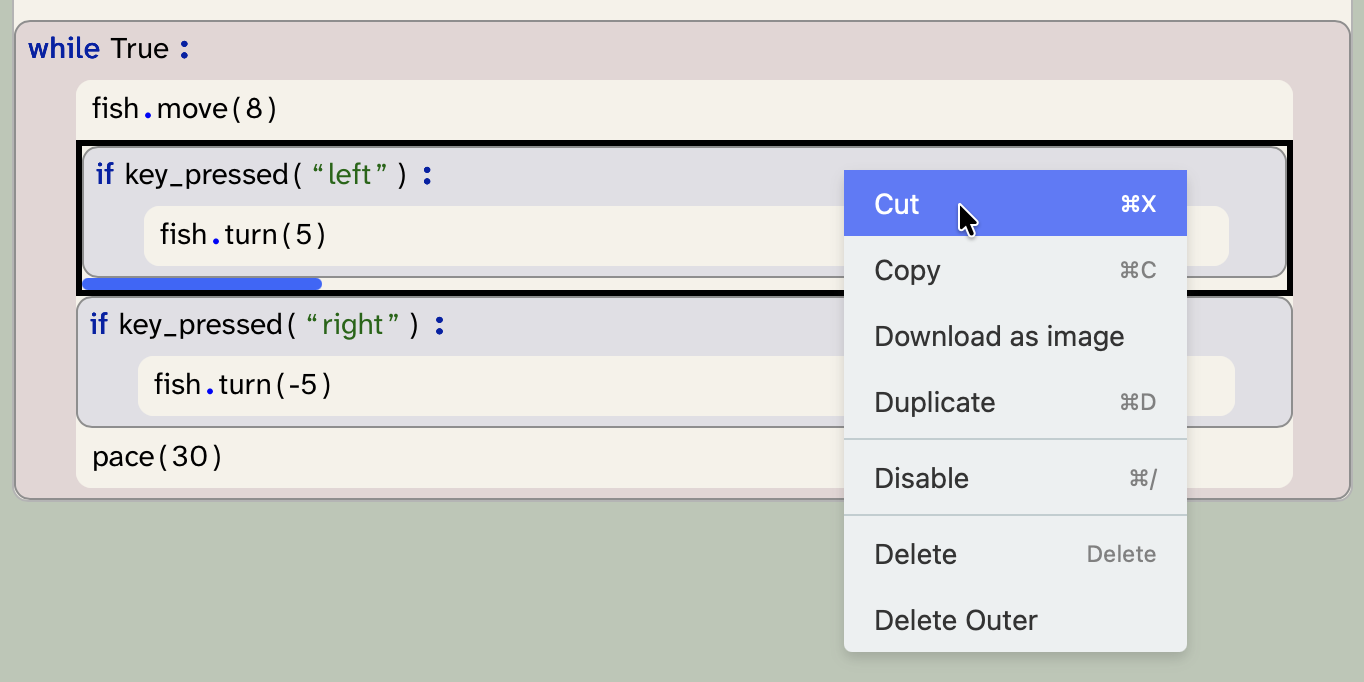
Right-clicking a frame with the mouse displays its context menu (Figure A.2). The context menu offers some useful functions for frames.
Context menu functions can be applied to multiple frames at the same time by first creating a multi-frame selection, and then using the context menu.
Some context menu functions can be applied using keyboard shortcuts; these are shown in the context menu.
Deleting frames
Frames can be deleted using the backspace and delete keys.
For a compound frame (such as an if-statement or a loop), the entire frame can be deleted (including children), or the outer frame can be deleted, leaving the body intact.
To delete the entire frame, place the cursor after the frame and use backspace.
To delete just the outer frame, place the cursor after the frame header and use backspace.
These functions can also be applied via the context menu.
Moving frames
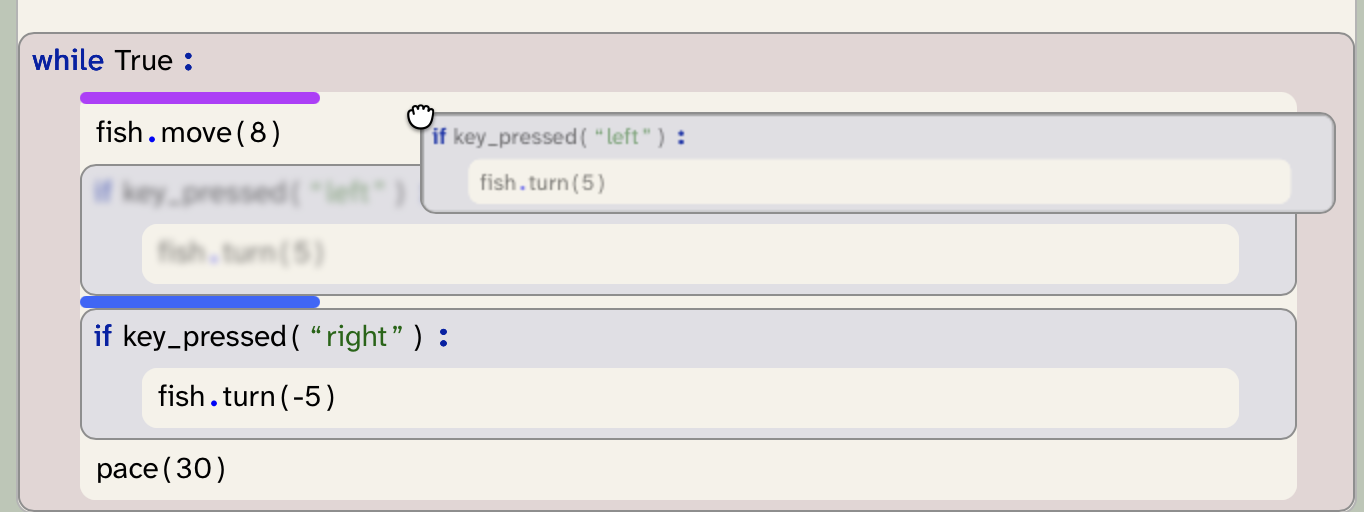
To move a frame, drag it with the mouse pointer to the desired location (Figure A.3). The purple frame cursor indicates the potential target location. Note that you will need to drag from an area with the frame background as dragging text will select it; we find it easiest to drag the right-hand end of the frames where often there is no text.
Frames can also be moved using the keyboard with frame selection, followed by cut/paste operations.
A.2. Convenience functions
Auto-completion
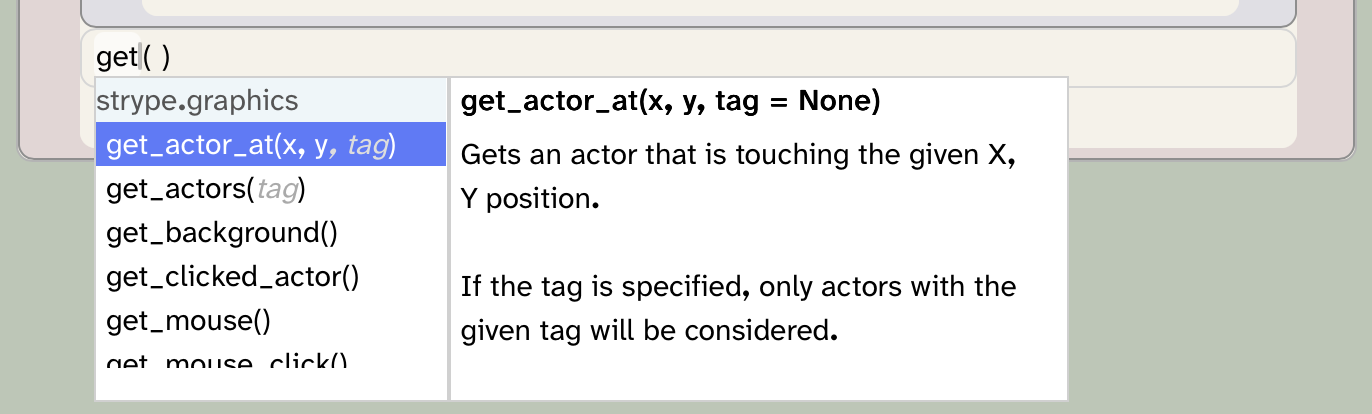
When inserting function calls or assignments, auto-completion can offer available identifiers. To activate auto-completion, use Ctrl-Space. This displays the auto-complete dialogue (Figure A.4); typing a prefix narrows the offered selection. Use the arrow keys and Enter to select an offered choice.
Disabling frames
Frames can be temporarily disabled without a need to delete them. Disabling is used in Strype instead of "commenting out" code. Disabled frames are shown with a blurred appearance.
Frames can be disabled using the context menu, or the keyboard shortcut shown in the menu.
If multiple frames are selected when the Disable keyboard shortcut is used, the state of each frame is toggled. This can be used to alternate between two different test statements: If one test statement is enabled and the other is disabled, select both frames and invoke the 'Disable' toggle. This will alternately activate each statement.