Chapter 4. A closer look at our first Python statements
Before getting back to our yellow-fish game, it will help to also look at some other constructs a bit more closely. In our first two chapters we have already seen variables, assignments, objects, method calls and if-statements.
You will have got a sense of what these statements do, and what they are there for. You will not, however, understand fully how any of them work yet. Don’t worry – that is perfectly okay. We will come back to talk more about each of these constructs and experiment with them, and you will gain a full understanding over time.
We will now go through this list and investigate each of these constructs a bit more, so that we can become comfortable with working with these language features before we start looking at new functionality.
4.1. Variables and assignment
Often, when we work with bits of data, it is not enough to just pass a value to a function. We often want to store a piece of data for use later on, or for doing further computations with it. This is when we need variables.
 We can use variables to store data for later use. Variables can be assigned a value, and later we can read that value again.
You have seen the first variable briefly at the start of Chapter 1, when we looked at the default program in the Strype editor. Let us briefly go back to this program and look at it more closely.
Exercise 4.1 From the Strype menu (click the three lines top-left in the Strype window), choose the "New project" option. This will reset the editor to the default two-line program that you started with at the beginning. (Don’t forget to save your program first if you still have unsaved changes open from previous exercises.) Run this program. What does it do?
You will see that the program consists of just two lines of code:

In this code segment, we can now recognise what the second line means: This is a function call to a function named print with one parameter. The print function is built into Python, and it prints its parameter to the Console (the text output area in the bottom right of the Strype window).
The first line is an assignment statement. We can add an assignment statement by inserting an assignment frame. A new assignment frame has two slots with an arrow symbol in the middle:

On the left side of the assignment, we can write the name of a variable. We can make up this name, and a variable with this name will be created. On the right side we write a value that we want to store in this variable. This can be any type of data that Python knows, including the three types we have seen before: strings, integers and floating point numbers.
In the example above we have stored a string into this variable ("Hello from Strype"), and we have given the variable a name that indicates that it stores a string (myString).
An assignment statement stores a value into a variable. The variable name is written on the left, followed by an arrow symbol, and the value to store is written on the right.
Exercise 4.2 Change the content of the string to a different string. Run your program.
Exercise 4.3 Write quotes around the word myString in the print method call, so that the call looks like this: print("myString"). Will this work? Run your program. What do you observe? Explain what you see. (When you are finished, remove the quotes again.)
Exercise 4.4 Change the value in the assignment (the right hand side) to a number. Run the program. Does this work?
Exercise 4.5 Once you have changed the value on the right to a number, the name of the variable is misleading: It is called "myString", but it does not hold a string. Change the name of the variable so that it accurately describes what it stores.
Exercise 4.6 Change the value on the right side of the assignment to 42 + 33. What do you think this will do? Try it out, and explain what happened.
Variable names must not have any spaces in them. If you need to use multiple words (for example, big fish), there are two programming conventions to do this:
-
Use underscores in place of spaces: big_fish
-
Capitalise each new word: bigFish
In this book, we generally use the first format.
4.2. Objects
In the previous section, we have seen that we can store values, such as strings or numbers, into variables. Next, let us look at a special kind of data type to store and work with: objects. To investigate this topic, we will use a project called knock-knock.
Exercise 4.7 Open the knock-knock example from the Chapter 4 projects. Run the project. Then read the code. Can you explain what the code does and how the project works?
Exercise 4.8 Change the dialog between the lobster and the crab. For example, you might find another knock-knock joke on the internet and use that one instead.
Exercise 4.9 Replace the images of the crab and lobster with different images.
This project makes use of an Actor object, which we first encountered in Chapter 1. The creation of this Actor object looks like this:

We can see that it looks very similar to a function call: It has a name, followed by a parameter list in parentheses. Because these look so similar, Python uses a convention: function names start with a lowercase character, while object types start with an uppercase character. This bit of Python code creates an object of type Actor, using the parameters provided.
In our code, we can see that we then assign this object to a variable, so that we can use it later:

This shows us that variables can also be used to store objects as values.
Before we go on and examine the rest of the program, let us ask a question: How do we know what object types and what functions exist for us to use?
Looking at our knock-knock program, we can see that it uses objects of type Actor, and functions such as set_background and pause. What other objects and functions are available for us, and how do we find out?
4.3. Reading the library documentation
When working in Strype, we will often make use of objects and functions from the Strype graphics library. Over time, we will have to become familiar with most of the functions available in it. So how can we see what it offers?
The answer to this lies in the library documentation. This documentation lists all object types and functions, with all their parameters and information how to use them. In Strype, you can access this documentation by selecting "Library documentation…" from the Strype menu.
Exercise 4.10 Select the "Library documentation…" option from the Strype main menu. Examine the webpage you see. Find the documentation for the pause function. How many parameters does it have? What are the types of its parameters? What do its parameters specify?
Exercise 4.11 What are the names of the special keys that you can use with the key_pressed function?
Exercise 4.12 How many parameters does the Actor’s move method have?
Exercise 4.13 In the documentation for the Actor’s move method, what does it tell you about negative parameter values?
Learning to read this documentation will be very useful for our future programming tasks. It enables us to find out what we can do. Luckily, it is not very difficult.
The main points to understand are these:
-
The heading for this documentation is Strype API documentation. "API" is short for "Application Programming Interface", which is a technical term for the functions available in a library.
-
In the list on the left, we can see that this library contains three modules. They are called strype.graphics, strype.sound and strype.builtins. Each module provides functions for a specific purpose, and each can be imported into our programs separately. We will investigate the strype.sound module later. For now, let us concentrate on the strype.graphics module.
-
We have mentioned before that we can distinguish functions and object types by their initials: Object types start with an uppercase letter, while functions start with a lowercase letter. Knowing this, we can see that this module contains three object types (Actor, Color and Image), and a list of about a dozen functions listed below them.
-
Object types are also called classes. You can see this in the documentation when you, for example, click on
Actorin the list on the left and then look at the details of the Actor definition on the right. Its first line starts withclass Actorto tell you that this specifies a class – a type of an object. We will, from now on, also use the term "class" for types of objects. -
We can click on each of the functions in the list on the left to see a detailed description of the function, including its parameters.
-
We can also see the methods of the classes. For example, we can see the
moveandturnmethods of the Actor class, which we have used in Chapter 1.
The type of an object is called a class. Classes define methods that can then be invoked on the objects of that class.
You will quickly get used to reading this type of documentation. Having it available will help us both understand the remaining parts of the knock-knock program, as well as enable us to find out what else we could do.
Exercise 4.14 In the pace function, what is the default speed used when no actual parameter is provided?
Exercise 4.15 What does the stop function do?
Exercise 4.16 What is the difference between the say and the say_for methods of the Actor class?
We have now seen that functions and classes can be defined in two different places: They can come from a library (such as the set_background function we have used from the strype.graphics library) or they can be defined in our own project, as we have seen in the fireworks example.
4.4. Methods
In Chapter 1, we have briefly mentioned the difference between functions and methods. They are similar in that they both perform specific actions. Functions, however, perform a stand-alone action (such as set_background("red") or ignite()), while methods are actions that belong to a class and are performed by a specific object. We have seen for example, that we write

to make our fish object move. move is a method of the Actor class, as we have seen in the library documentation. There, methods are listed under the class, while functions are listed on their own at the end of the module.
Exercise 4.17 The knock-knock project contains these two lines:

Which of these lines is a function call, and which is a method call? How can you tell?
Exercise 4.18 What does the say_for method do? What is its second parameter?
Exercise 4.19 Make each of the actors (the crab and the lobster) turn a bit after every time they say something. The crab should turn left, and the lobster should turn right every time they speak.
4.5. The "Fat Cat" example
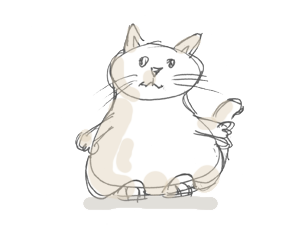
To continue experimenting with objects and their methods, we will use a different project: the Fat Cat project (Figure 4.8). This project defines its own class: Cat.
Exercise 4.20 Open the fatcat example. Run it. What do you observe?
Exercise 4.21 How many methods does the Cat class have?
Exercise 4.22 How many parameters does the sleep method have?
Exercise 4.23 Make the cat walk a bit further than it originally did.
Exercise 4.24 Make the cat walk left instead of walking right.
Exercise 4.25 Make the cat eat.
You can see that this project defines its own class called Cat. This class is also an actor, so it is also shown in the graphics world when we create an object of this class. We can also see that the Cat class defines a number of methods which we can call on the cat.
If you have paid attention, you will have noticed one oddity: the formal parameter called self as the first parameter of all the Cat’s methods. This special parameter is used only in definitions of methods within classes, not for functions. It is needed in the method body to implement the method, but it is not used when calling the method. So the Cat method
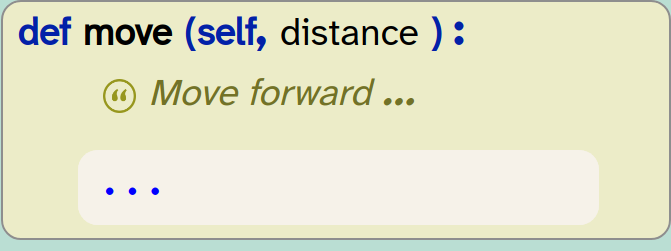
is called using the following method call:

In other words: This parameter is used only when defining methods, but when calling methods it is ignored. Since we are – at the moment – concerned only with calling methods, we can just ignore this parameter. (In the library documentation, this parameter is not listed at all, so we are implicitly ignoring it there as well.)
 When looking at method definitions in the Strype editor, we see the implicit "self" parameter. We can, for now, ignore this parameter.
Let us now experiment a little more with our cat. Instead of calling just a single method, we can also call a sequence of methods. Try this with the following exercises.
Exercise 4.26 Make the cat walk to the left, then make it eat.
Exercise 4.27 Make the cat dance, then sleep.
Exercise 4.28 Create a sequence of actions of your choice for the cat. The cat should do at least four different things.
 If you look carefully, you can see another odd-looking construct: For classes, the formal parameters for the construction of an object of that class are not shown after the class name, but in a special method called
 _ (note the two underscores each side of _init__init).
This, too, is specific to classes: If the class name is Cat, and the init method has the formal parameter list (self, x, y), then we create an object of this class like this:

That is, to create the cat object, we use the name of the class and the parameter list from the init method, ignoring the formal parameter self. This, again, has to do with the way classes are implemented in Python. You will see this notation only when you look at a class in the editor. When you look at the class documentation (in the library documentation), the same class header would be shown as Cat (x, y).
4.6. If-statements
Looking at the Cat methods, we can see a number of methods starting with the prefix is_, for example is_hungry, is_tired, and so on. These methods return a value of either True or False, and we can use them to introduce conditional actions: make our cat do something only if a given condition is true.
In Chapter 1, we have already seen that we can use if-statements to call a method only under certain conditions. In this case, we can, for example, make the cat eat only if it is hungry:
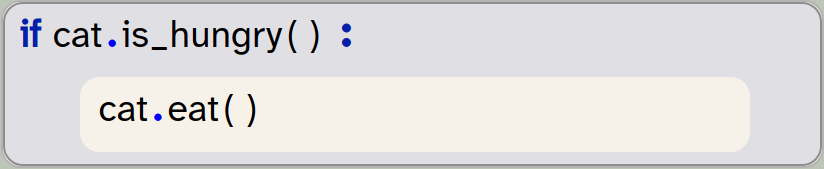
Try this yourself.
Exercise 4.29 Make the cat eat if it is hungry. If it is not hungry, it should do nothing.
Exercise 4.30 Change your program so that the cat dances if it is bored.
Exercise 4.31 Change your program again to do the following: If the cat is tired, it sleeps, and then it shouts hooray. If it is not tired, it just shouts hooray. (For testing, call another method first to make the cat tired. How can you make the cat tired?)
Exercise 4.32 How can you make the cat hungry? When will it be bored? Test it by writing a program that shows this.
Exercise 4.33 Change your program to do the following: If the cat is alone, let it sleep. If it is not alone, make it shout hooray. Test this by creating a second cat at the beginning of your program. The second cat should be at a different location than the first one, and its variable should be called cat2.
Exercise 4.34 Extend your program so that the second cat dances if is not alone.
If-statements can also have an else-case. An else-case is added to the if-statement by moving the frame cursor to the end of the body of the if-statement (the last line within the if-statement), and then inserting an else frame. The result is an extended if-statement that looks like this:
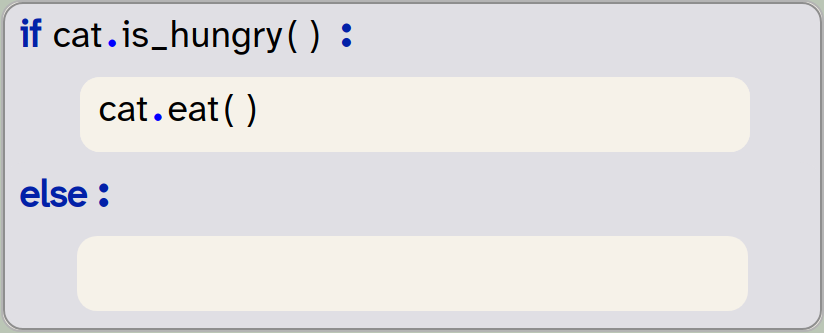
The if-statement now has two bodies: one for the if-case, and one for the else-case. The first one is executed when the condition is true, and the second one is executed if the condition is false. Thus, one or the other of the bodies will always be executed, but never both.
An if-statement may have an else-case. The else case is optional. If it exists, it is executed when the condition is false. If the if-statement has no else case, nothing happens when the condition is false.
Exercise 4.35 Rewrite your program to use an if-else-statement.
Exercise 4.36 Make a program with three cats. Make one cat eat, the second one sleep, and the third one dance.
Exercise 4.37 Invent your own routine for the cat (or two cats), and implement it.
You can find a version of the project that does some of these things in the book projects as fatcat-v2.
If you have done all the exercises in this chapter, you will have a good enough understanding of the Python constructs we have used thus far. We are now ready to get back to our game project and continue developing it into something more interesting.
4.7. Summary
In this chapter, we have investigated and experimented with some of the most important Python constructs. We have seen more detail about assignments, and also discussed how to use Actor objects, and how to read the library documentation to find out more detail about what we can do with them. The documentation will be important when we work with our projects; it shows us the methods we have available.
And finally, we had a closer look at if-statements to execute specific statements only if a certain condition is true. If-statements will be useful in just about every project we write from now on.

-
We can use variables to store data for later use. Variables can be assigned a value, and later we can read that value again.
-
An assignment statement stores a value into a variable. The variable name is written on the left, followed by an arrow symbol, and the value to store is written on the right.
-
The type of an object is called a class. Classes define methods that can then be invoked on the objects of that class.
-
An if-statement may have an else-case. The else case is optional. If it exists, it is executed when the condition is false. If the if-statement has no else case, nothing happens when the condition is false.

Space
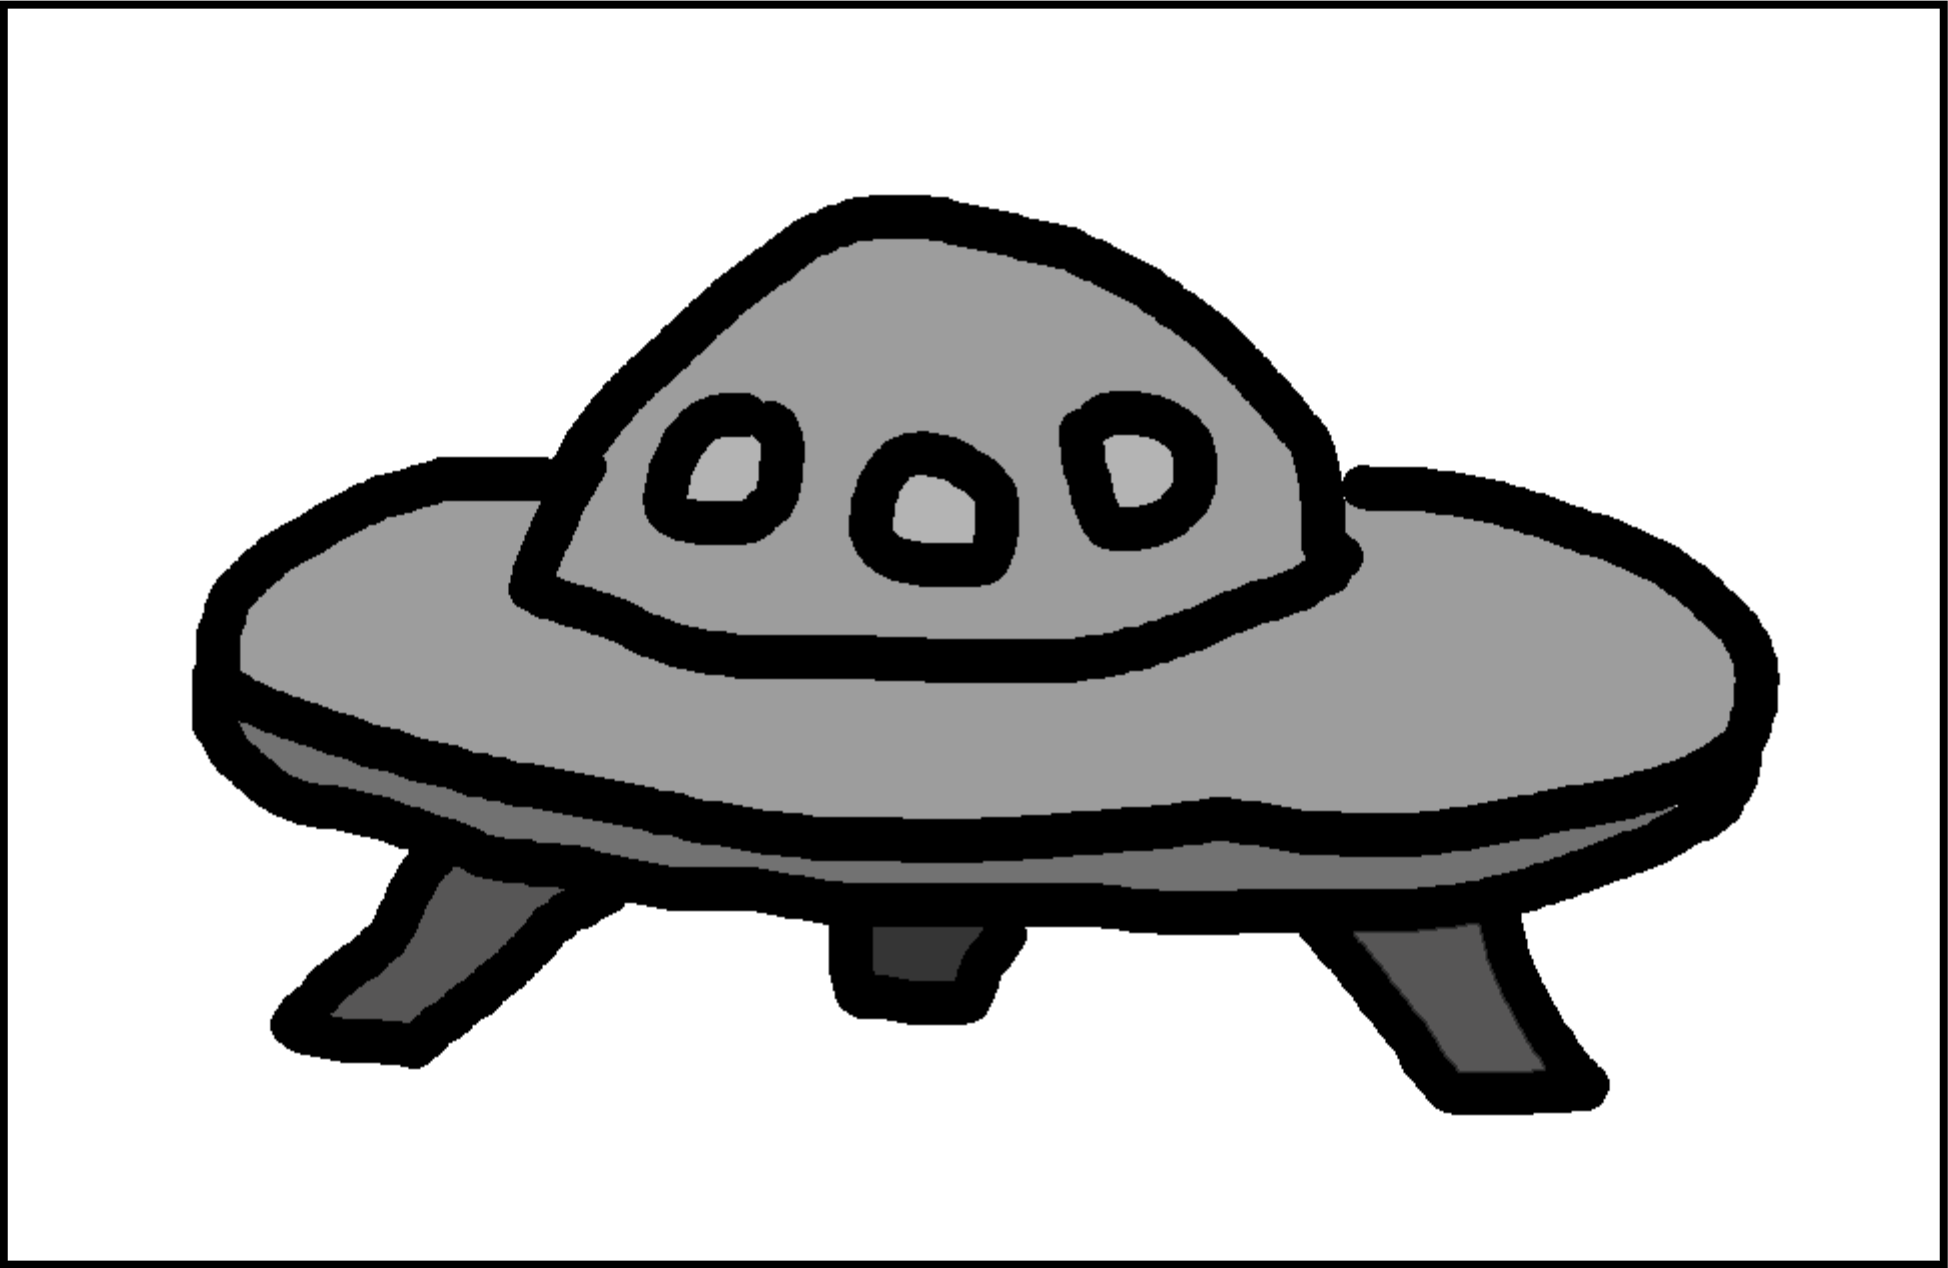 The space project is a very simple example of fixed, four-directional movement. In the yellow-fish example, we were able to turn and move in any direction we chose. Here, we see an example where the game character (a space ship, in this case) can move up, down, left and right, but does so without turning. (It is an extension of the two-dimensional movement from the pong game earlier.) Maybe this is useful for your own game idea.