Preface
Welcome to Python programming with Strype! In this book, you will learn the fundamentals of programming in Python, using the Strype programming environment. The goals of this book are two-fold.
First, we want readers to learn fundamental programming principles. After working through this book, you will have acquired quite a thorough understanding of how programming works, how to structure programs, and what makes good programming practice. We will use Python as the language for doing so, and along the way you will learn a lot about Python programming. However, Python itself is not the main goal, and we do not attempt to teach all of Python’s constructs. Rather, Python is a means to discuss programming principles more generally, and much of what you learn here will transfer directly to programming in other languages.
Second – and equally important – we want readers to experience the joy and thrill that programming can bring you. We are aware that readers who have not programmed before may frown at this statement, and question whether the words "programming" and "joy" can go together in the same sentence. But they really can!
This book emphasises creativity – the making of things. In each chapter, we will challenge you to add your own ideas, to extend what we show you, to create programs that are truly your own. There is real joy when a programmer sees one of their own creations working for the first time. Everyone who has programmed has experienced this, and we very much want you to experience this feeling as well.
A note for learners: How to use this book
There are many ways to read this book. You could read it sequentially, from beginning to end, and everything inbetween. Or you can jump around, dip in and out, look forward, and come back when you are missing something.
The main thing is: be curious. With the sequence of the chapters in this book, we are suggesting what we think is a sensible order of activities, but we also realise that everyone’s starting point is different. Concentrate on what interests you.
One thing, however, is crucial: Make sure to do the exercises and the practical work while you read this book. You will not get much out of it without it. Programming is a contact sport: you will not become a programmer just by reading about it. This book tries to put you in a position where you can actively do some programming tasks, but it is only in the actual doing that you will learn.
While you do the programming activities: be patient. The early chapters of the book start with easy projects, but they get quite a bit more difficult towards the end.
Spend a good amount of time with each topic. Extending the suggested projects will help you understand more. Add your own ideas, until you feel comfortable at each stage.
As you move through the book – whether it is in sequence or by jumping back and forth – pay attention to the concept summaries at the end of the chapters, and do not be afraid to go back to sections you have previously completed.
A note for teachers: Pedagogy
Pedagogy is the term for the art of teaching. The authors of this book have many years of experience in teaching programming, and this experience has shaped the approach of this text. This book follows a carefully designed pedagogy based on worked examples, scaffolding, a spiral approach and working from the concrete to the abstract.
Worked examples are used throughout, and all concepts are introduced and practiced via concrete projects. Emphasis is placed not only on the end product – the finished program – but also on the process of developing it.
Many textbooks follow a common pattern: A problem is presented, a solution is shown, and then the constructs used in that solution are explained. This is a terrible approach. It creates the illusion that a good programmer goes in one step from reading the problem description to writing down a fully working solution. This is not how programming works.
A result of this approach often is that learners who struggle with finding the right solution, or with making it work quickly, think they are failing. They react by developing a self-image of "I am not a good programmer" and "programming is just not for me".
The fact that we all work in small steps, try things out, run into problem, backtrack, try something different, and slowly work our way to a solution seems to be one of the best kept secrets in programming.
This is a shame.
In this book, we show not only the product, but the process of programming. With each project, we go through several phases of extension and refinement. Learners experience the process, and can follow along. We use a process of scaffolding to provide meaningful context while keeping learners focussed on the topic at hand, and fading of the scaffold and guidance over time.
At the same time, the examples are selected to be open-ended and extendable, so that learners are encouraged to take each example further in a direction of their own interest. Each chapter includes suggestions to do more.
We also use a spiral approach. When we first encounter a construct, we do not try to explain or understand everything about it. We learn what is necessary at that point, and then refine our understanding later. We come back to the concept in a different context, and then again later still – and in each iteration we deepen our understanding.
This is a more natural and useful approach to understanding programming. Firstly, many programming constructs are circularly dependent on each other, and there is no linear sequence in which everything can be explained only by backwards reference. But more importantly, when books try to explain everything about any given concept at once (think, for example: types) learners cannot usually distinguish what is needed at that moment ("what do I need to know right now?") from what is there only for completeness’s sake. The important is buried in the detail, and learning is made harder.
The spiral approach serves to break this linear form, iterate over concepts several times, and lead to a deeper understanding.
Strype
The other obvious difference of this book is the use of the Strype environment.
Strype is a browser-based educational Python development environment designed specifically for novice learners. It is free to use, and anyone can use it instantly – no creation of accounts is needed. Strype uses a frame-based editor: frame-based editing is an interaction style that combines the best of both worlds of block-based and text-based editing. It provides the discoverability and some of the error avoidance of blocks, but at the same time gives you the power and expressiveness of a full, professional language. Some of the friction of getting your programs to run is removed, and you achieve results more quickly and with less frustration. The use of Strype, and its integration in this book, are absolutely fundamental to our approach.
As we stated above, our firm goal is to make the first experience of programming engaging, fun and creative. One way to do so, for example, is the early use of graphics and animation. Yet animated graphics are much too complicated for novices to use in most Python environments.
Strype is designed to make this approach simple, painless and possible. We can create a graphic in a single line of code, and animate it in just a few lines more. The effect of program statements becomes immediately visible on screen in a way that no "Hello world" program can ever manage, and learners can observe their program execute.
The technology and the pedagogy used in this book were developed in tandem, with environment design strongly guided by our pedagogical principles. The result is a package of software, examples and explanation that is seamlessly integrated, and enables learners to achieve more satisfying results than they might with other systems.
Overall, we strongly believe that this helps the most important aspect of all: motivation. We hope to spark our readers' curiosity, to leave you wanting to read on, to continue to learn, because you have caught the programming bug just like we have.
We hope that you will see not only how programming works, but also why you might be interested in it, and what it can do for you.
Acknowledgements
We wish to thank Pierre Weill-Tessier for his work on the implementation of Strype. Pierre was, together with the authors of this book, a core member of the team that designed and implemented the Strype software. His work is present in many details of the system, and with that, he has contributed greatly to the outcome of this project.
We are also indebted to Pete Dring, who provided feedback on an early draft of this book. Pete’s feedback was incredibly valuable to us and has helped to improve this book in many places. His comments were thoughtful, detailed and specific, and the book is better because of them.
Chapter 1. Getting to know Strype
This chapter will show you how to get started with Python programming in Strype. We will work on our first project and start to see what programming in Strype is like, and what we can do with it.
1.1. Getting started
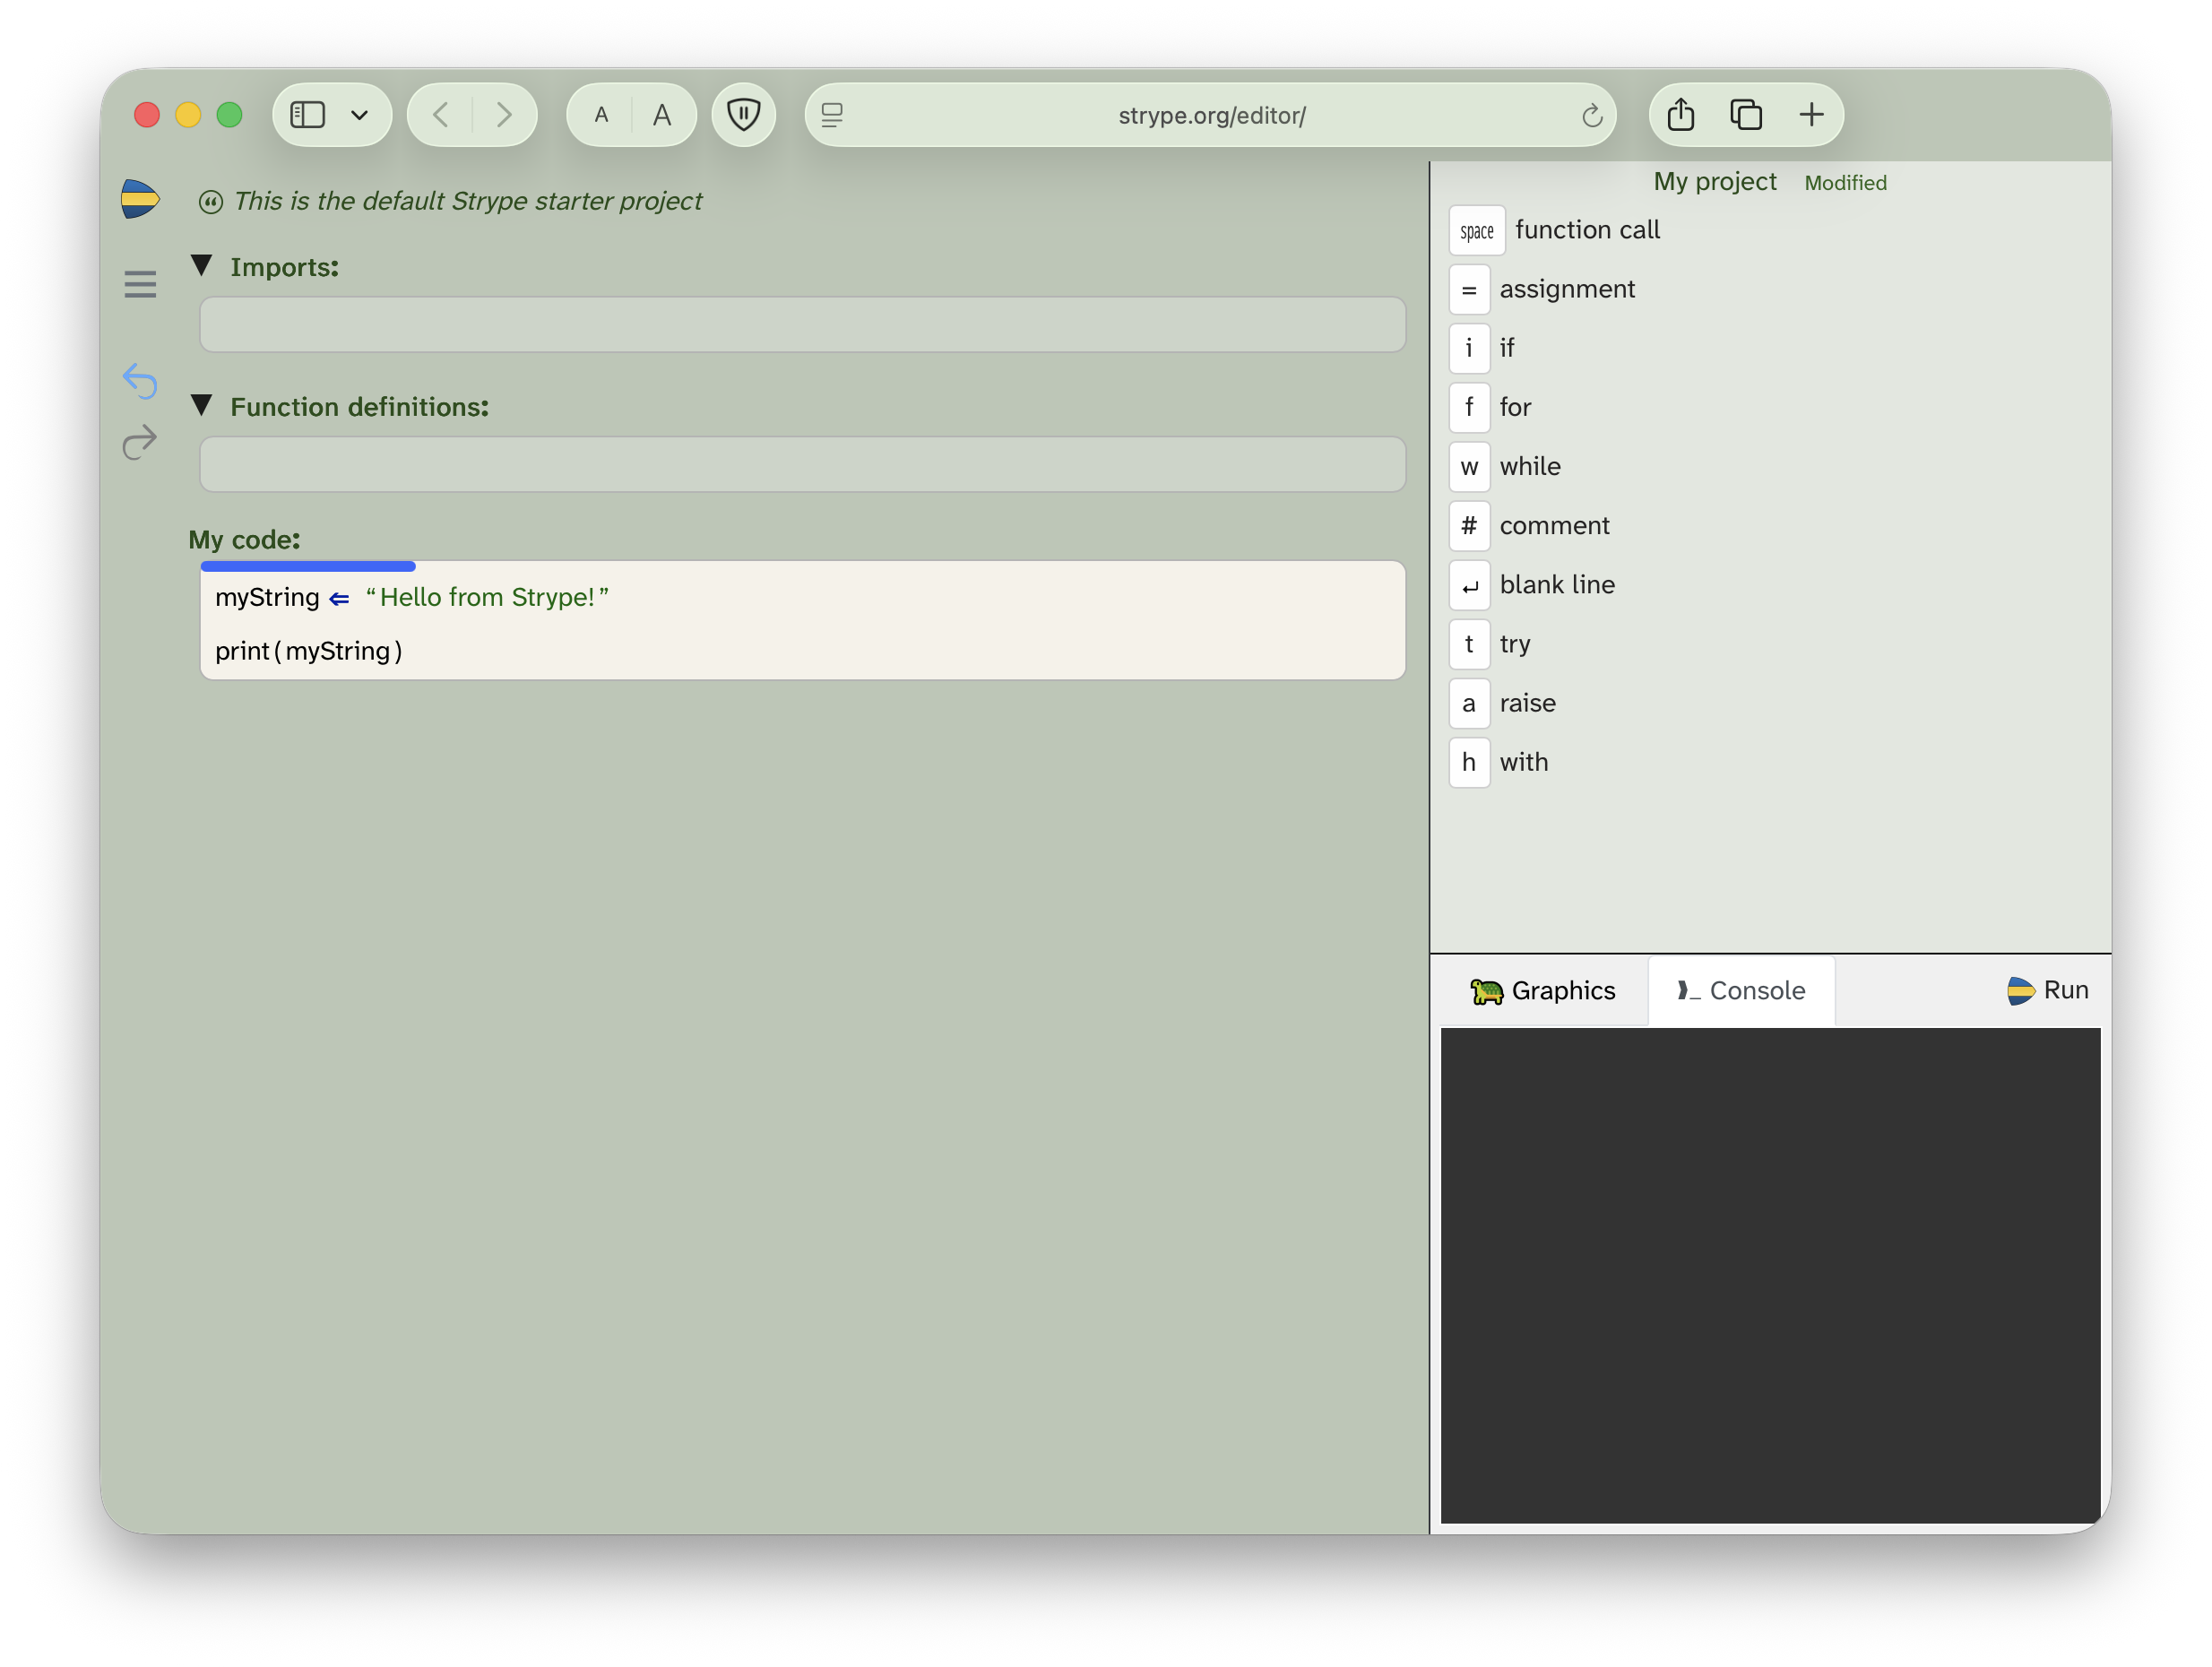
Getting started with programming in Strype is easy: Point your web browser to strype.org, click on the "Start coding now" button, and you will see the Strype editor. Here, you can enter, edit and run Strype programs. Figure 1.1 shows a screenshot of the editor.
When you first open Strype, you will see a short program to get you started.
1.1.1. Running a program
The first thing to try out is to run the sample program. To do this, click the "Run" button on the right and observe what happens.
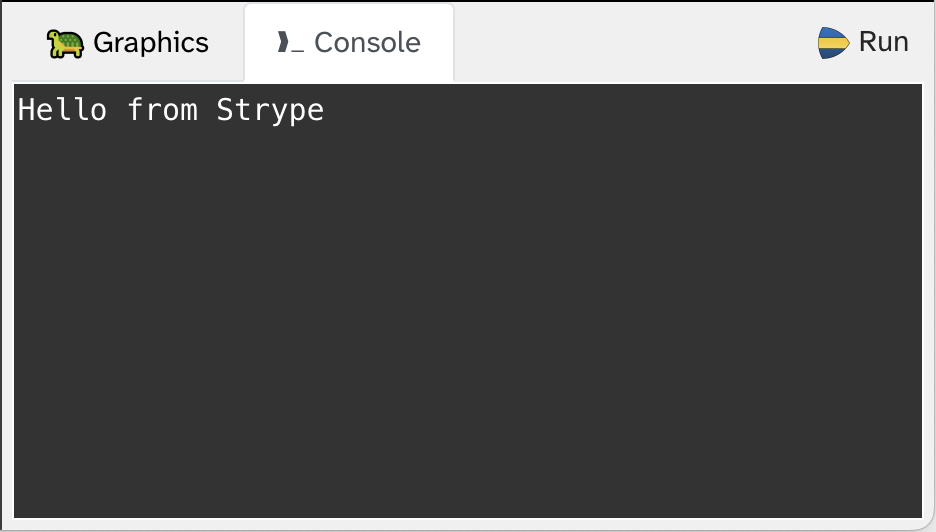
After clicking "Run", you should see the text "Hello from Strype" appear in the bottom right area of the window (Figure 1.2). This area is called the "Console", and it is where Strype will display text output. (You will note that there is also a "Graphics" tab next to the Console –- this is for graphical output, and we will use this shortly.)
Clicking the "Run" button executes the program shown in the editor and displays its results.
 Sometimes we will tell you "run" a program, or to "execute" a program. These mean the same thing — you do this by clicking the "Run" button.
 There is a keyboard shortcut for running a program: You can type Ctrl-Enter (on Windows) or Command-Enter (on macOS) to run the current program.
1.1.2. Editing a program
You can also change (edit) the current program and then run it again. For example, you could change the text that is printed by the sample program to print something different. Try this now. (If you are not familiar with the basics of editing in Strype, you should read Appendix A: Frame-based editing – the basics first.)
Exercise 1.1 In the Strype editor, change the green text that reads "Hello from Strype" to say Hello, followed by your own name. Make sure to leave the double quotes around the text you wish to print out. When you have done this, run the program again.
Exercise 1.2 Add a new function call frame at the end of the program. In it, call the print function and print out the words "How are you today?" You should now see two lines of text printed to the Console.
You can add a frame to the code by moving the frame cursor (the blue bar) to the intended location using the up and down cursor keys, and then typing Space followed by the frame shortcut for the desired frame. The shortcuts are shown in the top right.
Now that we know how to edit and run programs, we can, of course, write many more programs that produce text output (and much more interesting programs too), and we will do so later in this book. First, however, let us look at another type of output: graphics.
 If you are new to programming, you will be surprised how often it happens that we make errors in our programs. If you are not used to dealing with programming errors, you should read Appendix C: Dealing with errors first.
1.2. Starting with graphics
We will start our exploration of graphics programming in Strype with a very simple program that demonstrates some of the basic concepts.
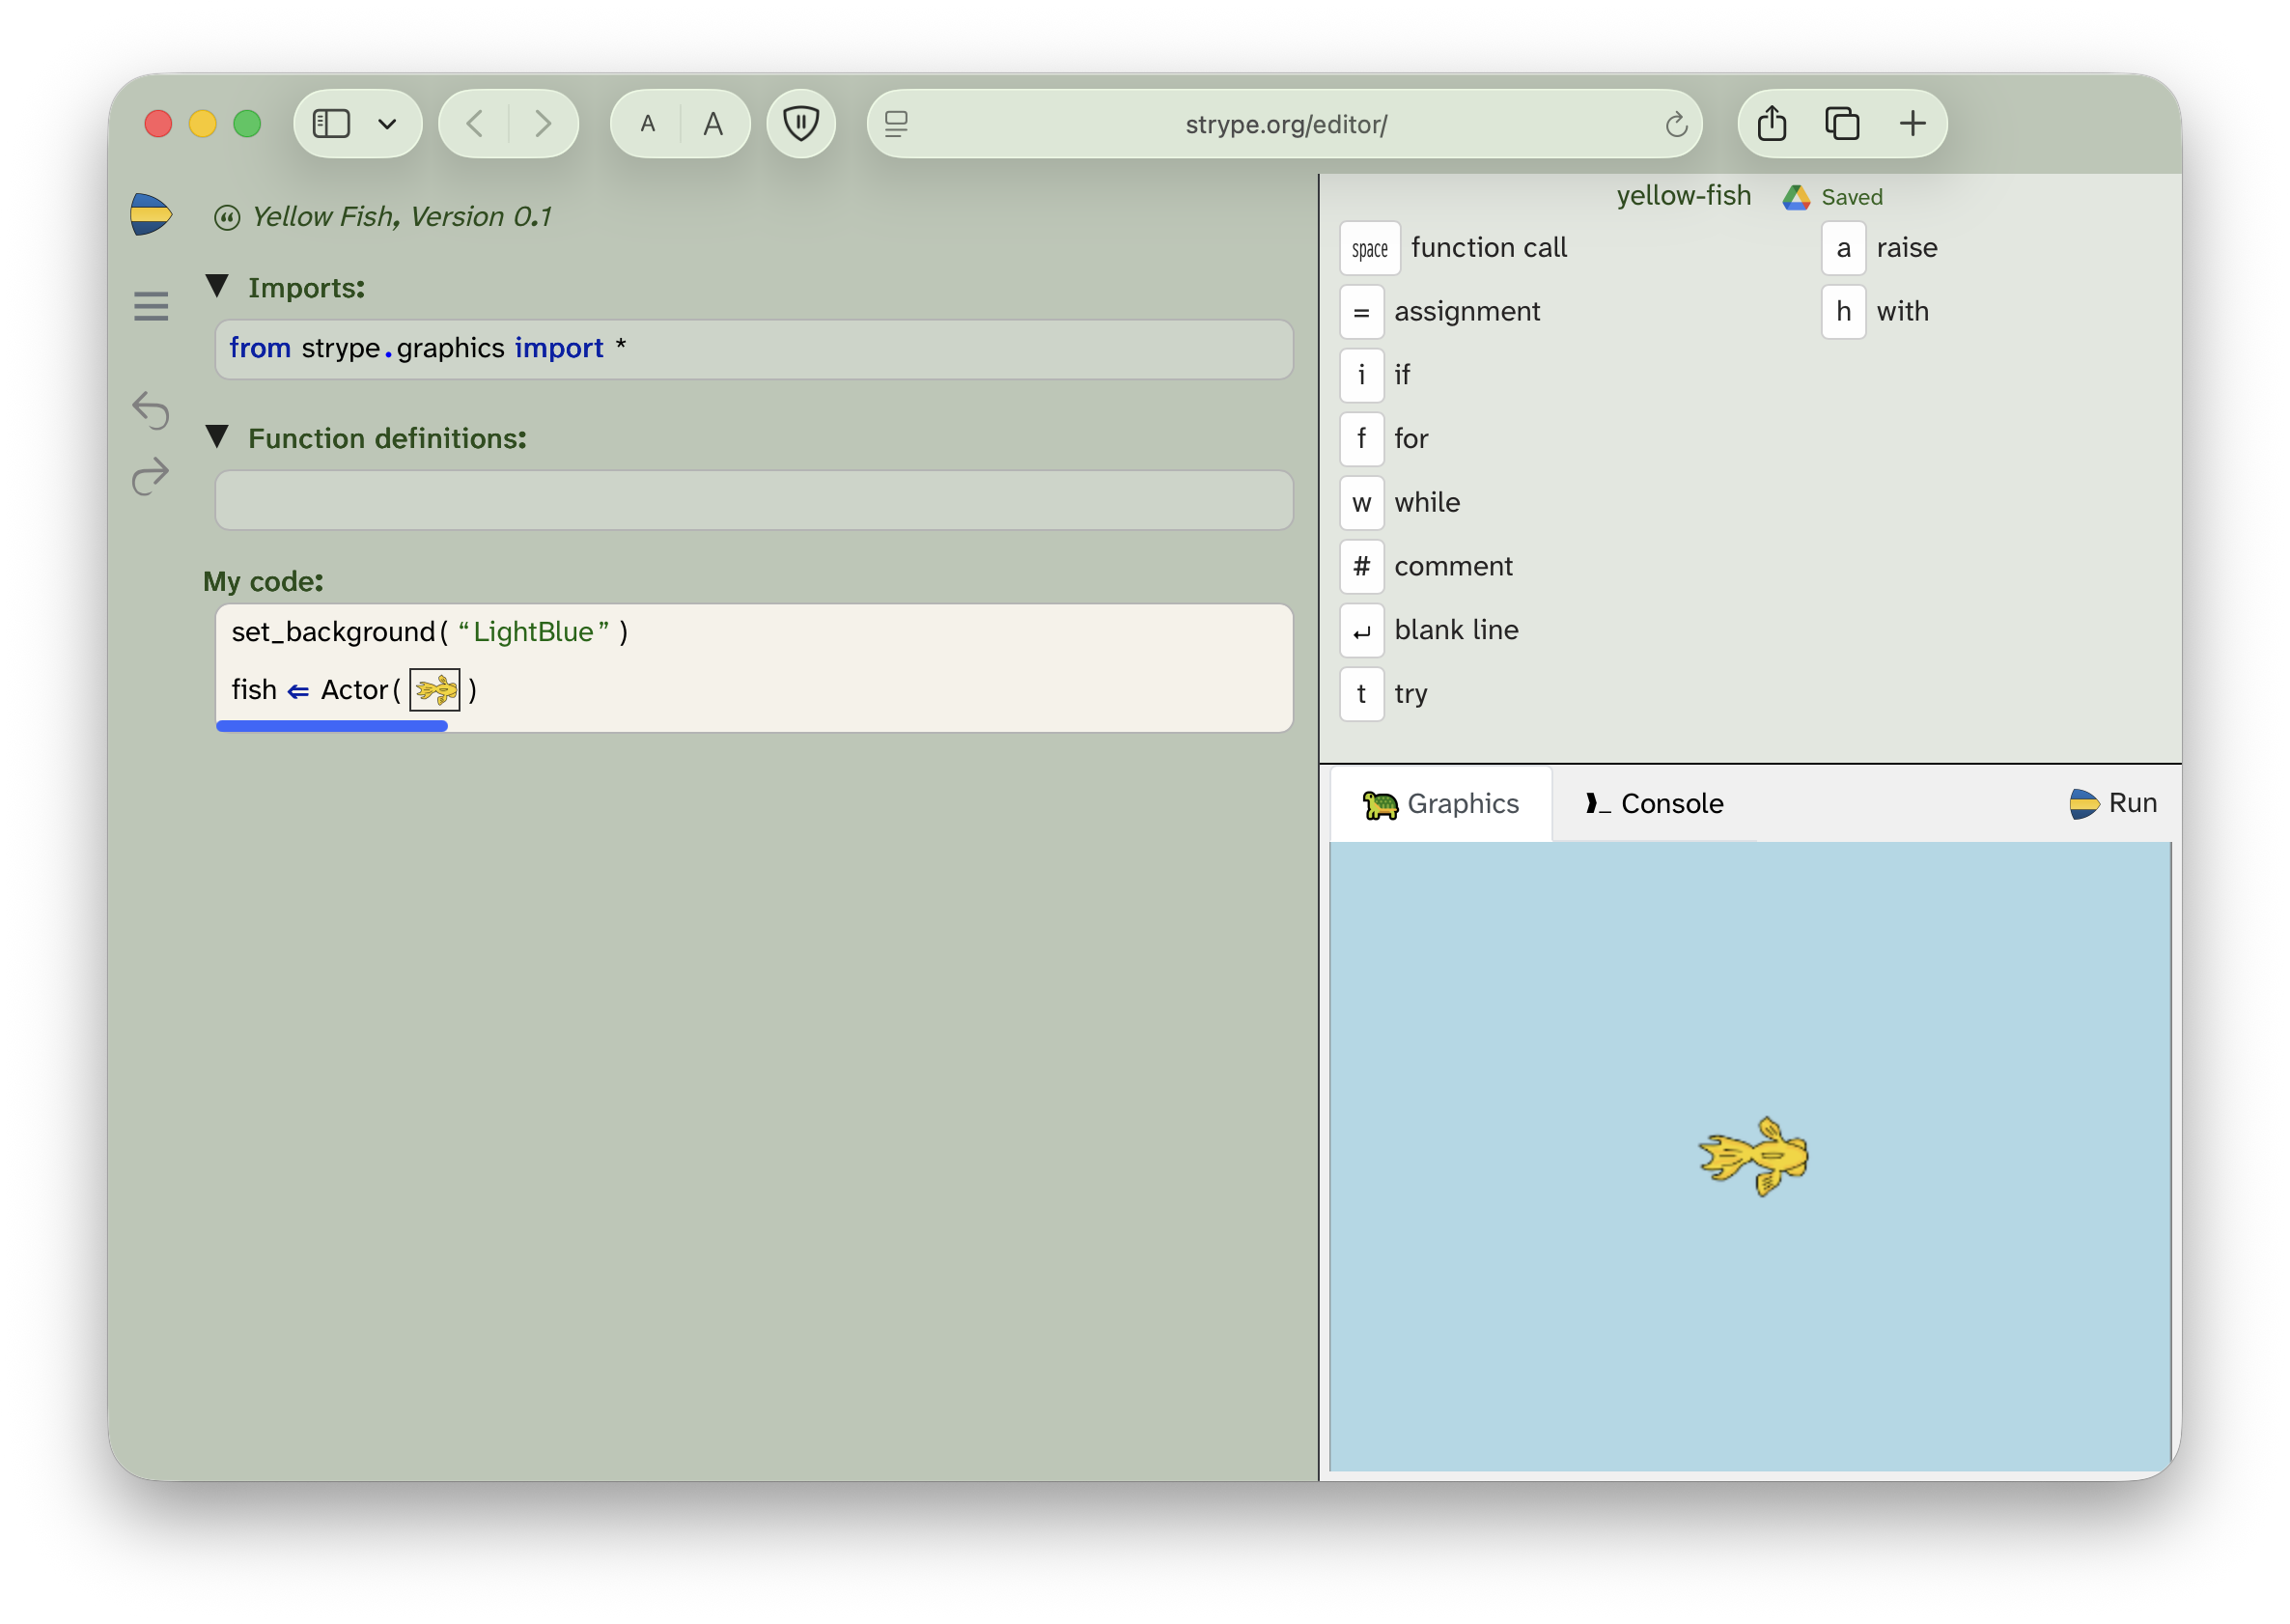
Open the yellow-fish project from the Chapter 1 book projects. Execute the program. You should see a result similar to the one shown in Figure 1.3.
 Opening book projects: If you are reading this on screen, you should be able to click on the project name to load the project in Strype. If you are reading this on paper, open Strype, then use the "Book…" menu (in the slide-out menu bar on the left) to find and open the book projects.
1.2.1. Importing the graphics library
This program makes use of the Strype graphics library. We can see this near the top of the program, in the section labelled "Imports".
Python is an extendable language, which has some functionality built in, and makes use of "libraries" to add more functions as we need them. In this book, you will learn to use both standard Python functions, as well as commonly used libraries. What is more, you will learn how you can find out what functionality is available in a library, so that you can teach yourself to use it later.
Producing graphical output is an area that is not built in to the standard Python language, so we need to use a library to enable this functionality. This has been done already in the project by adding the following line in the "Imports" section:

from strype.graphics import *The * symbol at the end of this line is a shortcut for "everything". So this line in effect tells the system to import everything from the Strype graphics library. "Importing" means to make it available for us to use in our program, so the effect is that we can now use all of the functionality of the graphics library in our program.
We will start by experimenting with some of the functionality that the library provides.
1.2.2. Setting the background
Let’s have a look at the first line of code in our program:

set_background("LightBlue")This kind of statement is called a "function call". A function call executes a function that is defined somewhere else (in this case: in our graphics library) and that performs some kind of action. Later on, we will need to work out how we can find out about all the functions that are available in the library, but for now we will just experiment with a few of them.
A function call is a Python statement that executes a function that is defined elsewhere. It consists of the name of the function and a parameter list in parentheses (another word for round brackets, like the ones around this text).
In this case, "set_background" is the name of the function we are calling, and it is followed by a pair of parentheses. Between the parentheses is what is called a "parameter". A parameter provides some additional information to tell the function more precisely what to do. Here, we are calling the function set_background, whose job it is to set the background of the graphics world, and we are providing the parameter "LightBlue" to let it know what colour we would like it to use.
A parameter provides additional detail information to a function. Parameters are written in parentheses, with multiple parameters separated by commas.
Let us experiment a bit with this function call to see how we can influence its behaviour.
Exercise 1.3 Change the parameter of the set_background function call to "DarkRed". Make sure you keep the quotes around the name. Execute the program to see the effect.
Exercise 1.4 The colour names you can use as a parameter are the standard colour names used in HTML for writing webpages. You can find a list of available colour names in Appendix F: Available colours. Try out some other colours. Choose a colour that you like.
Types of brackets: Python uses various different kinds of brackets in different places. The ones we have seen for functions above are called either "round brackets" or "parentheses": ( )
Other bracket types Python uses are "square brackets", which look like this: [ ], and "curly brackets", which are sometimes also called "braces": { }
1.2.3. Creating actor objects
The next line of code looks like this:

fish = Actor(image_literal)There are several things happening in this one line of code, so we will investigate this in some detail.
In the Strype graphics system, you can add graphical elements to the graphics world by creating "Actor" objects. Actor objects (we may also call them just "actors") are created by inserting a function call frame into your code, and then writing the word "Actor" in place of the function name . Try this out now.
Exercise 1.5 Insert a function call frame at the end of your code. To do this, move the frame cursor to the end of the code and then press the space key (or click on the function call option in the frame palette). In place of the function name, write "Actor".
Once you have completed the exercise above, you will see the call to create an actor:
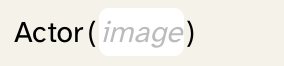
The frame also tells you that a parameter is expected here. It shows the grey word "image" on a white background. This tells us that creating an actor requires an image as a parameter. If you were to execute your program now (try it!), you will see that an error is reported in this frame when we try to run the program without providing an image. So let’s fix this, and add an image.
1.2.4. Working with images
You can add images to your program, by copying them from outside of Strype (for example, from the web, or from a file in your file system) and pasting them into Strype (Figure 1.4).
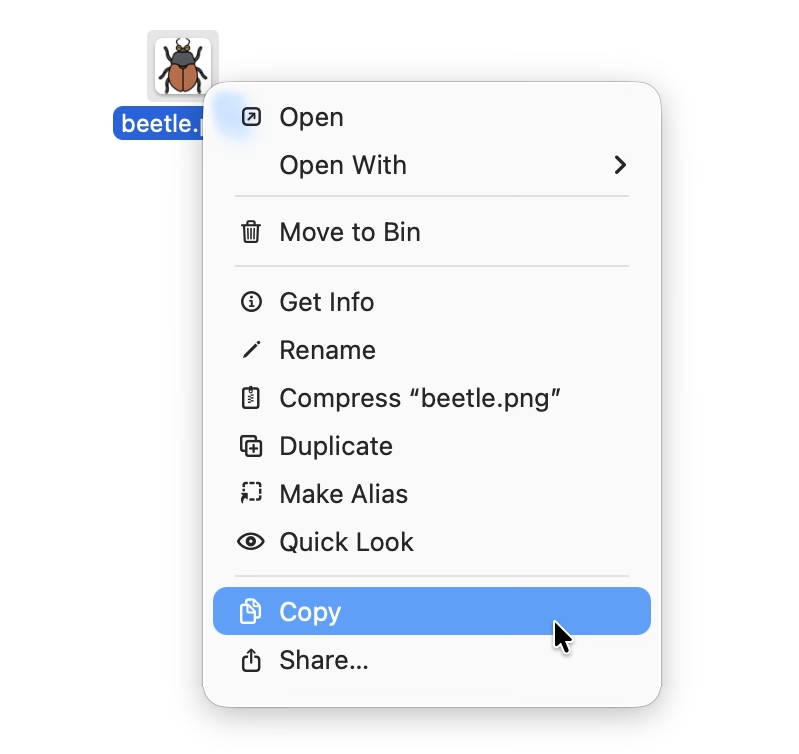
Exercise 1.6 Add your own image to the actor object now. You can, for example, do a web search for "beetle icon", find an appropriate image, and copy it. (The image does not need to be an animal. It could be a car, or a spaceship, or anything else that moves.) To copy the image, you can either copy it straight out of your web browser, or save it to your disk first and then copy it from there. Figure 1.4 shows the context menu of a local file with the "Copy" operation selected. This menu will look different on different operating systems, but you should be able to find the copy operation and use it. After copying the image, paste it into the Actor parameter.
Once you have pasted in your own image as the actor image, try running the program again. You should now see the new actor on screen. If you have left the line of code that creates the fish actor in place, you may also see the yellow fish. Both actors will, however, be drawn in the centre of the screen, so if your new actor is larger than the fish, its image may entirely cover the fish image.
It is quite possible that your new image does not look exactly as you would like it to. For this situation, Strype offers some simple image editing functions to adjust the image to make it more appropriate for our task. When you hover the mouse pointer over an image in the Strype code, you will see a preview of the image with an option to open a simple image edit function (Figure 1.5). Here, you can adjust the image for your project. If you need more sophisticated image editing functions, you can of course always use a separate image editing program before using the image.
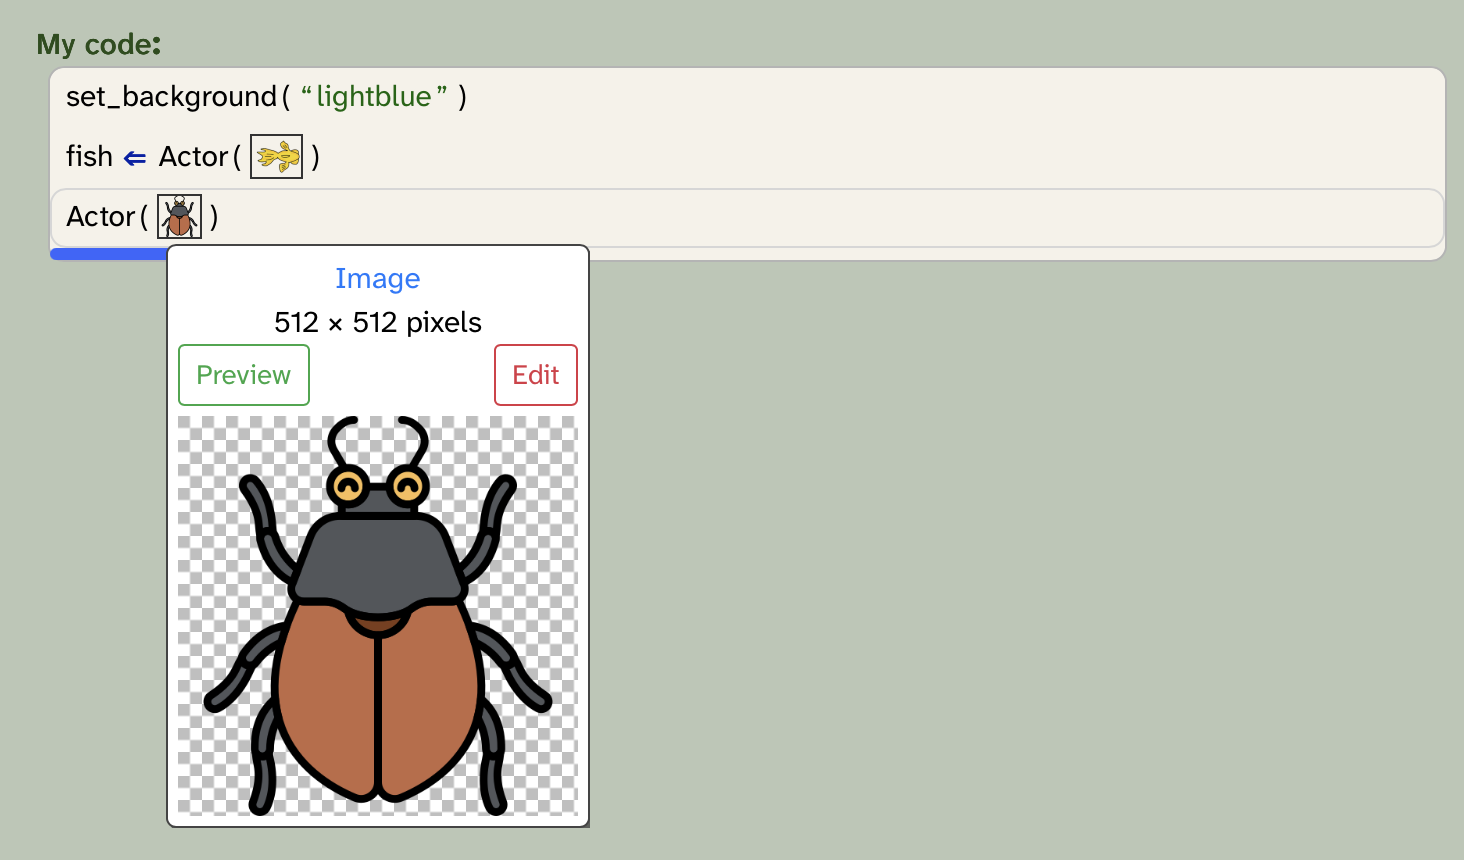
You almost always want actor images that have a transparent background, so that you can correctly see your world’s background behind the actor. You should use images of type PNG or WEBP to do this. JPEG images do not support transparent backgrounds.
1.2.5. The world coordinate system
When we placed our second actor into the world, we saw that they are both drawn on top of each other in the centre of the graphics world. We can change this by assigning initial coordinates to a new actor:

Actor(image_literal,200,100)The two additional parameters to the actor specify x and y coordinates for the positioning of the actor. You have probably encountered such coordinates in mathematics; x is the horizontal position and y is the vertical position. Here, the actor is placed at x-coordinate 200 and y-coordinate 100. The coordinate system of the graphics world reaches from -399 to 400 in the horizontal (x) dimension, and -299 to 300 in the vertical (y) dimension. It is shown in Figure 1.6).
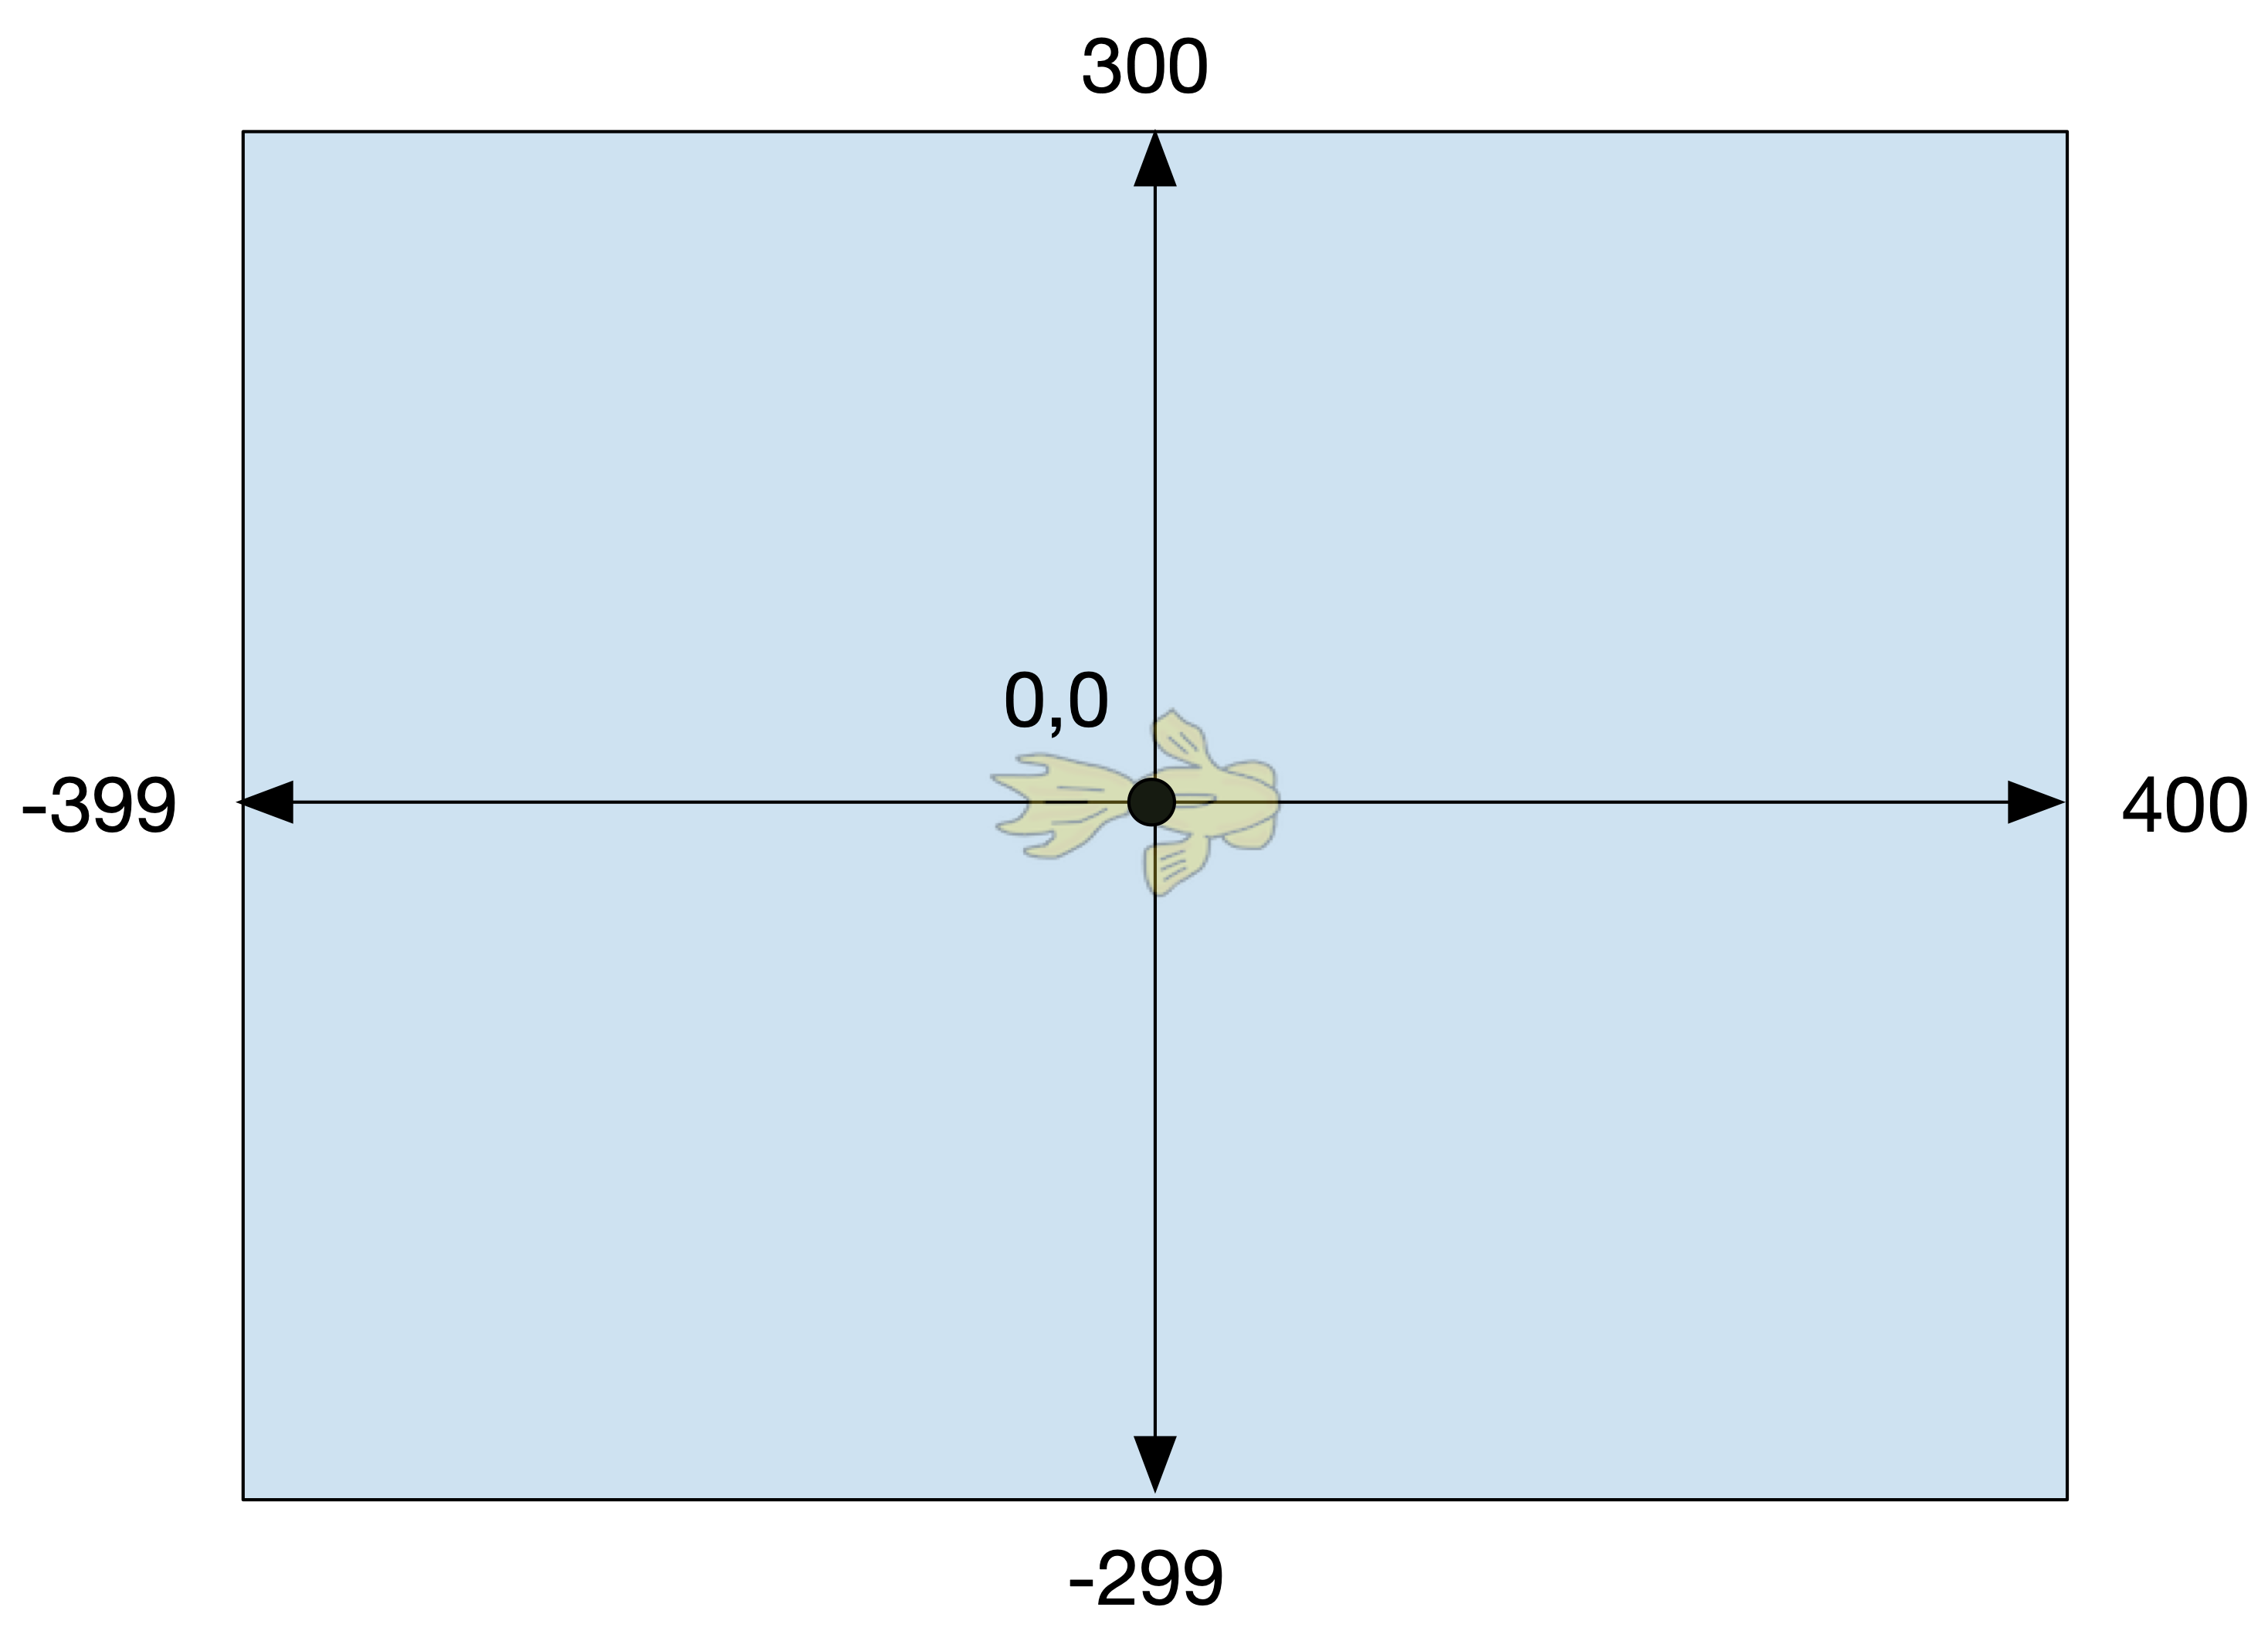
World coordinates: You may wonder why the negative edge of the world is at -399 for the x-coordinate, and not at -400 (with a similar difference for the y-coordinate). Would it not seem more consistent to make it -400 to 400? The reason is that the size of the world is 800 x 600 pixels, which is a commonly used aspect ratio. With coordinates ranging from -400 and -300, the size would actually be 801 x 601, because zero is also included. The coordinates are as they are because of the fixed 800 x 600 world size.
Exercise 1.7 Place your own new actor into the world somewhere near the top left corner, using the coordinates as shown above.
We have now reached a point where we can create actors, give them images and place them into the world at a specific location. However, currently our actors do not actually do anything. And that makes our project uninteresting. So let us now work on some code to make the actors move and react, so that we can turn this project into a simple game.
1.3. Actor movement
When we compare the two lines we currently have in our program to create actors, we can see that they look different:

fish = Actor(image_literal)
Actor(image_literal,200,100)
The different is not only the additional coordinates that we have specified with our second actor, but also the arrow symbol and name (fish) that we have used in the first line. This is called an assignment, and we will investigate this next.
The purpose of this is to keep a reference to our actor object, so that we can continue to work with it afterwards. When we create an actor in a line on its own (as in our second line above), the actor object is created, it is automatically placed into the world, and that is all that happens. After this statement, we do not have access to the actor anymore, and we cannot directly work with it further.
This is why we often use an assignment to assign the actor to a variable, which allows us to continue working with this actor. Let us investigate what this means.
1.3.1. Variables and assignment
We can enter an assignment frame into our code by typing the '=' key. When we enter the frame, it looks like this:

___strype_blank = ___strype_blankThe effect of an assignment frame is that it creates a variable and stores a value into it. A variable is a bit of storage that allows us to store some information, and to access and use it again later. Variables have names – this is how we refer to them – and store a value.
A variable is a bit of storage space that allows us to store a value and retrieve and use it again later. Variables have names, which are used to refer to them.
We can see that the assignment frame has two slots which we must fill in. The slot on the left is labelled "identifier". This is a technical term that means a "name for this variable", so here we can provide the name. We can make up this name, and we usually choose a word that describes what we will store in this variable.
The right hand side of the assignment has a slot labelled "value". Here, we can specify what we want to store in the variable.
Some examples of assignments to variables are:
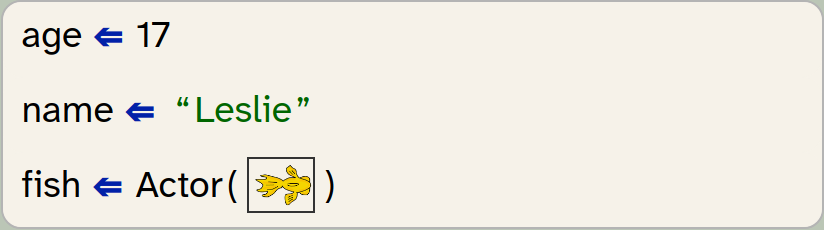
age = 17
name = "Leslie"
fish = Actor(image_literal)
We can see from these examples that we can use variables to store different kinds of thing. We can store numbers, or we can store text (words, or whole sentences), or we can store actor objects. We will see later that we can also store all sorts of other things – we will get to that in due course.
An assignment stores a value into a variable.
We can then use the value stored in that variable just by using the variable’s name. For example

print(age)will print out the contents of the 'age' variable (which will be 17 after the assignment which we made above). Compare that with the statement

print("age")This statement would print out the word "age". Note the difference: the quotation marks around the word "age". If we print "age" with quotation marks, we are printing the word "age". If we print age (without quotation marks), we are referring to our variable named age, so we are printing out the value stored in this variable: 17.
Now that we have seen the first basics of variables, let’s get back to our yellow-fish project.
1.3.2. Making the actor move
We can now properly interpret the two lines of code we have seen before:
fish = Actor(image_literal)
Actor(image_literal,200,100)
The first line creates an actor with a fish image and assigns it to a variable named fish, while the second line creates an actor and does nothing further with it.
We want to do further actions with our actor, so we need to assign it to a variable. But we do not need two actors at the moment, so we can delete one of the actors again. For this book, we will continue to use the fish actor, but you are welcome to use your own actor for the remainder of this project while you read on.
Exercise 1.8 Change your code again so that only one actor is created and assigned to a variable. The actor should use your own selected image. Rename the variable so that it correctly describes the type of actor that you have chosen. (For example, if your image shows a beetle, you might like to name the variable beetle, if it is a car, name it car. Whenever we use our fish variable in the remainder of this chapter, you should then use your own variable.)
Now that we have our actor, and we have stored it in a variable, we can make it move:

fish.move(8)Try this out with the following exercise.
Exercise 1.9 Add the line of code which makes the actor move (shown above) to your own code, after the actor has been created. You can do this by adding a function call frame, typing fish.move as the function name, and adding the parameter. Run your program. What do you observe?
Exercise 1.10 Change the parameter from 8 to 300. Run your program again. What do you observe?
After the first exercise, you will probably notice that the fish does not appear to move. This is because the parameter is in pixels. Eight pixels is a very small distance on screen, so when you ran your program, the fish was shown and then – very quickly – moved eight pixels to the right. But this distance is so small, and the movement so quick, that it is hard to notice it at all.
In the second exercise, the distance we have used is larger, so we can see that the fish is now at a different place. But again, the movement is so quick that we do not really see the fish move. If we want to turn this project into a game, we need our fish to move more slowly.
Before we go on to do this, a little more terminology: A function that is called on an object, such as the move function above, is called a method. Objects have a fixed set of methods, and we shall see over time what kinds of methods our actors have, and what we can do with them.
Methods are called by specifying the object, a dot, and the method name and parameters.
A function that is called on an object is called a method. Methods are called by specifying the object we want to call, a dot, and the method name and parameters.
1.3.3. Controlled movement
We have seen in the previous exercises that calling the move method moves the actor very quickly. If we want to have slow, visible movement, we need to move the actor repeatedly, in small steps. We can do this by placing the move method call into a loop:
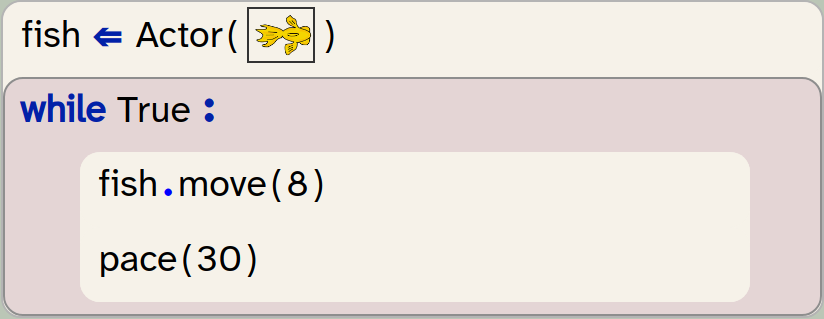
fish = Actor(image_literal)
while True:
    fish.move(8)
    pace(30)
Exercise 1.11 Add a while loop to your program to create the code shown above. Also add the call to the 'pace' function as shown above. Run your program. What does it do now?
If you have a statement in your code, and you want to place it into a loop, you have two options: You can either insert the loop frame into your code and then drag your statement into the loop body with the mouse. Or you can select your initial statement (use shift-arrow-down) and then insert the while loop – this will surround the statement with the loop.
Let us look at this code a bit more closely. The while statement which we have just inserted is a loop statement: it repeats the statements inside it over and over again. Since the fish.move method call is inside the loop, it will be executed over and over, many times. Thus, we move the fish eight pixels to the right, and then more it eight pixels again, and so on.
If we did this without the pace function in our loop, this would still be so quick that we would not see the fish move slowly. (Computers are fast – try it out!) The pace function, however, has the effect of slowing down the loop. To be precise: the parameter of the pace function specifies how quickly the loop should run. A parameter of 30 means that the loop will run 30 times per second. This is a good speed to actually see the movement of the fish as a smooth movement across the screen.
Note that because we now have a program that runs forever, when we want to edit it again, we need to manually stop the execution. You will see that the Run button becomes a Stop button; click the button while it says Stop in order to stop the execution and return to editing the program.
Exercise 1.12 Experiment with different parameter values for the pace function. Also change the parameter to the move function to different values. You will see that you can use either one to change the speed of movement of the fish on screen. What is the difference between changing one or the other value?
The loop we have used here is called a while loop, because it starts with the keywork while. It has the ability to repeat a set of statements several times.
In the slot after the word while, we can specify how long we want to loop to run for. Using the word True here has the effect that the loop will run forever (or at least until we stop the program). We will see a bit later how we can use more sophisticated loop conditions to write loops that run a specified number of times.
Running our loop forever has the effect that the fish keeps moving until it hits the edge of the world. In Strype, actors cannot leave the world, so the fish gets stuck at the edge – every further attempt to move in that direction has no effect, but the program will keep running until we stop it.
Exercise 1.13 Actor objects also have a method called turn, which also takes one parameter. The parameter is a number, and specifies the angle to turn in degrees. Try out this method: replace the fish.move method call with a call to fish.turn, and run your program. What do you observe?
Exercise 1.14 Experiment with different parameter values for the turn method. What value gives you a nice, slow turning motion?
Exercise 1.15 Can you make the fish turn the other way?
Exercise 1.16 Try inserting the call to the move method back into the loop, so that you have a call to the move method and a call to the turn method, following each other. What does the fish do now? Try to predict this before trying it out.
Exercise 1.17 What would you have to change to make the fish swim in a larger circle? Try it.
The program that we have written so far is available in the book projects as yellow-fish-v2. If you have written your own program while reading this, keep using your own program. If you want to compare your program with ours, you can look at this version, or use this one as a starting point for the next exercises.
1.4. Keyboard control
The next obvious step towards our goal to turn this into a game is to give us control: We would like to control the fish with our keyboard, so that it can become our player character. That’s what we will do next.
Our plan is to use the left and right arrow keys to control the fish: If the left arrow key is pressed, we want the fish to turn left, and if the right arrow key is pressed, it should turn right.
Luckily, Python has a statement to express exactly this: an if-statement.
An if-statement is an instruction that allows us to execute a set of statements only if a certain condition is true.
Modify your program so that the loop looks like this:
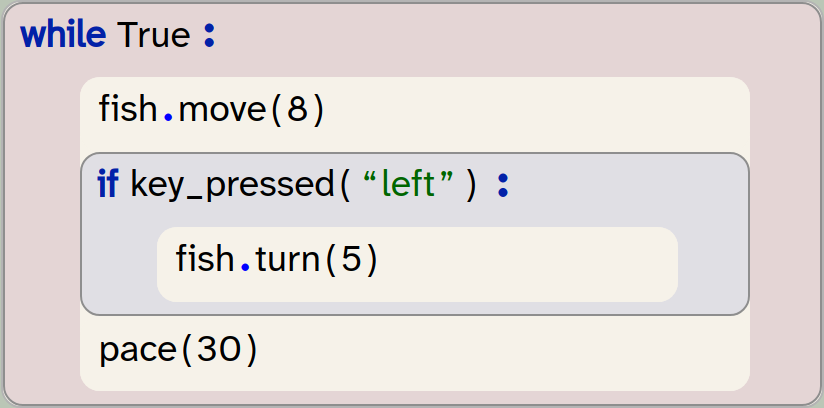
while True:
    fish.move(8)
    if key_pressed("left"):
        fish.turn(5)
    pace(30)
In this code, we have added an if-statement into the loop, and using this if-statement, we make the fish turn only if the left arrow key is pressed down.
When you insert a frame for an if-statement into your code, it looks like this:
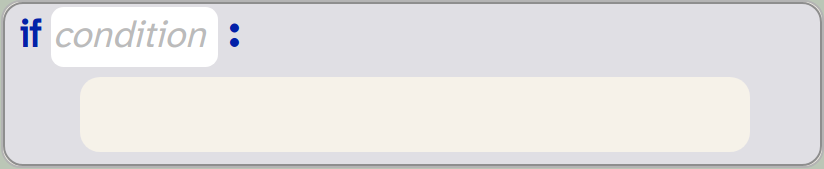
if ___strype_blank:
    pass
We can see that this frame has two slots: a text slot for the condition and a frame slot for the statements that should be executed if this condition is true. This frame slot is also called the body of the if-statement.
An if-statement has two slots: the condition and the body.
In our loop, we use a function call as the condition: key_pressed. This function takes as its parameter the name of the key we want to check, and returns true if this key is currently pressed down. If it is true, then it executes its body to make the fish turn.
If the condition is false, then the body is not executed, and the fish does not turn.
Exercise 1.18 Insert this code in your own program. Test it. This should work – if you see any errors, fix them.
All keys on the keyboard have names that we can use with the key_pressed function. The name of the character keys is just their character (so the a-key is called "a", and so on) and other key names include "left", "right", "up" and "down" for the arrow keys, and "enter", "tab" and "backspace" for some of the others.
Using this, we can now add a second if-statement to make the fish turn right when the right arrow key is pressed.
Exercise 1.19 Add a second if-statement to your code, immediately following the first one. Use this statement to make the fish turn right when the right arrow key is being pressed. Test your program.
You can find this version of the program in the book projects as yellow-fish-v3.
1.5. Summary
In this chapter, we have jumped into the start of our first Python program: a simple animated game. So far, we only have the beginning of the game implemented: a moving graphical character that we can control with our keyboard.
We will continue developing this game further in Chapter 3, and if you are really keen to continue with this project, you could jump ahead and continue reading there.
In this book, however, we will first take a moment and look more closely at the language constructs we have encountered so far. We have seen quite a few: function calls, parameters, variables, assignments, objects, methods, if-statements and while statements.
That is a long list!
We have had a first contact with each of these constructs, and we can roughly understand what they do, but there is more to learn about each of them. So we will now – in Chapter 2 – have a closer look at each of these constructs to deepen our understanding, before we get back to completing our yellow-fish game.

-
Sometimes we will tell you "run" a program, or to "execute" a program. These mean the same thing — you do this by clicking the "Run" button.
-
A function call is a Python statement that executes a function that is defined elsewhere. It consists of the name of the function and a parameter list in parentheses (another word for round brackets, like the ones around this text).
-
A parameter provides additional detail information to a function. Parameters are written in parentheses, with multiple parameters separated by commas.
-
A variable is a bit of storage space that allows us to store a value and retrieve and use it again later. Variables have names, which are used to refer to them.
-
An assignment stores a value into a variable.
-
A function that is called on an object is called a method. Methods are called by specifying the object we want to call, a dot, and the method name and parameters.
-
An if-statement is an instruction that allows us to execute a set of statements only if a certain condition is true.
-
An if-statement has two slots: the condition and the body.

At the end of most chapters, we will suggest additional projects which you may like to try out at this stage. These projects will not be discussed in detail, and it is up to you to study them, decide what you would like to do with them, and take them forward. They are designed to give you some ideas what you can do with the constructs you know now. They can generally be approached with the knowledge you have at this stage in the book (and sometimes require looking something up on your own). You should take these projects as suggestions and ideas what you might do – in either a new project, or to add to an existing project of yours – not as rigid specifications.
Pong
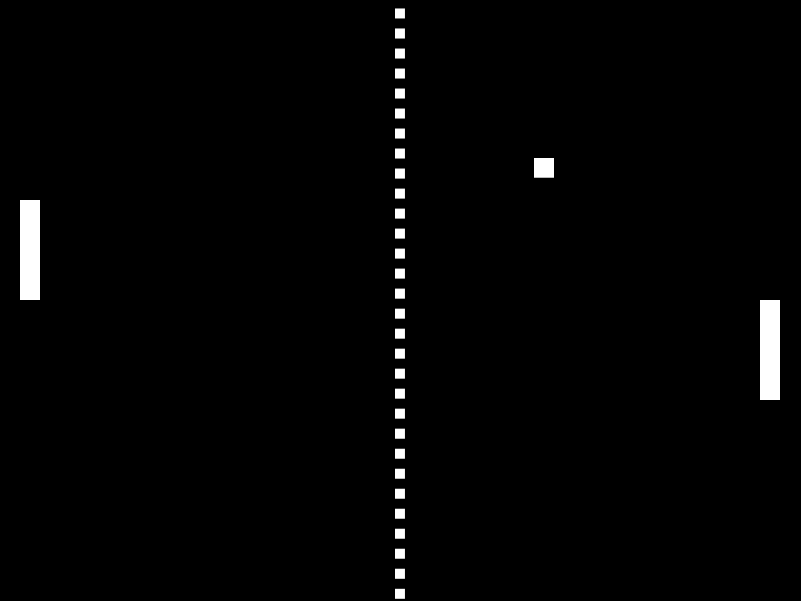 Pong is a very old-school, classic arcade game. If you have not seen it before, you can find out about it by doing a web search for "pong game".
You can find a starter project in the book projects under the name pong-classic. This shows you how to do two-dimensional movement (up/down only), by directly setting the x/y-coordinates of an Actor, instead of using the move method. You can take it from here.
Chapter 2. Our first Python statements
In the previous chapter, we have jumped straight into the development of our first project – an animated game. Along the way, we encountered a series of Python statements. We shall now look at these statements in more detail and experiment with them a bit more, before we go on with completing our game.
The list of Python constructs we have encountered so far is quite long already. It includes function calls, parameters, objects, method calls, variables, assignment and if-statements.
You will have got a sense of what these statements do, and what they are there for. You will not, however, understand fully how any of them work yet. Don’t worry – that is perfectly okay. We will come back to talk more about each of these constructs and experiment with them, and you will gain a full understanding over time.
We will now go through this list and investigate each of these constructs a bit more, so that we can become comfortable with working with these language features before we start looking at new functionality. Let’s start with one of the most fundamental Python constructs: a function call.
2.1. Function calls
We have seen function calls a couple of times now. For example, we have seen the call
set_background("LightBlue")and the call

pace(30)In each case, we call, or invoke, an existing function to get it to do some task for us (setting the background colour, in this case, or setting the pace of the loop.)
In general, a function call always has the format
function-name ( parameters )
The function name specifies the name of the function we wish to call, and the parameters provide some more information to execute the call. Both functions above have one parameter, but a function can have more than one parameter, or none at all, indicating that no further information is required. If a function does not have any parameters, then we still write the parentheses. We just write nothing in between. For example

stop()calls a function called "stop" that has no parameters. It is the presence of the round brackets (also known as parentheses) that identifies this statement as a function call.
To practice with function calls, we will now use another project: fireworks.
Exercise 2.1 Open the fireworks project from the Chapter 2 book projects. Run the project. What do you observe?
If you have completed the exercise above, you will have seen that this project includes some code, but does very little when we run it. In fact, you have to look very carefully to notice any effect at all: It sets the background of the graphics world to a dark blue colour (which is not so different from the default black), and does nothing else.
This project lets us create a fireworks display. It offers us methods to place some firework rockets into the world, and then ignite them to set them off. At the moment, nothing much happens because the project does not place any fireworks into the world.
Let us look at the program code that is executed when we run this project. It is the code in the "My code" section of your project:
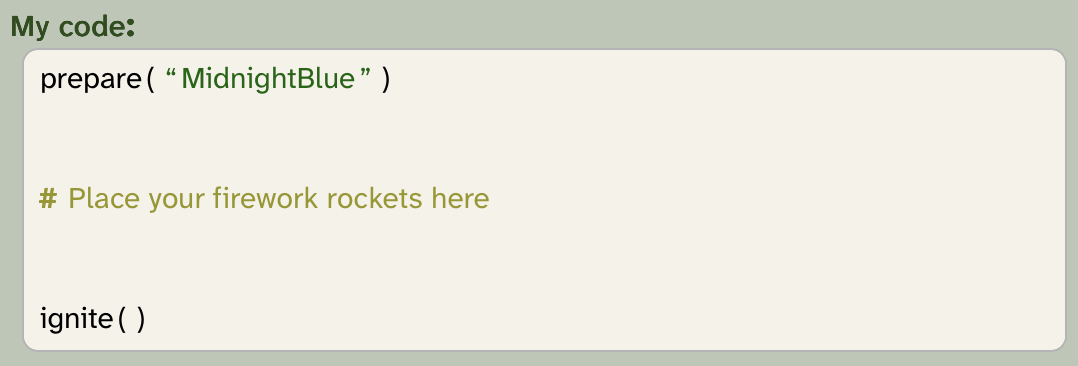
We can see two method calls and one comment. The method calls, in this order, prepare the project to be ready (including setting of the background colour) and ignite the fireworks. In the middle, we see a comment that tells us where in our code we should place our firework rockets.
A comment always starts with the symbol #, and continues with some text. The comment is ignored by the Python system; it is here only for a human reader to give us a hint. We can insert a comment into our program by adding a comment frame.
A comment is frame that shows text for the human reader(s) of the program. It is ignored by the Python system.
We would now like to start creating a fireworks display by placing some rockets into our world, and then igniting them.
Exercise 2.2 Delete the comment frame from your program. In its place, insert a method call frame for a method named place_rocket with a colour name as a parameter, like this:

place_rocket("magenta")As before, you can use colour names of all the usual web colours (a full list is in Appendix F: Available colours). Run the program.
If all went well, you should now see a single fireworks rocket being fired into the night sky. The program, as it is now, prepares some internals to get the fireworks ready, places one rocket into the world, and then ignites it.
This is nice enough so far, and we could now go on to make our fireworks more interesting by adding more rockets. But we are running into a fundamental question: How do we actually know what methods are available? What are their names, what do they do, and how do we call them?
2.1.1. Reading function definitions
The three functions we are calling here, prepare(), place_rocket() and ignite(), are all defined further up in our own project. We can see the definition of these functions in the "Definitions" section:
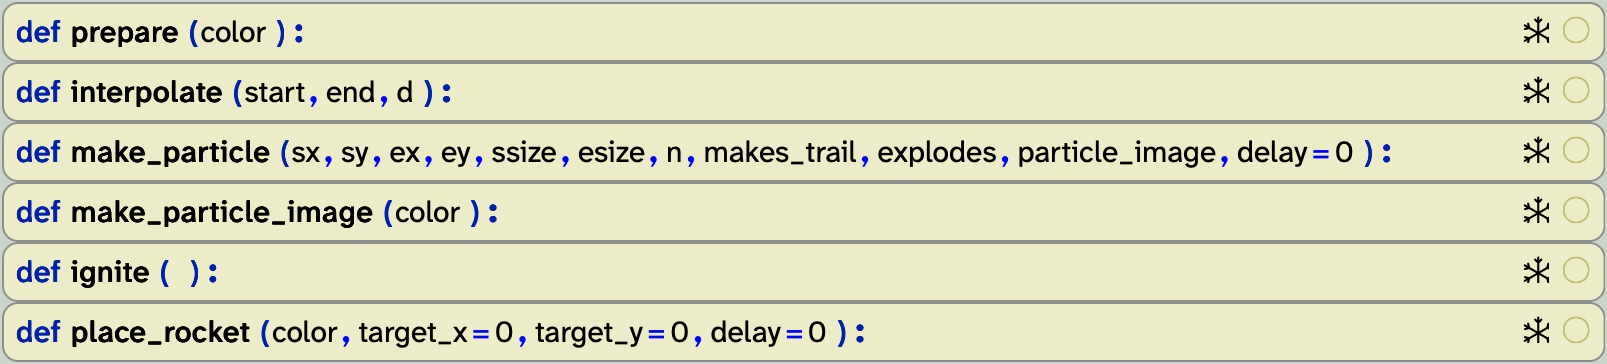
This list shows us what functions we have available to call in our project, what their names are (in bold), and what parameters they expect (in the parentheses). They all start with the word def which is short for define, and is how Python indicates a function definition.
We can, for example, see that there is a function called ignite. The fact that it shows a pair of parentheses after the method name, with nothing inbetween, tells us that this method expects no parameters. This matches the method call in our code section, where we invoke this method without passing a parameter, like this:

ignite()If we wanted to find out more about what this method does, we can unfold its definition. This is done by clicking on the small circle outline at the far right of the function definition frame. Once we do so, the function comment is folded out, and we can see some information about this function:

You can fold and unfold function definitions by clicking on the small circle outline in the top right corner of the function definition frame.
Let us now look at another function: prepare(). Its definition looks like this:

Again, the def keyword tells us that we are looking at the definition of a function, the next word is the name of the function ("prepare"), followed by a pair of parentheses. This time, however, there is a word within the parentheses (color). This tells us that this function expects one parameter when it is invoked, and this parameter is called "color".
As before, we can unfold the function definition to see a function comment that gives us some more information:
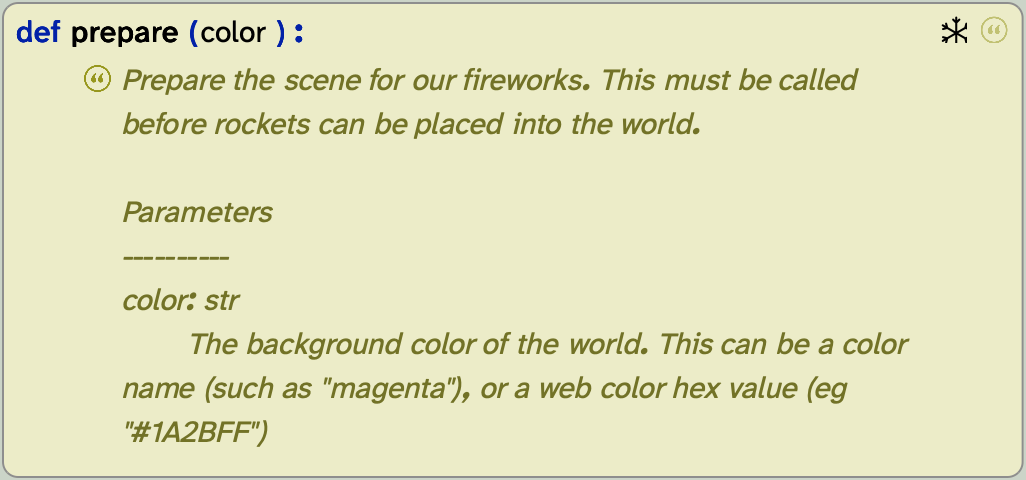
The comment first tells us what this function does, and then, crucially, gives us more information about the expected parameter. Function comments are often formatted like this: They include general information about the purpose of the function, and then some information about each parameter (there may be more than one).
The parameter information starts with the line
color : str
This line tells us the type of the parameter.
The type of a parameter tells us what kind of information is expected here. Python uses several different data types to distinguish different kinds of data. These include, for example, text, whole numbers, decimal numbers or boolean (true/false) values. We will explain these types more, later in this chapter.
Internally, each type of data is handled differently, so the Python system will always keep track of what type of data it is currently working with, and often we have to be aware of this type.
All data in Python has a type. This distinguishes different kinds of data, such as text, numbers and boolean values.
In our example above, it shows the name of the parameter (color), a colon, and then the term "str". "str" is short for "string", and it means that this variable expects a segment of text (such as a word or a sentence).
The data type string is used to store text, such as a word or a sentence. It is often abbreviated to "str". When we specify string values, we always write them in quotes, "like this".
The parameter information in the comment of the prepare function tells us that we should supply a parameter that is a string, and then tells us a bit more about what this string should contain (a colour name). Thus, when we call the function, we supply a value for this parameter (in our case, we used "MidnightBlue").
When we write string values in Python, we must always enclose them in quotes. Python allows us to use either double quotes or single quotes:

print("This is a string")
print('This is also a string')
In this book, we will usually use double quotes for strings.
When write a function call, the call must match the function definition. If the function definition says that it expects one parameter of type string, then the function call must provide a parameter of type string. Let us look at this situation again in context. In Figure 2.1, we can see that the function definition states that the name of the function is prepare, and it expects a parameter named color. The parameter definition in the function definition is called the formal parameter – it tells us what is expected.
The function call then uses the function name to invoke the function, and it provides an actual parameter – that is, a value for the expected parameter.
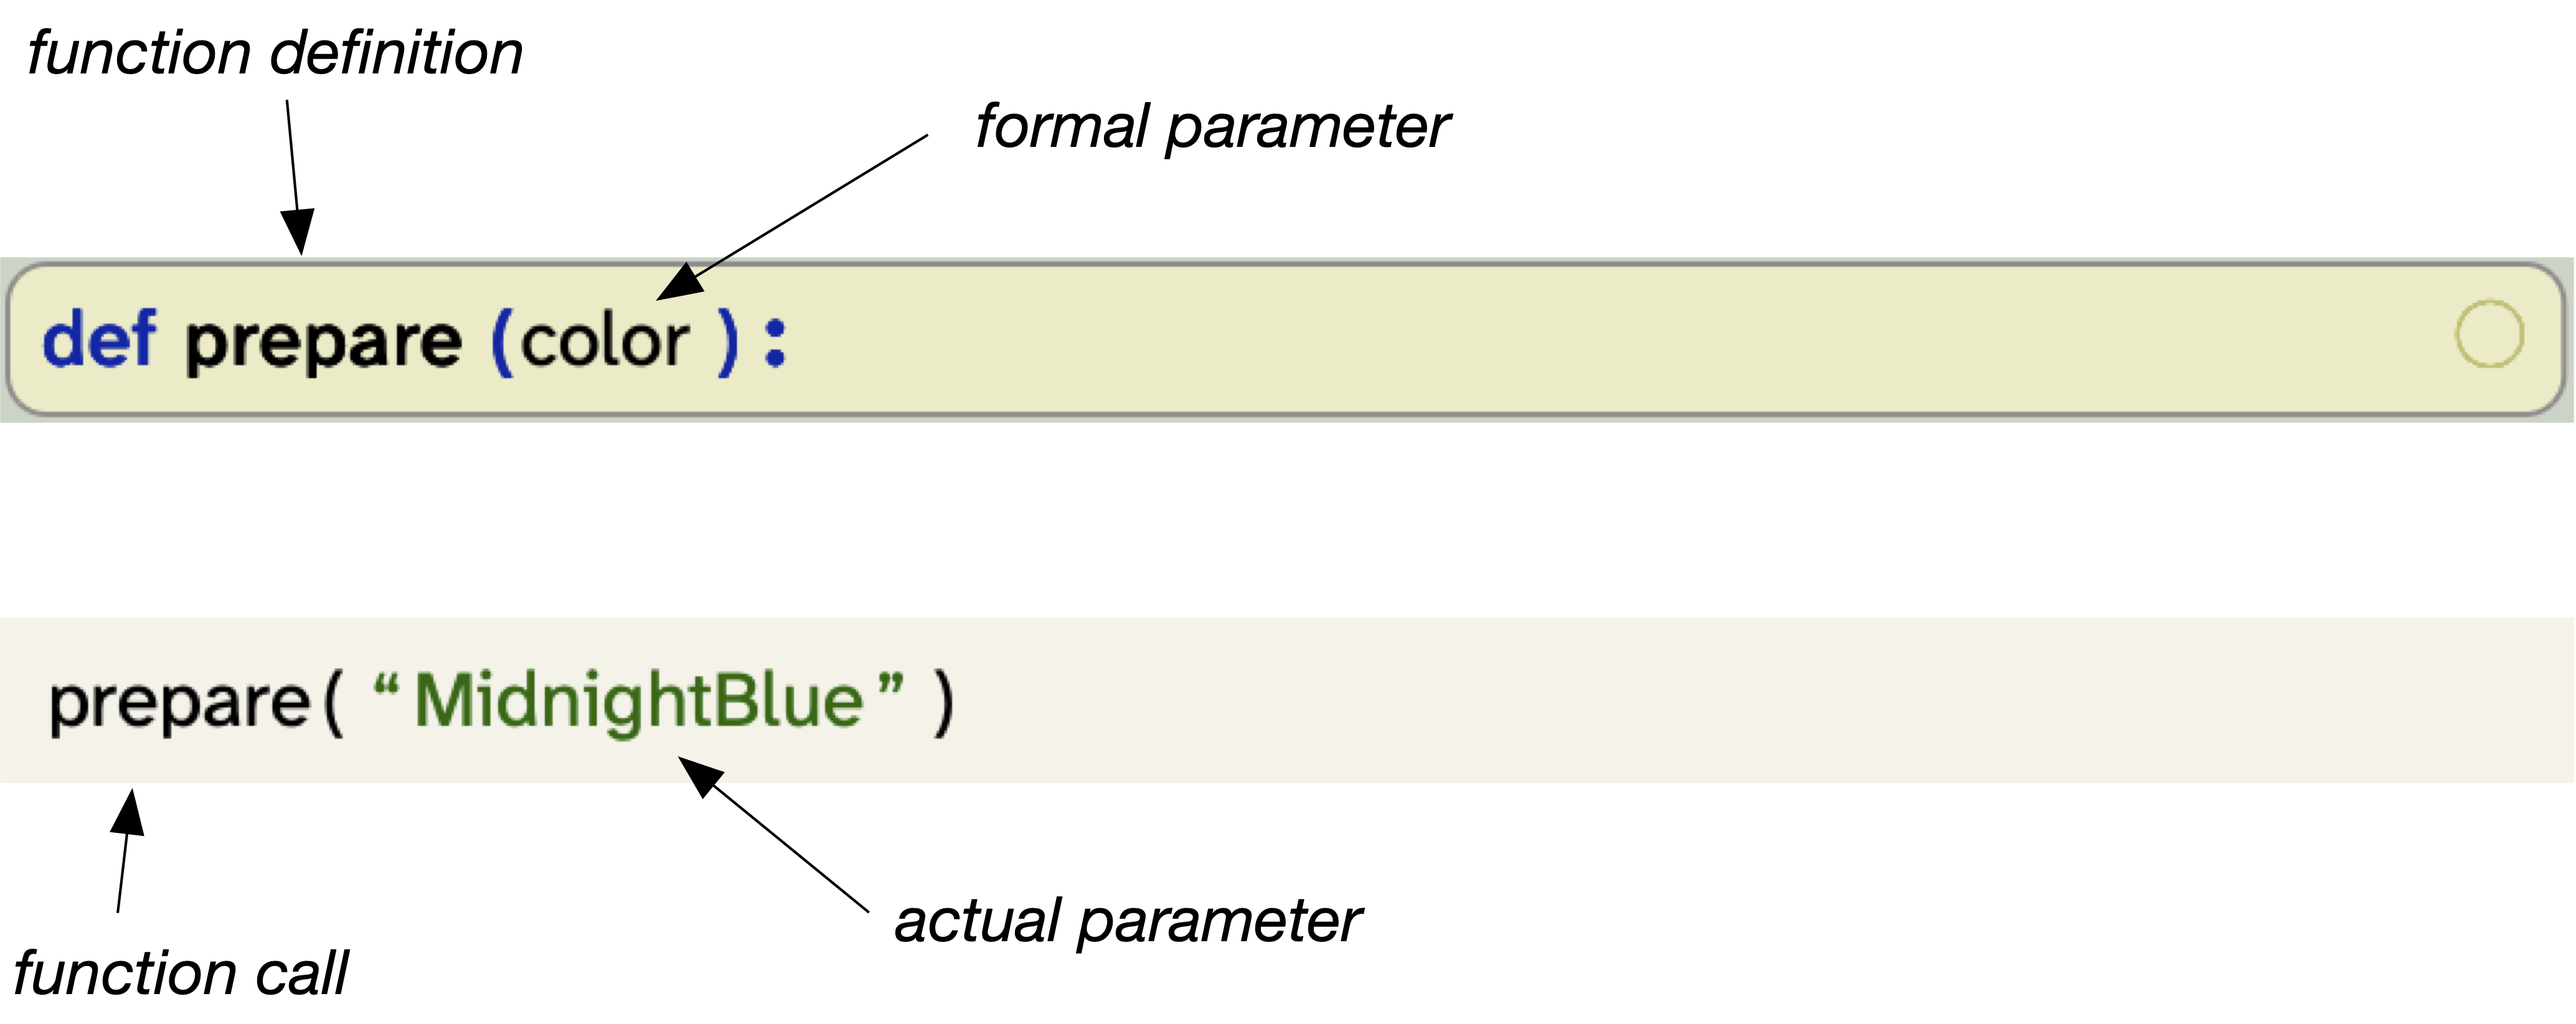
The number and type of the actual parameters in a function call must match the number and type of the formal parameters specified in a function definition.
Exercise 2.3 Change the actual parameter in the call to the prepare function to another colour value. Run your program to see the different background colour.
Exercise 2.4 Remove the quotes from the colour name in your function call. Run your program. What do you observe? (Afterwards, fix the problem again.)
We use the terms formal parameter for the declared parameter in the function definition, and actual parameter for the value passed in with the function call. In other books you will sometimes see the terms parameter and argument instead. In this usage, the argument is the actual parameter, and the formal parameter is just called parameter.
In this book, we prefer the formal/actual parameter terms, since the stand-alone term "parameter" can be ambiguous.
2.1.2. Optional parameters
Let us now look back at the call to the place_rocket function which we added in an exercise above.
Exercise 2.5 Find the function definition for the place_rocket function which we used earlier. How many parameters does it have?
Exercise 2.6 What do you notice about the parameter definitions that is different from what we have seen before?
Exercise 2.7 What do you think the parameters are used for? Try to find out. (Remember that you can unfold the function definition.)
If you have completed the exercises above, you will have noticed that the number of parameters in the place_rocket function call does not match the number of formal parameters in its definition. So what is going on here?
To invoke the function, we have used the call
place_rocket("magenta")Looking at the definition of the function, we can see that it is

The new (and important) construct here is the =0 specification used for some of the formal parameters. This is called a default value. If a parameter has a default value, then we can leave out the actual parameter in our method call, and the default value will be used for the parameter in this case. Therefore, these two calls

place_rocket ("magenta")
place_rocket ("magenta", 0, 0, 0)
achieve exactly the same thing, since the values used in the second call are exactly the same as the default values. We can, however, use values different from the defaults for the parameters. If we do, these values are used instead of the defaults.
Function definitions may include default values for parameters. If they do, then we do not need to provide an actual parameter for this value; the default will be used instead.
The following calls are all valid:
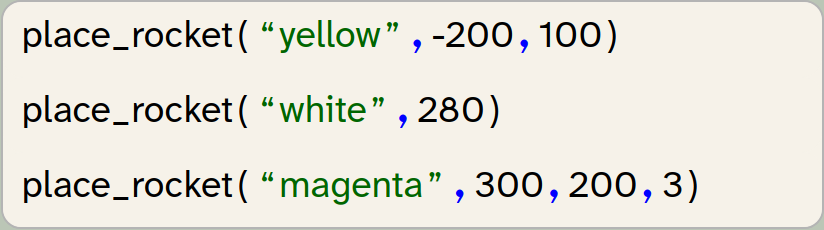
place_rocket ("yellow", -200, 100)
place_rocket ("white", 280)
place_rocket ("magenta", 300, 200, 3)
Here you can see that we do not have to supply all of the values at the same time: We can override some of the defaults with different values, while leaving the later parameters to their defaults.
If we provide only some values for the parameters, but not all, the actual values are assigned to the parameters in the order of their definitions. So if we provide only one number after the colour name, it will be assigned to the target_x parameter, while the remaining two parameters use their defaults.
But what if we want to provide a value for the delay, and leave the target_x and target_y parameters to their defaults? In that case, we can specify the formal parameter name in the function call, like this:

place_rocket ("magenta", delay=2)In this case, the two middle parameters use their default values, while the color and delay parameters receive their values from the function call.
You may have worked out by now that the two middle parameters (target_x and target_y) specify the location in the world area the rocket should aim at (using the coordinate system shown in Figure 1.6), while the delay parameter specifies a delay after igniting until the rocket should fire.
Experiment with this yourself.
Exercise 2.8 Add some more rockets to your fireworks. Make them explode in different areas of the sky.
Exercise 2.9 Add some rockets that use a delay after igniting, so that not all rockets fire at the same time. (The delay value is specified in seconds.)
Exercise 2.10 Create a fireworks show that uses several rockets. It should use at least four different colours. It should also use symmetrical pairs of rockets, where two rockets of the same colour are shot to the right and left of centre, at the same angle from the vertical.
Freezing functions: If you look carefully at the function definitions in the fireworks project, you see a little snowflake symbol towards the right of the function definition frame. This means that the function definition is frozen. A function is usually frozen if it should not be changed as part of the work in this project. You can freeze or unfreeze a function using the frame’s context menu (mouse right-click).
When a function is frozen, its implementation is hidden, and folding/unfolding alternates between showing the function comment, or showing only the function header. When it is unfrozen, the folding cycles through three states: header only, header with comment, full implementation.
If you provide projects for others, you can freeze a function as a signal that this function implementation should not need change, and that the user may not need to understand the implementation of this function. The function is here just to be called as it is.
If you are a learner working with a project, the frozen function tells you that you can use this function without being expected to understand how it works internally. (If you are curious, you can of course unfreeze a function and look at its implementation, but you should not need to.)
2.2. Data types: string, int and float
The first data type we have encountered above was str, which is short for "string". We have seen that the values for this type are snippets of text, written in quotes: "This is a string".
If you paid attention when you did the exercises above, you may have noticed that the comment for the place_rocket function specified that the type of the last three parameters is float. "float" is short for "floating point number", and it means that the value for this parameter should be a number that may include a decimal point. 3.14 and 0.0001 and 42.0 are all floating point numbers. It is allowed to provide numbers without a decimal point: 128, for example, will just be treated the same way as 128.0.
There is a third data type that is worth mentioning at this point, because we will encounter it very soon: int. "int" is short for "integer", which means a whole number. If a parameter type is int, then we have to supply a number, but this number cannot have a decimal point. Only whole numbers are allowed, such as 1001, -42, or 0.
The three most common data types are str, int and float.
str (string) is used to store text, int (integer) is used to store whole numbers, and float (floating point number) is used to store decimal numbers. Some examples are shown in the table below.
| type name | full name | used for | examples |
|---|---|---|---|
str |
string |
text |
|
int |
integer |
whole numbers |
|
float |
floating point |
decimal numbers |
|
Exercise 2.11 In your fireworks display, use floating point numbers (numbers with a decimal point) for some of your delay values. For example, delay a rocket by 4.75 seconds.
After doing these exercises, you might like to compare your project to the fireworks-finished example, which is an implementation of these exercises.
2.3. Variables and assignment
Often, when we work with bits of data, it is not enough to just pass a value to a function. We often want to store a piece of data for use later on, or for doing further computations with it. This is when we need variables.
We can use variables to store data for later use. Variables can be assigned a value, and later we can read that value again.
You have seen the first variable briefly at the start of Chapter 1, when we looked at the default program in the Strype editor. Let us briefly go back to this program and look at it more closely.
Exercise 2.12 From the Strype menu (on the left hand side of the Strype window), choose the "New project" option. This will reset the editor to the default two-line program that you started with at the beginning. Run this program. What does it do?
You will see that the program consists of just two lines of code:

myString = "Hello from Strype"
print(myString)
In this code segment, we can now recognise what the second line means: This is a function call to a function named print with one parameter. The print function is built into Python, and it prints its parameter to the console (the text output area in the bottom right of the Strype window). (Note that "printing" in a programming language is not used how we usually use it: it does not mean to print something on paper using an external printer. In Python, "printing" means just to write something to the text console.)
The first line is an assignment statement. We can add an assignment statement by inserting an assignment frame. A new assignment frame has two slots with an arrow symbol in the middle:
___strype_blank = ___strype_blankOn the left side of the assignment, we can write the name of a variable. We can make up this name, and a variable with this name will be created. On the right side we write a value that we want to store in this variable. This can be any type of data that Python knows, including the three types we have seen above: strings, integers and floating point numbers.
In the example above we have stored a string into this variable ("Hello from Strype"), and we have given the variable a name that indicates that it stores a string (myString).
An assignment statement stores a value into a variable. The variable name is written on the left, followed by an arrow symbol, and the value to store is written on the right.
Exercise 2.13 Change the content of the string to a different string. Run your program.
Exercise 2.14 Write quotes around the word myString in the print method call, so that the call looks like this: print("myString"). Will this work? Run your program. What do you observe? Explain what you see. (When you are finished, remove the quotes again.)
Exercise 2.15 Change the value in the assignment (the right hand side) to a number. Run the program. Does this work?
Exercise 2.16 Once you have changed the value on the right to a number, the name of the variable is misleading: It is called "myString", but it does not hold a string. Change the name of the variable so that it accurately describes what it stores.
Exercise 2.17 Change the value on the right hand side of the assignment to 42 + 33. What do you think this will do? Try it out, and explain what happened.
Variable names must not have any spaces in them. If you need to use multiple words (for example, big fish), there are two programming conventions to do this:
-
Use underscores in place of spaces: big_fish
-
Capitalise each new word: bigFish
In this book, we generally use the first format.
2.4. Objects
In the previous section, we have seen that we can store values, such as strings or numbers, into variables. Next, let us look at a special kind of data type to store and work with: objects. To investigate this topic, we will use another project called knock-knock.
Exercise 2.18 Open the knock-knock example from the Chapter 2 projects. Run the project. Then read the code. Can you explain what the code does and how the project works?
Exercise 2.19 Change the dialog between the lobster and the crab. For example, you might find another knock-knock joke on the internet and use that one instead.
Exercise 2.20 Replace the images of the crab and lobster with different images.
This project makes use of an Actor object, which we first encountered in Chapter 1. The creation of this Actor object looks like this:

Actor(image_literal,-220,0)We can see that it looks very similar to a function call: It has a name, followed by a parameter list in parentheses. Because these look so similar, Python uses a convention: function names start with a lowercase character, while object types start with an uppercase character. This bit of Python code creates an object of type Actor, using the parameters provided.
In our code, we can see that we then assign this object to a variable, so that we can use it later:

crab = Actor(image_literal,-220,0)This shows us that variables can also be used to store objects as values.
Before we go on and examine the rest of the program, let us ask a question: How do we know what object types and what functions exist for us to use?
Looking at our knock-knock program, we can see that it uses objects of type Actor, and functions such as set_background and pause. What other objects and functions are available for us, and how do we find out?
2.5. Reading the library documentation
When working in Strype, we will often make use of objects and functions from the Strype graphics library. Over time, we will have to become familiar with most of the functions available in it. So how can we see what it offers?
The answer to this lies in the library documentation. This documentation lists all object types and functions, with all their parameters and information how to use them. In Strype, you can access this documentation by selecting "Library documentation…" from the Strype menu.
Exercise 2.21 Select the "Library documentation…" option from the Strype main menu. Examine the webpage you see. Find the documentation for the pause function. How many parameters does it have? What are the types of its parameters? What do its parameters specify?
Exercise 2.22 What are the names of the special keys that you can use with the key_pressed function?
Exercise 2.23 How many parameters does the Actor’s move method have?
Exercise 2.24 In the documentation for the Actor’s move method, what does it tell you about negative parameter values?
Learning to read this documentation will be very useful for our future programming tasks. It enables us to find out what we can do. Luckily, it is not very difficult.
The main points to understand are these:
-
The heading for this documentation is Strype API documentation. "API" is short for "Application Programming Interface", which is a technical term for the functions available in a library.
-
In the list on the left, we can see that this library contains three modules. They are called strype.graphics, strype.sound and strype.builtins. Each module provides functions for a specific purpose, and each can be imported into our programs separately. We will investigate the strype.sound module later in this book. For now, let us concentrate on the strype.graphics module.
-
We have mentioned before that we can distinguish functions and object types by their initials: Object types start with an uppercase letter, while functions start with a lowercase letter. Knowing this, we can see that this module contains three object types (Actor, Color and Image), and a list of about a dozen functions listed below them.
-
Object types are also called classes. You can see this in the documentation when you, for example, click on
Actorin the list on the left and then look at the details of the Actor definition on the right. Its first line starts withclass Actorto tell you that this specifies a class – a type of an object. We will, from now on, also use the term "class" for types of objects. -
We can click on each of the functions in the list on the left to see a detailed description of the function, including its parameters.
-
We can also see the methods of the classes. For example, we can see the
moveandturnmethods of the Actor class, which we have used in Chapter 1.
The type of an object is called a class. Classes define methods that can then be invoked on the objects of that class.
You will quickly get used to reading this type of documentation. Having it available will help us both understand the remaining parts of the knock-knock program, as well as enable us to find out what else we could do.
Exercise 2.25 In the pace function, what is the default speed used when no actual parameter is provided?
Exercise 2.26 What does the stop function do?
Exercise 2.27 What is the difference between the say and the say_for methods of the Actor class?
We have now seen that functions and classes can be defined in two different places: They can come from a library (such as the set_background function we have used from the strype.graphics library) or they can be defined in our own project, as we have seen in the fireworks example.
2.6. Methods
In Chapter 1, we have briefly mentioned the difference between functions and methods. They are similar in that they both perform specific actions. Functions, however, perform a stand-alone action (such as set_background("red") or ignite()), while methods are actions that belong to a class and are performed by a specific object. We have seen for example, that we write

fish.move(6)to make our fish object move. move is a method of the Actor class, as we have seen in the library documentation. There, methods are listed under the class, while functions are listed on their own at the end of the module.
Exercise 2.28 The knock-knock project contains these two lines:

crab.say_for ("Knock, knock", 2)
pause(2)
Which of these lines is a function call, and which is a method call? How can you tell?
Exercise 2.29 What does the say_for method do? What is its second parameter?
Exercise 2.30 Make each of the actors (the crab and the lobster) turn a bit after every time they say something. The crab should turn left, and the lobster should turn right every time they speak.
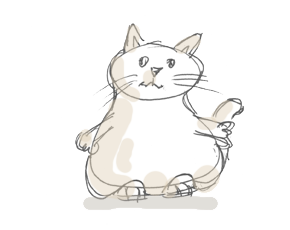
2.6.1. The "Fat Cat" example
To continue experimenting with objects and their methods, we will use a different project: the Fat Cat project (Figure 2.2). This project defines its own class: Cat.
Exercise 2.31 Open the fatcat example. Run it. What do you observe?
Exercise 2.32 How many methods does the Cat class have?
Exercise 2.33 How many parameters does the sleep method have?
Exercise 2.34 Make the cat walk a bit further than it originally did.
Exercise 2.35 Make the cat walk left instead of walking right.
Exercise 2.36 Make the cat eat.
You can see that this project defines its own class called Cat. This class is also an actor, so it is also shown in the graphics world when we create an object of this class. We can also see that the Cat class defines a number of methods which we can call on the cat.
If you have paid attention, you will have noticed one oddity: the formal parameter called self as the first parameter of all the Cat’s methods. This special parameter is used only in definitions of methods within classes, not for functions. It is needed in the method body to implement the method, but it is not used when calling the method. So the Cat method
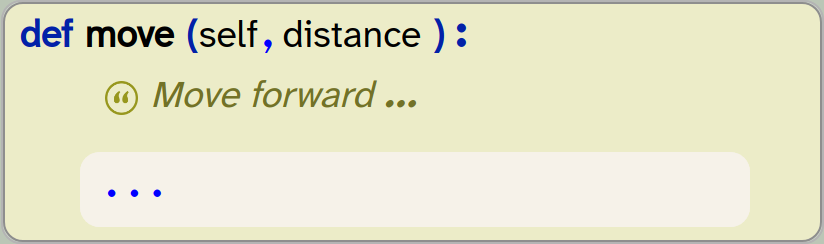
def move(self, distance):
    '''Move forward ...'''
    ...
is called using the following method call:

cat.move(3)In other words: This parameter is used only when defining methods, but when calling methods it is ignored. Since we are – at the moment – concerned only with calling methods, we can just ignore this parameter. (In the library documentation, this parameter is not listed at all, so we are implicitly ignoring it there as well.)
When looking at method definitions in the Strype editor, we see the implicit "self" parameter. We can, for now, ignore this parameter.
Let us now experiment a little more with our cat. Instead of calling just a single method, we can also call a sequence of methods. Try this with the following exercises.
Exercise 2.37 Make the cat walk to the left, then make it eat.
Exercise 2.38 Make the cat dance, then sleep.
Exercise 2.39 Create a sequence of actions of your choice for the cat. The cat should do at least four different things.
If you look carefully, you can see another odd-looking construct: For classes, the formal parameters for the construction of an object of that class are not shown after the class name, but in a special method called _._init__
This, too, is specific to classes: If the class name is Cat, and the init method has the formal parameter list (self, x, y), then we create an object of this class like this:

cat = Cat(50, 60)This is, to create the cat object, we use the name of the class and the parameter list from the init method, ignoring the formal parameter self. This, again, has to do with the way classes are implemented in Python. You will see this notation only when you look at a class in the editor. When you look at the class documentation (in the library documentation), the same class header would be shown as Cat (x, y).
2.7. If-statements
Looking at the Cat methods, we can see a number of methods starting with the prefix is_, for example is_hungry, is_tired, and so on. These methods return a value of either True or False, and we can use them to introduce conditional actions: make our cat do something only is a given condition is true.
In Chapter 1, we have already seen that we can use if-statements to call a method only only under certain conditions. In this case, we can, for example, make the cat eat only if it is hungry:
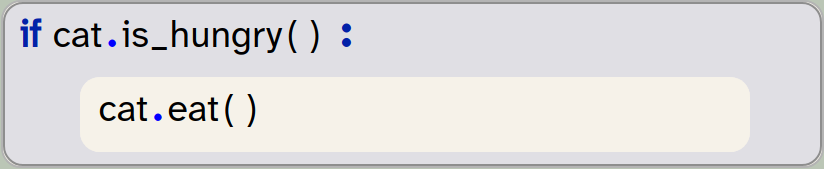
if cat.is_hungry():
    cat.eat()
Try this yourself.
Exercise 2.40 Make the cat eat if it is hungry. If it is not hungry, it should do nothing.
Exercise 2.41 Change your program so that the cat dances if it is bored.
Exercise 2.42 Change your program again to do the following: If the cat is tired, it sleeps, and then it shouts hooray. If it is not tired, it just shouts hooray. (For testing, call another method first to make the cat tired. How can you make the cat tired?)
Exercise 2.43 How can you make the cat hungry? When will it be bored? Test it by writing a program that shows this.
Exercise 2.44 Change your program to do the following: If the cat is alone, let it sleep. If it is not alone, make it shout hooray. Test this by creating a second cat at the beginning of your program. The second cat should be at a different location than the first one, and its variable should be called cat2.
Exercise 2.45 Extend your program so that the second cat dances if is not alone.
If-statements can also have an else-case. An else-case is added to the if-statement by moving the frame cursor to the end of the body of the if-statement (the last line within the if-statement), and then inserting an else frame. The result is an extended if-statement that looks like this:
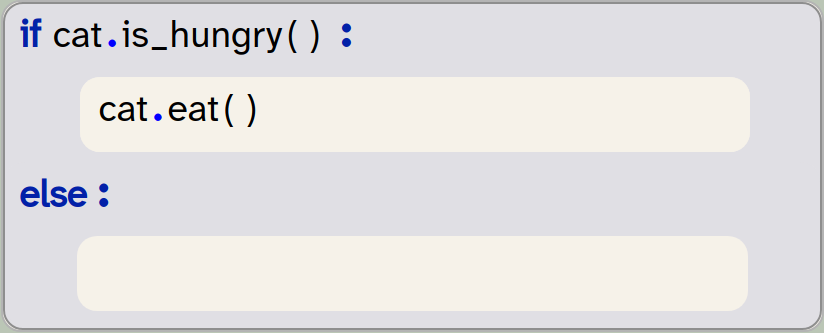
if cat.is_hungry():
    cat.eat()
else:
    pass
The if-statement now has two bodies: one for the if-case, and one for the else-case. The first one is executed when the condition is true, and the second one is executed if the condition is false. Thus, one or the other of the bodies will always be executed, but never both.
An if-statement may have an else-case. The else case is optional. If it exists, it is executed when the condition is false. If the if-statement has no else case, nothing happens when the condition is false.
Exercise 2.46 Rewrite your program to use an if-else-statement.
Exercise 2.47 Make a program with three cats. Make one cat eat, the second one sleep, and the third one dance.
Exercise 2.48 Invent your own routine for the cat (or two cats), and implement it.
You can find a version of the project that does some of these things in the book projects as fatcat-v2.
If you have done all the exercises in this chapter, you will have a good enough understanding of the Python constructs we have used thus far. We are now ready to get back to our game project and continue developing it into something more interesting.
2.8. Summary
In this chapter, we have investigated and experimented with some of the most important Python constructs. We have seen more detail about reading function definitions and calling those function. We have seen that functions can take parameters (which can include optional parameters), and that the types of the formal and actual parameters must match.
We have also discussed how to use Actor objects, and how to read the library documentation to find out more detail about what we can do with them. The documentation will be important when we work with our projects; it shows us the methods we have available.
And finally, we had a closer look at if-statements to execute specific statements only if a certain condition is true. If-statements will be useful in just about every project we write from now on.
-
A comment is frame that shows text for the human reader(s) of the program. It is ignored by the Python system.
-
All data in Python has a type. This distinguishes different kinds of data, such as text, numbers and boolean values.
-
The data type string is used to store text, such as a word or a sentence. It is often abbreviated to "str". When we specify string values, we always write them in quotes, "like this".
-
The number and type of the actual parameters in a function call must match the number and type of the formal parameters specified in a function definition.
-
Function definitions may include default values for parameters. If they do, then we do not need to provide an actual parameter for this value; the default will be used instead.
-
The three most common data types are str, int and float. str (string) is used to store text, int (integer) is used to store whole numbers, and float (floating point number) is used to store decimal numbers. Some examples are shown in the table below.
-
We can use variables to store data for later use. Variables can be assigned a value, and later we can read that value again.
-
An assignment statement stores a value into a variable. The variable name is written on the left, followed by an arrow symbol, and the value to store is written on the right.
-
The type of an object is called a class. Classes define methods that can then be invoked on the objects of that class.
-
An if-statement may have an else-case. The else case is optional. If it exists, it is executed when the condition is false. If the if-statement has no else case, nothing happens when the condition is false.
Drum
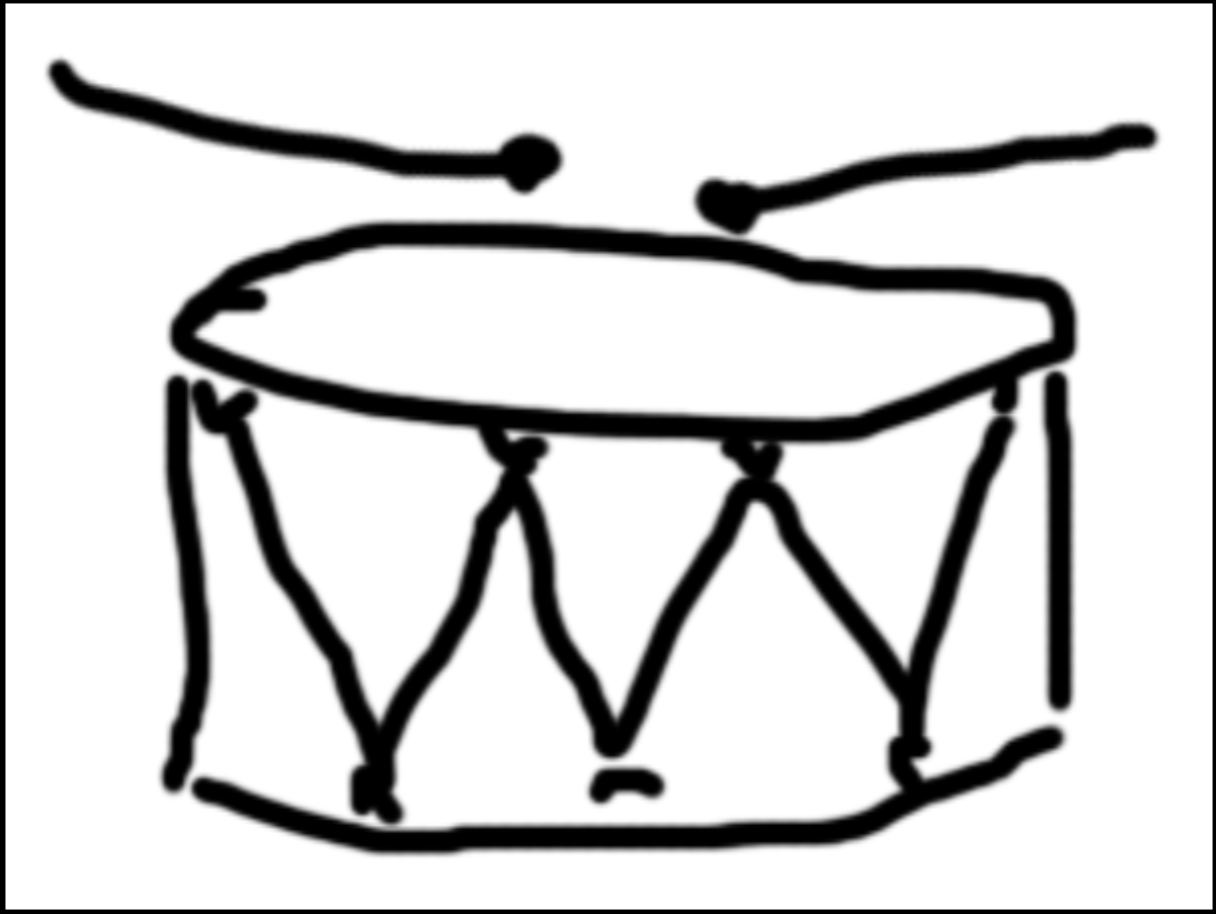 This is a very simple project that lets you bang a drum. Get it here: drum, and use your left/right cursor keys to play.
This project shows you some controlled movement (moving the drum sticks) and how to play a sound. Maybe you can add another instrument?
Chapter 3. Creating a game
In Chapter 1, we started experimenting with the graphics functions built into Strype, with the aim of turning our yellow-fish into a simple interactive game. In this chapter, we will continue this project and finish our first version of the game.
If you have completed all the tasks in Chapter 1, you can continue with your project from that chapter. If you would like a fresh start, you can use the yellow-fish-v3 project from Chapter 1 of the book projects as your starting point.
3.1. The plan
To make this game even a little bit interesting, we need to have a task, a goal, and some danger. For our yellow fish, we have already seen how we can make the fish the player character by letting the player control the movement of the fish. The task will be to eat: We will introduce some shrimp to our game, which the fish can eat. The goal of the game then is to eat all the shrimp on screen.
To make this a bit more interesting, we will also add a shark: the shark likes to eat fish, so we need to stay away from it, otherwise we will be eaten by the shark. The aim of the game then is to manage to eat all shrimp without being first eaten by the shark.
3.2. Adding food
Our first task is to add some food to the game: a shrimp in our case. We can start by adding one single shrimp. This should now be quite easy: We can add a line of code to add the shrimp immediately after the line that adds the fish, with a very similar structure. We just use a different name for the variable, different coordinates and a different image:

fish = Actor(image_literal,0,-200)
shrimp = Actor(image_literal,100,50)
Of course, if you have changed your player character and image in this project to a different actor, you can choose a different kind of actor for the food as well. If your player is, for example, a turtle, then the food could be a lettuce. Or if your player character is a spaceship, then the second character could be an astronaut. (In that case, it is not "food", and the player is not "eating" the second character, but rather picking them up from space.) You get the idea: whatever your game scenario is, choose an appropriate image for your second character. Whenever we write "shrimp" in the remainder of this chapter, use your own character instead.
In case you would like to stick with our fish/shrimp theme, you can find a shrimp image in the Chapter 3 section of the book projects in Strype (use the "Book…" option in Strype’s fold-out menu, go to Chapter 3, and copy the image from there).
Exercise 3.1 Add a shrimp to your project. Place it at a different location from the fish. Test to make sure that the fish and shrimp both appear on screen.
Exercise 3.2 Add a second shrimp at another location. Then add a third one.
3.3. Repetition - the for-loop
Let us say we would like to have 15 shrimp in our game. We could now go ahead and duplicate the line that creates the shrimp another 14 times, each time changing the world coordinates to different values. This would work, but it would be tedious.
Computers are good at doing things repeatedly, but that does not mean that we should need to write the same statement repeatedly. We can just tell the computer to execute a statement 15 times. (This will become even more important later on when we will execute statements not 15 times, but thousands of times. In that case, it is really not practical to write all the statements out one by one.)
A loop is a statement that can execute a statement (or a set of statements) repeatedly, potentially many times. The loop body contains the statements which we wish to repeat, and the loop header determines how often it should run.
The type of Python statement to do something repeatedly is called a loop. Python has several different kinds of loop statement, and the one we will use here is called a for-loop. It looks like this:
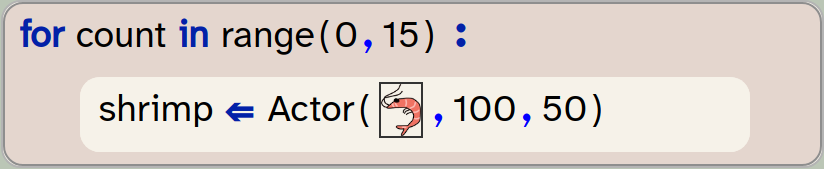
for count in range(0, 15):
    shrimp = Actor(image_literal,100,50)
Exercise 3.3 Remove all but one of the statements that create the shrimp. Place the remaining one in a for-loop as shown here. Run your program. What do you observe?
Exercise 3.4 How many shrimp are created by this loop? How many shrimp can you see on screen? Can you explain what you see?
The for-loop executes the statements within it repeatedly. (There can be more than one statement in the body.) How often it executes depends on the header of the loop. The loop we see above counts from 0 to 15, and for each count executes the loop body (the statement with in the loop) once.
Let us discuss this in a bit more detail. The empty for-loop frame looks like this:
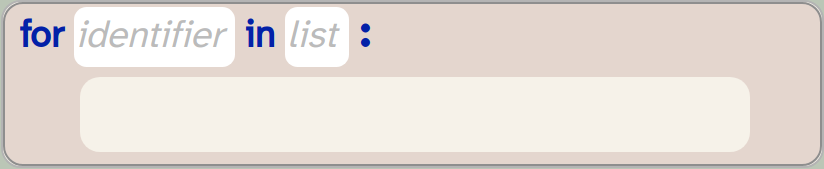
for ___strype_blank in ___strype_blank:
    pass
In the place of the expected identifier, we can write the name of a variable we want to use for counting. We can make up the name for the variable ourselves, and a variable with that name will be created. In our example above, we have used count as the variable name, but we could have named the variable anything we like. (In programming, the variable name i is also often used as a loop counter.)
In the 'list' slot, a list of numbers is expected. Here, we use the range function: this function creates a list of numbers from a lower bound to an upper bound. In our case we have used 0 and 15, so we will get a list of numbers from 0 to 15. One important detail to be aware of is that the range includes the lower bound, but excludes the upper bound. So strictly speaking, the numbers we get are 0, 1, 2, …, 14. This suits us well, because it means that we are getting 15 different numbers (0 to 14), and the loop will run 15 times.
When the loop executes, it first assigns the first number (0) to the loop variable count and then executes the loop body once. Then it assigns the second number (1) to count and executes the body again. Then again for the third number, and so forth.
Once it has done this for the last number, the loop body will have been executed 15 times. For each run of the loop body, the count variable has a different value, and we can use this value to our advantage to solve our next problem.
A for-loop is a type of loop statement that uses a counter variable (called the loop counter) and a list. It executes the loop body once for each item in the list.
3.4. Using the loop counter
In the last exercise above, you will have noticed a problem: The code created 15 shrimp, but they were all placed at the same location. Because all shrimp were drawn exactly on top of each other, it made it look as if there was only one.
We can fix this by placing each shrimp at a different location. How do we do that if all 15 shrimp are created using the same statement?
The answer is not to used fixed values for the x- and y-coordinates, but to use variables instead.
As our first try, let us use the loop counter variable as the coordinates for both the x- and y-position:
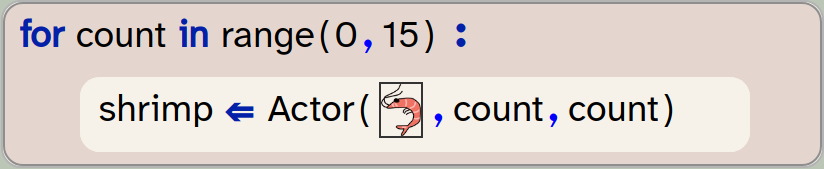
for count in range(0, 15):
    shrimp = Actor(image_literal,count,count)
Using this code, the x/y coordinates will be 0,0 for the first shrimp, 1,1 for the second, and so on. This way, the shrimp are not all drawn at the same location.
Exercise 3.5 Implement the loop as shown above, using the count variable. Run your program. What do you observe? Explain what you see.
Exercise 3.6 To space the shrimp out more, multiply the count variables by 20 when you use them for the coordinates. That is: write count * 20 as the actual parameter for the x- and y-coordinates.
Exercise 3.7 Experiment with values other than 20 for the multiplication.
Exercise 3.8 What effect does it have if you use different multipliers for x and y?
Exercise 3.9 Make the row of shrimp start from the left edge of the screen.
Exercise 3.10 Arrange the shrimp in a straight line from the top left corner of the screen to the bottom right.
Exercise 3.11 Python allows us to call the range function with only one parameter, for example range (15). In this case, the parameter is the upper bound, and the lower bound is automatically set to zero. Change your program to use the one-parameter version of this function call.
In the exercises above, we have seen that we can use the * symbol for multiplication. Python has built-in operators for many frequently used mathematical operations; you can see a list of all available operators in Appendix C: Python operators.
For the purposes of our game, being able to place the shrimp at different locations is good, but placing them in such a regular pattern seems odd in our context. So let us make the next improvement: Let’s place the shrimp at random locations.
3.5. Creating random behaviour
Often, we want an element of randomness in our programs. In our case, we would like to place our shrimp at random locations, but we may also want other characters to move randomly, or have interesting things happen at random times. Randomness makes our game less predictable, and thus more fun to play.
In computer programs, all random behaviour is based on random numbers. Python can create random numbers, and we can then write code to translate this into any kind of random behaviour we need. We will see an example here for the random placement of the shrimp, and another example later in this chapter, when we want to make our shark move randomly.
3.5.1. Generating random numbers
Python provides a function called randint to generate and return random integers (whole numbers). We can call this function to receive a random number and assign it to a variable. For example, we can write an assignment statement like this:

x = randint(5, 19)The function call to randint returns a random number, and we assign this number to a variable called x.
The function takes two parameters, which are the lower bound and the upper bound of the random numbers we wish to receive. Both bounds are included in the possible range, so our example will produce numbers between 5 and 19, inclusive.
Python provides functions to generate random numbers. The randint function provides a random integer from a given range.
Exercise 3.12 Add the assignment statement with the randint function call to your own code, inside the for-loop. Run your program. What do you observe?
The exercise above shows us that we are not quite done yet: The code produces an error that tells us that randint is not defined. This is Python’s way of telling us that it does not know the randint method.
The reason for this is that the randint method is defined in a library. Python provides so many functions for different purposes that it might get confusing to make all of them available all the time. Instead, they are arranged into libraries, which we can import when we need them. Each library contains a set of functions for a specific purpose. Python provides a set of libraries by default with the language – these are referred to as the standard libraries. They are always available in every Python system. Other libraries can be added with explicit statements.
To make our randint function work, we have to first import it from a library.
3.5.2. Importing from a library
When we import from a library, we have the option of importing all the definitions in that library, or we can import specific functions.
We have seen an example of the first option in Chapter 1, when we looked at the import of the Strype graphics library. We saw the following import statement in the Imports section of our program:
from strype.graphics import *In this case, we used the asterisk (*) to specify what we wish to import, which is a symbol meaning "everything". Thus, we imported the entire Strype graphics library.
We can now add the following statement to our Imports section:

from random import randintThis statement shows us that Python has a standard library called random (which contains various functions dealing with random numbers), and from there we can import a function called randint. In this import statement, we import just a single function from the library.
As a general rule of thumb, we should import separate named functions whenever we need just one or two functions from a library, and we import everything when we need access to a large number of definitions from the same library.
Exercise 3.13 Add the import statement for randint to the Imports section of your program as shown above. Run your program. This should now work. If it does not, then you made an error that you need to fix. You will not see any effect of the random number yet, but you should not see an error either.
3.5.3. Random placement
It is now time to use our random numbers for random placement of our shrimp.
Exercise 3.14 Add a second assignment of a random number to a variable. This time, call the variable y. Add this line directly below the assignment to x. Make sure both lines are inside your for-loop.
Exercise 3.15 Use your variables x and y as the actual parameters for the x- and y-coordinates in the creation of your Actor.
Exercise 3.16 Experiment with different values for the upper and lower bounds of your random numbers. Remember that the x-coordinates of the Strype world range from -399 to 400, and the y-coordinates from -299 to 300 (see Figure 1.6). What would be reasonable bounds for your random numbers?
Exercise 3.17 Start and stop your program multiple times to convince yourself that the shrimp are placed in different random locations each time.
If you have successfully completed the exercises, you now have a version of your program that has a keyboard controlled player character and several actors of a second type at random locations. If you would like to compare your version to ours, you can find a version of the program in this state in the book projects as yellow-fish-v4.
In our version, we have made one additional change: instead of defining the variables x and y and assigning random numbers to them, we have written the call to the random number function directly into the parameter list of the Actor creation:

for count in range(0,15):
    shrimp = Actor(image_literal,randint(-360,360), randint(-260,260))
This is an alternative way to achieve the same thing: we can write a function call that returns a value directly into a parameter list, and the result of the function will be used as the actual parameter.
Which version of the program you prefer is a matter of personal preference – both are good ways to achieve the same goal.
3.6. Collision detection
The next task we wish to implement is the eating of the shrimp: When the fish swims across the shrimp, the shrimp should be removed from the world.
What we need here is technically called collision detection: We want to know when one actor (the fish) touches another actor (a shrimp).
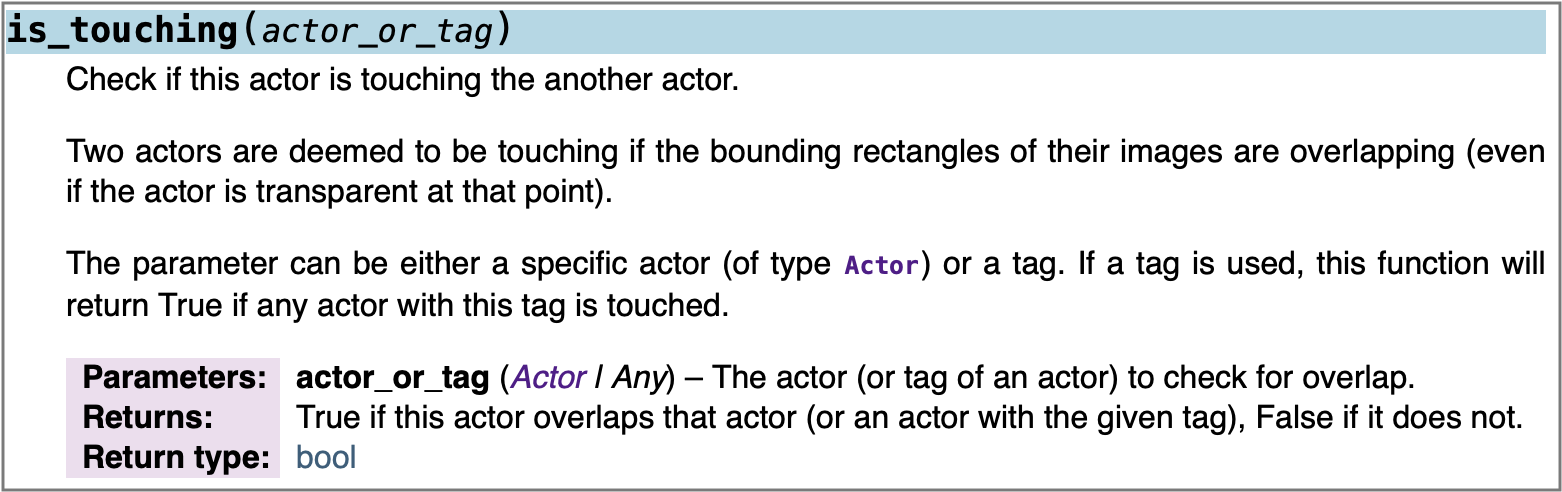
is_touching methodThe Strype graphics library provides a method to help with this: the is_touching() method from the Actor class. Figure 3.1 shows the documentation of this method (you can also find this in the library documentation in Strype).
We have previously discussed how to read the header of the method: We know to use the method name to invoke this method, and to provide a matching number of parameters. Let’s first take a closer look at the parameter of this method.
We can see that we can provide either an actor (using a variable that holds an actor) or a "tag" as a parameter. A tag is a label that we can provide for actor objects to identify them later. In our case, we wish to check for collision not just with a single actor, but with any of the shrimps. To achieve this, we will tag all shrimp objects as "shrimp" and then check for that tag.
Figure 3.2 shows the header of the Actor constructor, and we can see there that it has an optional fourth parameter: the tag we have just mentioned.

We can use this to attach a tag to our shrimp objects to identify them later:

shrimp = Actor(image_literal,x,y, "shrimp")The tag could be of any type, but it is most common to use a simple string to mark a set of actors so that we can easily recognise them later. In the method call to check whether we are touching a shrimp actor, we can then write:

fish.is_touching("shrimp")and this call will return true only if we are touching an actor that was tagged with the string "shrimp". This would ensure, for example, that we are not eating other fish, should we decide later to introduce other fish into our game. Note also that this is a method – called on an object – not a stand-alone function, so we call it on the fish object. This makes sense, since it is the fish which wants to check whether it is touching another actor.
We should now also pay closer attention to the return value of the method. We already know that the documentation typically includes information about the general function of the method, and about its parameters. Here, we can see that the documentation also includes information telling us what the method returns to us.
Functions and methods may return a value to the caller of the function. This is called the return value. Like all data in Python, the return value has a type. This is called the return type of the function.
We have already seen earlier that some methods and functions return a result to the caller of the function. It is time to see how we can find out about this from the documentation.
Figure 3.1 shows two bits of information about the return value, in its two last lines. It first tells us what it returns, and then it tells us the type of the return value. The first line tells us that the method will return the value True if this actor touches a specified other actor, and False if it does not. The type in this case is a data type we have not discussed before: bool.
The boolean type (in Python abbeviated to bool) is a type that can only hold two possible values: True or False.
In Chapter 2, we have already seen the types str, int and float. To this list, we should now add our boolean type:
| type name | full name | used for | examples |
|---|---|---|---|
bool |
boolean |
true/false values |
|
When a method returns a value, we typically do something with that value. One option is to store it in a variable:

found_shrimp = fish.is_touching("shrimp")For method calls returning boolean values, we have already seen before that we can also use them directly in if-statements. Figure 3.3 illustrates this: The condition in an if-statement needs an expression that returns a boolean value (true or false), and our method call returns just such a value.
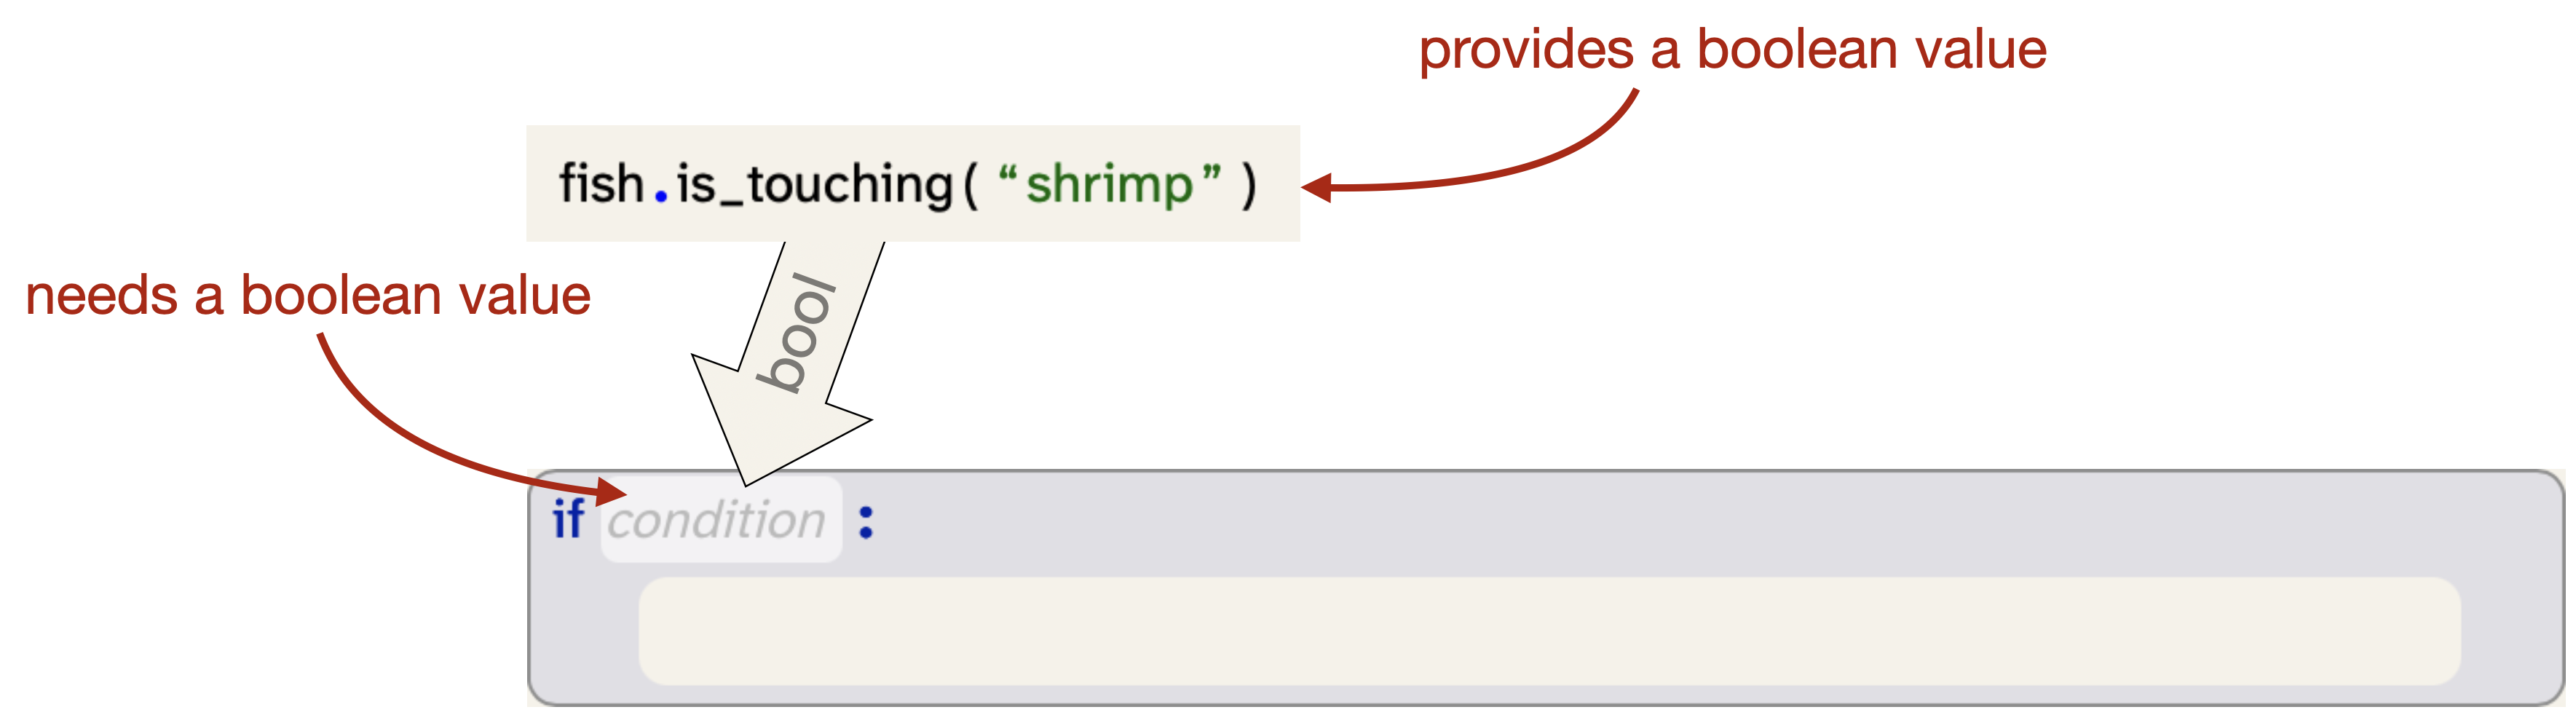
If you have done the exercises in Chapter 2, you have, in fact, made use of this before when you worked with the Fat Cat project. There, too, we used return values from method calls as conditions in our if-statements.
Exercise 3.18 Look through the documentation for the Actor class. What other methods can you find that return boolean values?
Exercise 3.19 What methods can you find in the Actor class that return int values?
Exercise 3.20 In your program, add the "shrimp" tag to your shrimp actors. You do this by adding an additional parameter to the creation of the shrimp, as shown above.
Exercise 3.21 Add an if-statement to your program to check whether the fish is touching a shrimp, as discussed. In the body of this if-statement, call the method fish.remove_touching("shrimp") to remove the shrimp if we have run into it. Where should this if-statement go?
Exercise 3.22 Test your program. The fish should now remove the shrimp when it swims over it. If this is not happening in your program, go back and check your code. Have you added the right tag to the shrimp? Have you used the same tag in your is_touching check?
Exercise 3.23 In the exercise above, we have used the remove_touching() method. What does this method do? What does it do when the actor is not currently touching another actor? What does it do when it is touching two other actors at the same time?
Exercise 3.24 If the fish touches two shrimp at exactly the same time, will they both be eaten? Explain your answer.
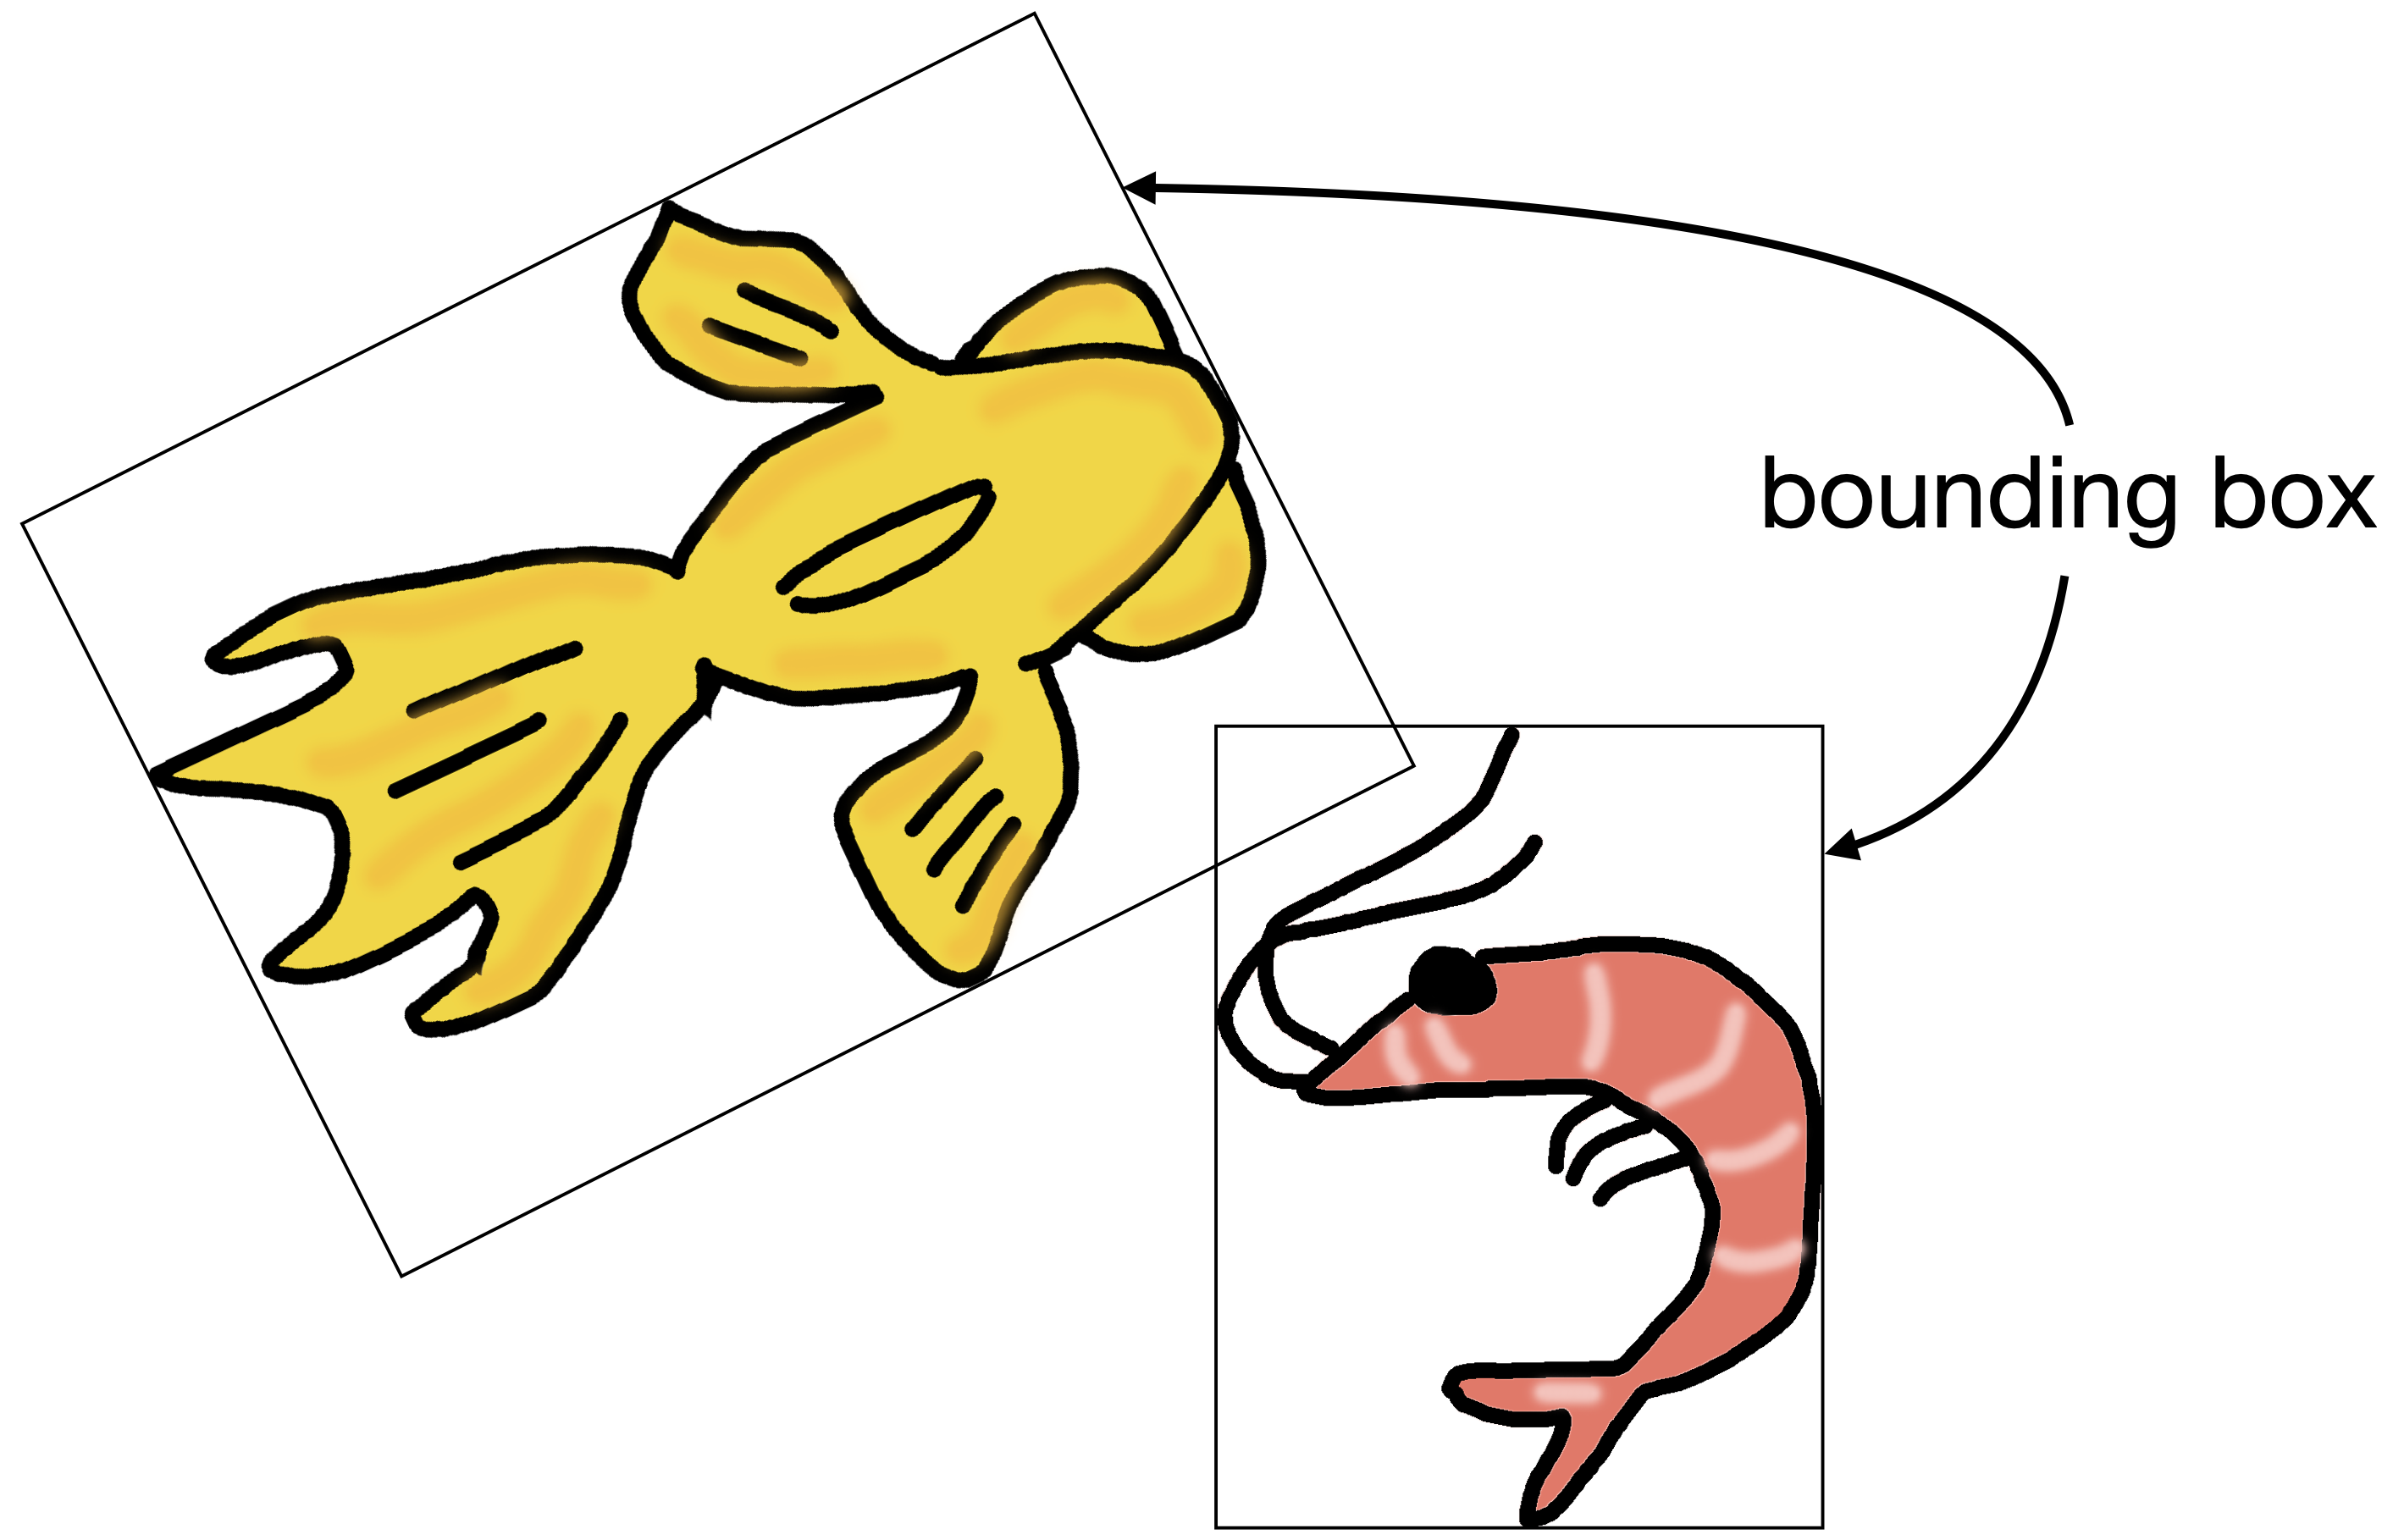
If you have watched closely when playing with your project, you may have noticed that often the shrimp disappear just before the fish seems to touch them. This has to do with how graphics are managed in many computer graphics systems (including Strype).
In Strype, even though images appear to have free form, all graphics drawn to the screen are, in fact, rectangular. Figure 3.4 illustrates this: it shows the bounding box of each image. The bounding box is the actual boundary of the graphic being painted. The image appears to be of arbitrary shape by using transparent pixels: the parts of the image where we do not want to show anything are transparent, making them essentially invisible. For the computer, they are, however, still part of the image, even though we cannot see them.
For the purposes of collision detection, two actors are "touching" when their images overlap. Since the invisible pixels are part of the image, this means that they are effectively touching when their bounding boxes overlap. The effect is that they are often technically "touching" even though the visible images do not touch each other.
When you make your own images for use with actors, make sure to crop any unnecessary transparent area around the visible part of the image. If an image has transparent padding, it increases the size of the (invisible) bounding box and makes collision detection less precise.
3.7. Adding a predator
Now, let us make the game more interesting by adding a predator that hunts the fish: a shark. An image for this is in the Chapter 3 section of the book projects, but as always, you are free to use your own actor type and image for this. For example, if your player actor is a spaceship, then the "predator" might be an asteroid which you have to avoid hitting.
The beginning of this is easy: at the beginning of the game, where we create the fish and shrimp, we now add a line to create a shark:

shark = Actor(image_literal, -200, 100)Next, we add code into our main loop (after all the code dealing with our fish) to make the shark move:

shark.move(12)It might be a good idea to make the shark move a bit faster than the fish to increase the challenge.
Exercise 3.25 Make the additions shown here to your own program: Add the shark and make it move.
Of course, at the moment the shark moves only in a straight line, and it gets stuck at the right edge of the screen. To fix this, we want to make the shark turn when it reaches the edge of the screen. The Actor class has a method to check for this: the is_at_edge() method returns True if the actor is at the edge of the world.
Exercise 3.26 Look up the is_at_edge() method in the documentation. What is its return type? What does it mean, precisely, to be "at the edge" of the world?
Exercise 3.27 In your program, after the method call that makes the shark move, add an if-statement. Use the shark.is_at_edge() method for the condition of the if-statement, and make the shark turn 15 degrees if it is at the edge.
Exercise 3.28 Is 15 degrees enough to turn away from the edge? Will the shark manage to turn enough to continue? Why not turn 180 degrees? Experiment with different degree values for the turn and see what the effect looks like. Explain what you see.
Next, we should make the shark eat the fish when they meet. So let us add some collision detection checking whether the shark touches the fish. This is now not too difficult, because it closely mirrors the code for the fish eating the shrimp:
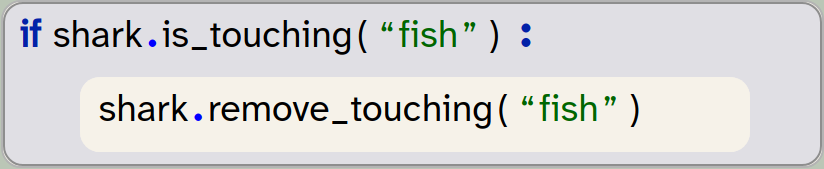
if shark.is_touching("fish"):
    shark.remove_touching("fish")
We need to remember, of course, to tag the fish with the "fish" tag when we create it, so that it will be identified.
Exercise 3.29 Add code to your main loop to make the shark eat the fish. Test your program to make sure this works.
We now have the beginnings of a simple game: We have a keyboard-controlled character that has a task and has to avoid being caught. (This version of the program is in the book projects as yellow-fish-v5.)
If you have programmed along with yout own images and characters, your story might, of course, be different: you might have a game where you control a spaceship that picks up astronauts, or you might be controlling a white blood cell that removes bacteria and tries to avoid a virus. You can see that very similar game playing code can be used to present different stories.
There are many ways in which we can now improve this game and make it more interesting, and we will suggest some in the next chapter.
3.8. Summary
In this chapter, we have made good progress in developing our yellow fish game. In fact, we are getting close to having a playable game now. We have used some more Actor objects, and we have seen how we can use a for-loop to create several actors without writing separate statements for each one. We have also investigated collision detection of actors, using the is_touching() method.
And finally, we have seen that we can import functions from the random module to generate random numbers. These numbers allow us to implement random behaviour in our programs.
-
A loop is a statement that can execute a statement (or a set of statements) repeatedly, potentially many times. The loop body contains the statements which we wish to repeat, and the loop header determines how often it should run.
-
A for-loop is a type of loop statement that uses a counter variable (called the loop counter) and a list. It executes the loop body once for each item in the list.
-
Python provides functions to generate random numbers. The randint function provides a random integer from a given range.
-
Functions and methods may return a value to the caller of the function. This is called the return value. Like all data in Python, the return value has a type. This is called the return type of the function.
Space
 The space project is a very simple example of fixed, four-directional movement. In the yellow-fish example, we were able to turn and move in any direction we chose. Here, we see an example where the game character (a space ship, in this case) can move up, down, left and right, but does so without turning. (It is en extension of the two-dimensional movement from the pong game in chapter 1.) Maybe this is useful for your own game idea.
Chapter 4. Finishing our game
In this chapter, we will suggest and investigate some improvements to our game. How exactly you extend your own game depends, of course, on your game story, and on what behaviour makes sense in your context. But even if you choose slightly different extensions, the functionality we discuss here should help you improve your game.
But before we make further additions, let us take a step back and reflect on our code.
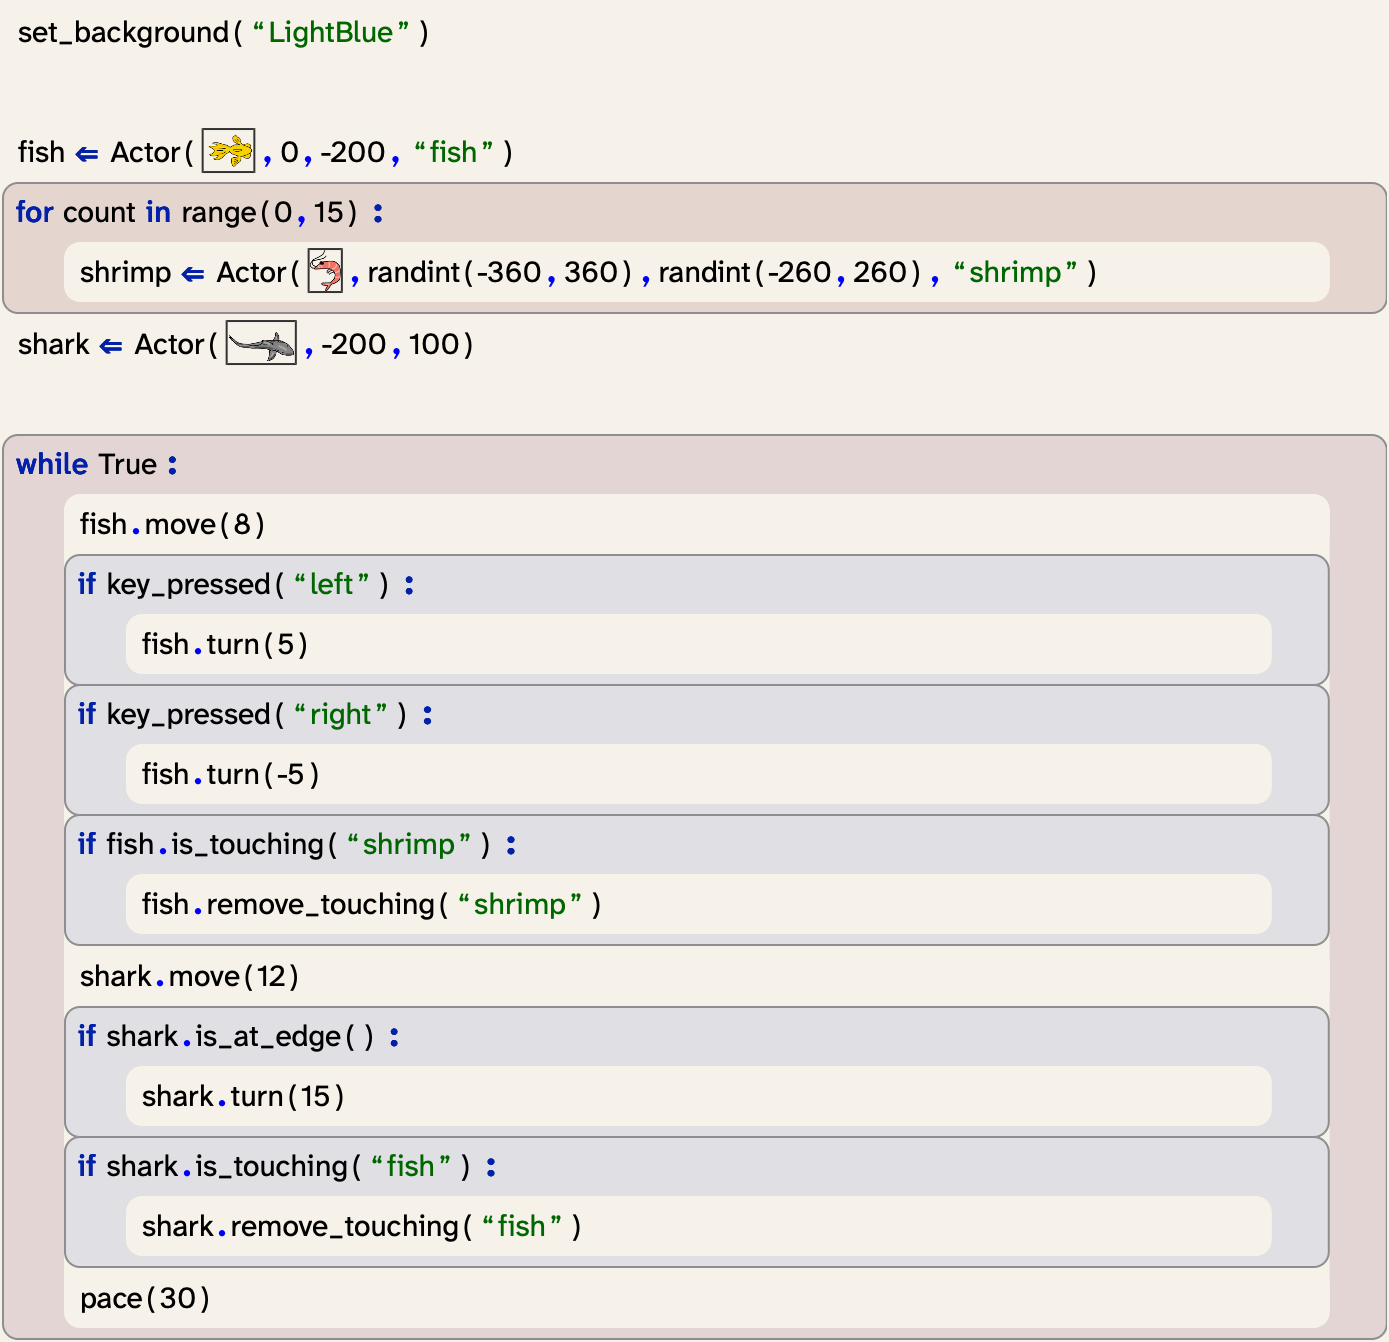
4.1. Defining your own functions
When we observe the development of our project through the steps we have taken so far, we notice that it gets longer and longer. This is natural: the more functionality we add, the more code we will have, and the longer our program text will be.
So far, this is not too bad. The program still spans only about a page (Figure 4.1), and with some effort and practice we can manage to read and understand it. Over time, however, this will get worse. Our program is still very simple, but as we add more improvements, its size will quickly grow. We will soon deal with programs that are not one page long, but dozens of pages. In professional systems, programs often span thousands or millions of lines of code.
4.1.1. Analysing program structure
To be able to manage longer programs, we need a way to structure our program text better. And while our program is still fairly short, it is never too early to start with this. Developing a good program structure is a habit we should get into from the start, because later on it will be essential. When we deal with the projects in the later chapters of this book, we would not be able to work with them without this practice.
So what does this mean exactly?
Currently, the program text does not really reflect the logical structure of the program very well. We have written the program as a single sequence of statements in the "My code" section of the editor. If another programmer now came to read our program for the first time, they would have few clues about which part of the code does what, and they will have to read the program line-by-line to find out. As our programs get longer, this will become more and more challenging.
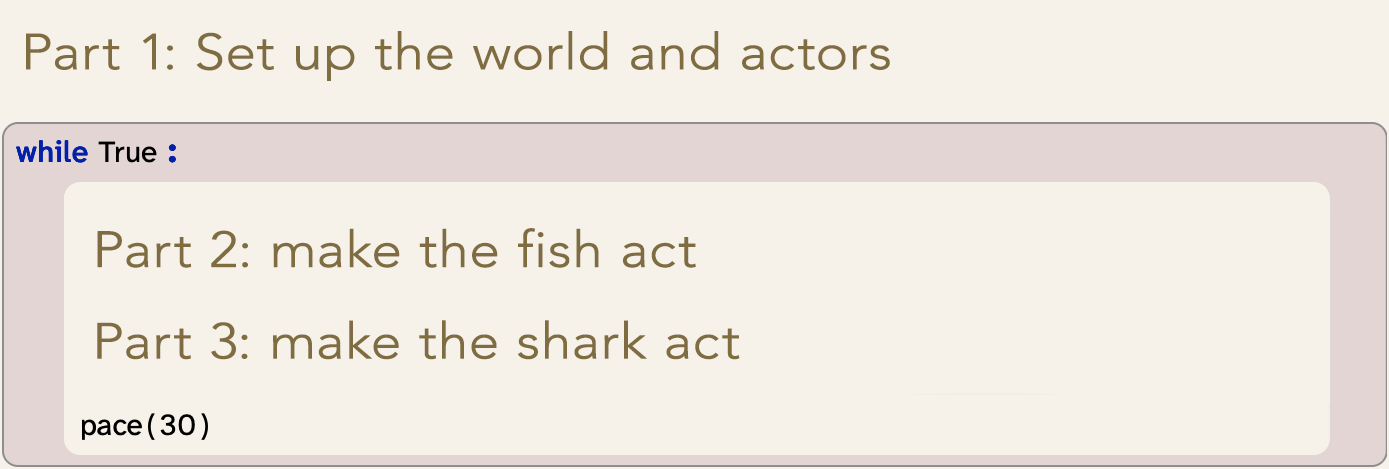
If we analyse our program carefully, we can see that it consists of three distinct logical parts (Figure 4.2):
-
First, we set up the world (set the background and create the actors)
-
Then (in the loop), we make the fish act (move, turn and eat)
-
And finally, we make the shark act (move, turn and eat)
We can improve our program by reflecting this logical structure in our program structure. To use this, we use functions.
4.1.2. Functions as logical blocks
We have encountered functions before in the context of using ready-made functionality: We have, for example, called the set_background function to set the world background colour, or the randint function to obtain a random number. In both of these cases, the functions came from a library.
In the fireworks project in Chapter 2, we have also seen that functions can be defined in our own project. We called, for example, the place_rocket and ignite functions to invoke functionality defined in the "Definitions" section of our program.
We can now create our own functions and move some of our code into them. This way, we can put all code that serves one single logical purpose into one place and give it a logical name. We start with this my making a function for the fish actions.
Exercise 4.1 Move the frame cursor into the "Definitions" section in your program and enter a frame for a function definition. Since the function we are about to create will be responsible for moving the fish, you can call it "move_fish". It does not need any parameters.
Exercise 4.2 Move all the code that is responsible for the fish actions from the main loop into the move_fish() function. This includes the code to make the fish turn and eat shrimp.
Exercise 4.3 In the place where the fish code had been (in the main loop), insert a call to the move_fish() function.
Exercise 4.4 Do the same for the shark: Create a move_shark function, and move all the shark code into it, and call the function from the main loop. Test your program: If all went well, it should work just as it did before.
Exercise 4.5 Create another function called "setup". Move all the code that sets up the world into this function. Then move the two frames that create the fish and the shark to the beginning of the "Definitions" section, before (outside) the first function. Again, test your program.
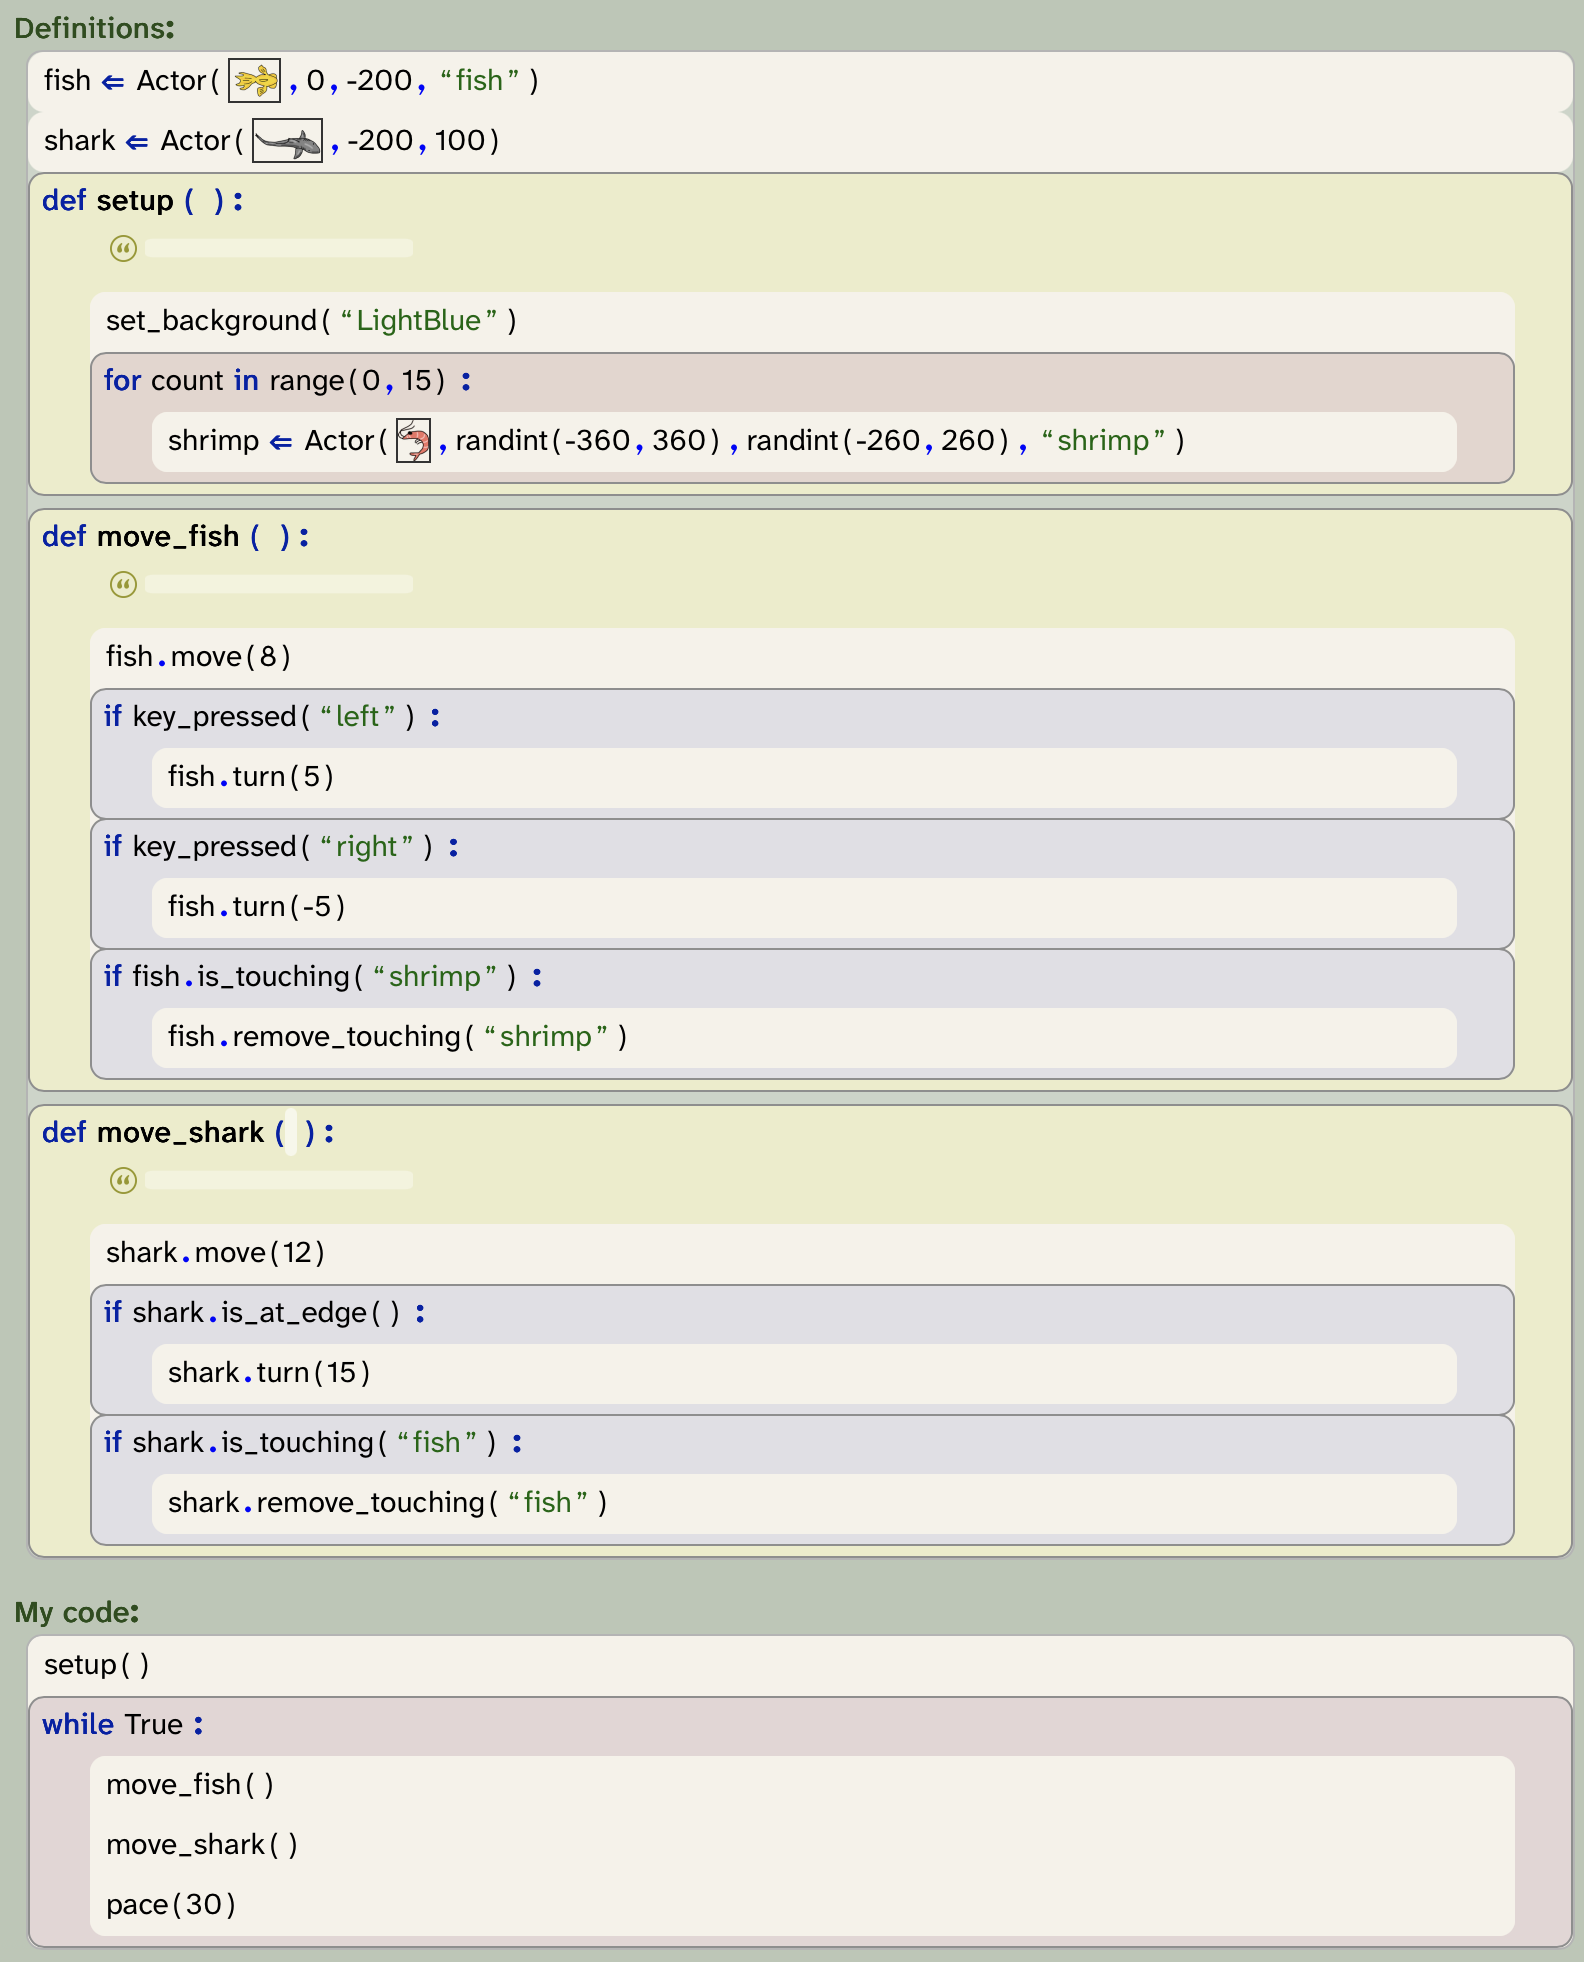
Figure 4.3 shows what our program now looks like. When the execution reaches the setup() function call, it jumps up to the setup function, executes its body, and then returns to the function call and continues execution there. The same happens for the move_fish() and move_shark() calls.
One further change that we made here is that we have moved the creation of the fish and shark variables out of the function, and added them straight to the definitions section. (The definitions section can contain definitions of variables and functions, but no other code.)
The reason for this is that variables defined inside a function are, by default, only usable within that same function. We need, however, the fish and shark variables in the other functions as well, so they need to be defined outside the function to be visible to all functions. We will discuss this aspect of variables in more detail later (in Chapter 7).
The new program does exactly the same thing it did before the reorganisation, but it has a nicer structure. So what exactly are the advantages of this new version?
Sequences of code can be moved into functions, and the functions can be called at the place where we would like to execute that code. This makes our program more modular, and easier to read and maintain.
4.2. Readability and naming
The more we work with programs, the more we will need to read programs. Sometimes beginning programmers think programming is all about writing code. That is certainly important, but it is by far not everything: reading code will be just as important – if not more important – as writing code.
As your programs become more interesting and larger, you will take more and more time to work on them. You will work with code that you have written months earlier, and you have to read it again to remind yourself what it does.
If you continue programming, you will start working with other programmers. You will need to read code that others have written, and you will need to write code for others to read. When you progress even further, you may contribute to an open source project, or you may find some publicly available code on the internet that you’d like to use and extend. In each case, your work will start by reading large amounts of code that others have written before you can add your own.
In each of these cases, it is important that the code you are working with is readable. Being readable means that it is written in a way that helps a human reader to make sense of it and understand it. Not all code is easily readable, and there are big differences in how different programmers write code. Writing your code with readability in mind is one of the most important principles if you care about your program.
Readability is one of the most important aspects of a program. Programs can be written in many different ways, and this can affect greatly how easy or hard they are to understand. Always strive to make your programs as easy to read and understand as possible.
The most basic thing you can do to aid readability is to choose good names for your variables. From the beginning, we have named our variables so that they describe what they are used for. We used, for example "fish" for the variable holding the fish, and "shark" for the variable holding the shark.
This seems obvious in retrospect, but it is by no means automatic. We could have named our variables "a", "b" and "c" instead of "fish", shrimp" and "shark", and the program would have worked just the same. In fact, we have seen many programs where programmers did just this: they used one-letter variable names, just to save a bit of typing, and the program is full of variables called things such as "n", "p1", or "c".
A programmer can get away with using lazy names for variables as long as the program is really small, and no other programmer needs to read it. But as soon as we want to work with others, or work with our own program for a longer time, we should take variable naming seriously. If you name your variables in a way that they describe well what is stored in them, the whole program will be much easier to read and understand. You should get into the habit of always thinking carefully about naming your variables.
So what has this discussion to do with our use of functions?
The answer is that using functions gives us a chance to attach a name to a section of code to describe what it does. For example, we have taken all the lines of code that have to do with moving the fish, and put them into a function called "move_fish". The name of the function describes to the reader what happens in this function, and at the place in the code where it is actually needed, it now says "move_fish()" instead of listing a long sequence of statements. This is of great help to a reader of this program, as it gives them a very useful hint what the program does here, without cluttering the main loop.
The ability to attach a meaningful name to the block of code – in the form of a function name – is the first advantage of our restructure.
Take the naming of your variables and functions seriously. Always try to use a descriptive name that gives a good hint what the variable is used for, or what the function does.
Exercise 4.6 Look back through your program. Make a list of all identifiers that you have used in the program. Think about each of them: are they well-chosen? Do they describe their purpose well?
A note about names: In Python, you are often expected to name things. For example, you can make up your own names for variables or for functions. Python has some rules about what these names must look like:
-
You can use letters, digits and the underscore ( _ ) for names, but no other special characters.
-
You cannot use spaces in a name.
-
The first character cannot be a digit. (It has to be a letter or the underscore.)
-
Names in Python are case-sensitive. This means that the names "number" and "Number" are different names.
The technical term for these names is "identifier". You may come across this term occasionally: When the system asks you for an "identifier", it is asking for a name in this format.
Exercise 4.7 Which of the following names are valid Python identifiers, and which are not? Why?
sum
sum01
1sum
sum_
sum 01
sum%1
_
33
__33__
sum+
Good programming practice: Choose names carefully
Pay close attention to the names you give to variables and functions. Choose names that describe as well as you can what a variable is used for, or what a function does.
4.3. Abstraction
The second advantage of using functions in our program is abstraction. Abstraction is the technique of solving a sub-problem first, and then being able to ignore the details of the problem once it has been solved.
For example, if we now read our main loop, we can see that in each loop iteration it moves the fish, moves the shark, and maintains the pace of the loop. This is really easy to understand, and as long as we are happy with the behaviour of the fish movement, and we trust that it works as intended, we do not need to worry about the details of how it works any longer.
We have essentially treated the programming of the fish behaviour as a distinct sub-problem, which we solved by writing a function. When we need to invoke the fish behaviour, we can now call it just using its name, without needing to worry about the details of how it works. We treat "fish_movement" as if it were a single task, and we free our minds to concentrate on other things. We "abstract from" the details of the task, and treat it as a single, easy thing.
As our programs become longer and the tasks we wish to implement more complex, this becomes really important. Towards the end of this book, we will write programs solving problem that are too big to hold all details in your head at the same time. We will solve those problems by dividing them into sub-problems, which are smaller and can be solved more easily. These sub-problems are often solved in functions. And once we have written enough functions solving enough sub-problems, the solving of the overall problem becomes easy and straight forward.
Abstraction is thus a technique that wraps a potentially complex task into one unit and gives it a name. It hides the complexity, and makes it easy for us to use it without needing to think about the complicated details.
Even more importantly: it allows us to share the work between different people. For example, one programmer, somewhere, once implemented the randint function from the random library, or the is_touching method from the graphics library. But since we are using abstraction, we do not need to understand or worry about how these functions work internally. We just use them as a single instruction that does what we need. We aim to achieve the same with our own functions.
To use a function without the need to study its body, we just need to understand how to call it and what it does. The one additional thing that is needed is a good function comment that gives a reader enough information to understand what a function does without the need to read the body. So far, we have neglected the comment in our own functions. It is time to fix this.
Exercise 4.8 For each of the functions defined in your program, write a function comment. This is done in the area under the function header, marked with a small double-quote symbol. In the comment, describe what the function does.
The idea of abstraction is supported in Strype using the folding functionality of the function definition frame. Once the implementation of a function is finished, you can fold in the implementation to simplify the view of your program. Since you only need to know the header to call the function, this will be all you need to see for much of the time. Only when you later want to modify the function do you need to fold it out again.
Good programming practice: Always comment carefully
You should always add a comment to every function you create. The comment should state what the function does, what parameters it expects, and what it returns. Another programmer should be able to call your function without having to look at the implementation; the comment should tell them all they need to know.
Within the code, use comments to add information when a segment of code is not obvious.
4.4. Reuse
Yet another advantage of using functions for part of our code is reuse: Once we have created a function for a subtask, we can call this function multiple times in our program, without the need to write out the whole code again. We will see more examples of this in later projects.
4.5. Refactoring
The technical term for what we have done when we move part of our code into functions is refactoring. Refactoring is an activity of improving the structure of our code without adding any new functionality. Typically, after a step of refactoring, the program behaves in exactly the same way as before, but the internal structure is better. The structure matters, because it typically makes it easier to understand, extend or modify the program
Refactoring is the restructuring of a program to improve the internal quality of the code. Refactoring maintains the functionality of the program: it will do exactly the same after the refactoring as it did before. The improved structure makes it easier to do further work with the program.
The program as it looks after the improvements described here is available in the book projects as yellow-fish-v6.
So far, we have only made structural improvements to our game, but not added more functionality. In the remainder of this chapter, we discuss some ideas of functionality you could add to your game. These do not need to be done in this order, or indeed at all. You are very much invited to invent your own improvements and try to add those as well. You might like to treat the following sections as suggestions rather than as strict recipes you have to follow. If you want to compare your code to ours, you can look at yellow-fish-v7, which is the last of the yellow-fish projects in the examples folder and contains implementation of some of the functionality suggested here,
Good programming practice: Use small functions
You should always strive to break up your code into separate functions. Your "My code" section should never hold a long sequence of code. If it does, it is time to move some code into separate functions.
If functions get long, break them up as well. Each function should always be responsible for only one well-defined logical task. If it does more than that, create a new function.
4.6. Adding sound
Currently, our game is silent. One obvious addition is to add sound effects. This is fairly straight forward:
-
To use sound in our project, we need to use the
strype.soundlibrary. We can import the entire library, using the*symbol, as we have done with thestrype.graphicslibrary. Make sure this library is imported. -
We can either copy sound files from our file system into our program, or we can record sounds directly in Strype.
-
We can then use the
playmethod from theSoundclass to play the sound file.
Let us start by recording our own sound – this is the easiest option. Strype has a built-in sound recorder that lets you produce your own sound effects easily. Insert an assignment frame and place the cursor into the value slot on the right-hand side:

my_sound = ___strype_blankIn the help area in the top right of the Strype window, you will see the hint that pressing Ctrl-Shift-U can be used to record a sound. Try this out.
You will see first a sound recorder and, after recording your sound, a simple sound editor (Figure 4.4). In this editor, you can trim the sound (remove unwanted parts at the start and end) by using the red handles, and you can adjust the volume. Experiment with this.
Exercise 4.9 Find the place in your program where the fish eats a shrimp. Add an assignment frame there for a sound to be played at that point.
Exercise 4.10 Place the cursor into the value slot of this assignment and use Ctrl-Shift-U to record a sound. Change, trim, check, re-record the sound until you are happy with it.
Now that we have a sound recorded, we can play it:

my_sound = image_literal
my_sound.play()
Exercise 4.11 Enter the code shown above into your own program. Try it out.
Exercise 4.12 Also play a sound when the shark east the fish.
If a sound is only used once in a program, we can also play it without assigning it to a variable. For this, we create a function call frame, record the sound directly into that frame, and then call play on the sound literal:

image_literal.play()Either way is fine.
Another option is to find and copy sound effects from the internet. Some sounds are provided with the Strype projects, and you can find libraries of free sound effects by doing a web search. To use those sounds, download them to your own computer and then copy/paste them into your program, just like you did with images.
If you would like to explore this, do the following exercises.
Exercise 4.13 Add ready-made sounds from the internet to your program. The Chapter03/sounds folder contains the sounds we have used for our own version of the game. You can find some more sounds in the Material section of the book website, or you can search for sound effects on other websites. Download one to your computer, copy it, and then paste it into your own program. Sound file formats that work include MP3 and WAV format files.
Exercise 4.14 Add another sound that is played when the player wins the game (when all shrimp are eaten).
4.7. Game over
At the moment, the game just runs on when the fish is caught. Implement a proper end to your game.
Exercise 4.15 Add a game-over message to your game. You could do that by creating an actor that has a "Game Over" image as its actor image, at the time when it should be shown.
Exercise 4.16 Stop the execution of the game when the game is over. (You can do this using the stop() function from the graphics library.)
Exercise 4.17 As an advanced exercise, you could also end the game when the player has eaten all the shrimp. This requires using the len() function to check the length of a list, which we have not discussed yet, so do this exercise only if you feel adventurous and are happy to look ahead and find out about this on your own. The idea is to put up a "You win" sign (and maybe play a sound) when all the shrimp are gone. You can check this by using a call to get_actors("shrimp") to get a list of all shrimps, and then checking whether the length of this list is zero.
One tip to consider if you are stopping the game: If you play a sound and then immediately stop the execution of your game, you will not hear the sound. This is because execution will be stopped immediately after the sound has been started (not ended). If you want to hear a sound at the end of the game, you should use a variant of the play method:

image_literal.play_and_wait()
stop()
This version of the play method waits until the sound has finsihed playing before the execution continues with the next statement. (The original play method continues execution while the sound is playing.)
4.8. Random turns
Winning the game is still quite easy. This is partly because the shark swims in a very predictable way: when it is not at the edge of the world, it just swims straight. We can make it a bit more interesting if we make the shark swim more randomly.
We can use randomness here in two ways: we can make the shark turn at random times, and turn by a random amount. Let’s start with the second part of this: turning by a random amount. This is quite straight forward. We can use the shark’s turn method, and then use a call to the random function for the actual parameter of the degree to turn. For example

shark.turn(randint(-45,45))will make the shark turn a random angle, between -45 and 45 degrees.
Exercise 4.18 Add code to your program to make the shark turn a random amount at each step.
When you test this version, you will notice that it makes the shark appear too nervous. The constant turning makes it flick back and forth – it does not look good. So our next step is to make it turn less often. Let’s say, at every step we want a 10% chance of turning, and in 90% of the steps we just continue straight. How can we do this?
Exercise 4.19 How can you use a random number to express a 10% chance? Describe at least two different ways.
One way to express a 10% chance is to generate a random number between 0 and 99, and then look at the number. There is an exactly 10% chance that this number is less than 10.
In Python, we can use the < operator to test whether one number is less than another one. For example number < 20 returns True if the value in the variable number is less than 20. (Again, see Appendix C: Python operators for a full list of operators.)
This means that the expression randint(0, 99) < 10 will be True exactly 10% if the time. By using this expression as the condition in an if-statement, we can make the turn happen in 10% of the steps:
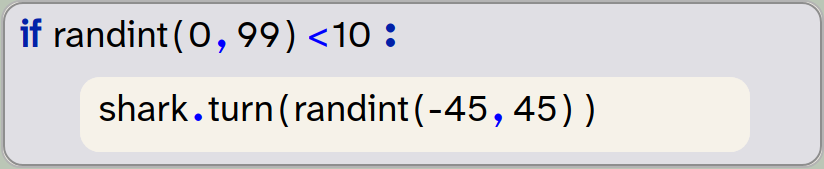
if randint(0, 99) < 10:
    shark.turn(randint(-45,45))
Exercise 4.20 Add this improvement to your code: make the shark turn with a 10% probability. Experiment with different values for the chance and the turn until you are happy with the movement.
4.9. Keeping score
Another possible addition is to keep a score. We could, for example, award 20 points for every shrimp eaten. Doing this involves creating a variable for the score, initialising it to zero, and then incrementing it by 20 every time a shrimp is eaten.
We have not yet discussed using variables in this way, and we will do so only in the next chapter. However, if you feel adventurous, or you know a bit of Python already, try this yourself with the following exercises. If you are uncertain, leave these exercises until after you have studied the next chapter
Exercise 4.21 Add a variable for the score. Initialise it to zero.
Exercise 4.22 Increment your score variable every time the fish eats a shrimp. (Note: you need to understand local and global variables for this, including the global keyword.)
Exercise 4.23 Show the score on screen by using the say_for method of the fish. Every time the score changes, get the fish to say the current score for one second.
4.10. Other extensions
Many more extensions to this game are possible. The following exercises suggest some ideas. We will not discuss these here, but leave it up to you to work these out. Some of them are advances exercises that require you to look ahead and find out some things for yourself.
Exercise 4.24 Make new shrimp appear, either every time a shrimp is eaten, or at random intervals.
Exercise 4.25 Change the fish movement so that it moves forward only when the up-arrow key is pressed.
Exercise 4.26 Make the game get more difficult over time by slowly increasing the shark’s speed.
Exercise 4.27 Turn the game into a two-player game by introducing a second fish.
We will leave this project behind for now, but try to have fun with it by making it your own with your own ideas.
4.11. Summary
In this chapter we have suggested some more functionality which you can add to your game. But most importantly, we have discussed how to structure your program as it gets longer. We have discussed modularisation, which is the structuring of your program into distinct logical units, and we have used functions to create those units. Each function is given a name, and we have discussed the important aspect of how you should name functions and variables.
And finally, we had a first look at adding sound output to your programs, to create more engaging games.
-
Sequences of code can be moved into functions, and the functions can be called at the place where we would like to execute that code. This makes our program more modular, and easier to read and maintain.
-
Readability is one of the most important aspects of a program. Programs can be written in many different ways, and this can affect greatly how easy or hard they are to understand. Always strive to make your programs as easy to read and understand as possible.
-
Take the naming of your variables and functions seriously. Always try to use a descriptive name that gives a good hint what the variable is used for, or what the function does.
-
Refactoring is the restructuring of a program to improve the internal quality of the code. Refactoring maintains the functionality of the program: it will do exactly the same after the refactoring as it did before. The improved structure makes it easier to do further work with the program.
Chapter 5. Introduction to text analysis
Despite the many things that computers can do – including many things that humans cannot (easily) do – computers are not intelligent. All of the power of computers flows from the fact that they can do things very fast, and with vast amounts of data.
This is true even for artificial intelligence (AI) applications, such as large language models (LLMs), which is the technology that AI chatbots are based on. These systems create an appearance of intelligence, but at their core is just very fast (but quite simple) processing of very large amounts of data.
5.1. The superpower of computers: speed
The incredible speed of computers can be used to achieve many very different things. In the previous chapters, we have seen how it can be used to create games: the computer can draw an image consisting of many, many pixels, then draw it again slightly differently, and then again, so fast that it appears to us as smooth motion. Animation is just an optical illusion: it is a series of still images drawn so quickly that we cannot recognise the individual images.
The example we have programmed in the previous chapters is a very simple one. You will likely have seen more professional computer games, possibly including three-dimensional representations of imaginary worlds and complex interactions of game characters. Those examples show you even more clearly how fast computers are: they compute complicated models of a three-dimensional scene and display these on screen so quickly that we see it as smooth animation.
Ultimately, this effect is based just on the fact that the computer can hold vast amounts of data (thousands of game objects, millions of pixels) and can process them very quickly.
The same is true for any other of the many things that computers can do. You see examples of the amount of data and the computer’s speed when a search engine searches hundreds of millions of webpages in fractions of a second, or when an online map can show you details of any place in the world almost instantaneously.
One specific area which makes use of the memory size and speed of computers is data science. We will now have a closer look at this topic, and especially at a specific sub-field: text analysis.
5.2. Data science and text analysis
Data science is a field that is concerned with gaining insights from large amounts of data. It usually combines techniques from statistics, computer science and visualisation to extract meaning out of data sets that are too big to analyse without computers.
The actual data can be many different things: data science can be used to analyse healthcare data to predict disease risks, or it can be used to analyse traffic and transport data to improve planning of public transport systems. Equally, it could be used to analyse financial data to detect online fraud, or environmental data to make climate or weather predictions.
A sub-field of data science is text analysis. This is one of the earliest examples of data science techniques, and it uses text documents as the data to be analysed. This might be used, for example, by historians to classify large amounts of ancient scanned documents, or it could be used by political scientists to analyse public opinion by scanning online comments.
In this chapter, we will start looking at some examples of simple text analysis to get a feel for how this works. Doing this, we will practice some important Python programming concepts, gain a first insight into data science and – in a later chapter – even get a first insight into the basics of how LLMs work.
5.3. Working with strings
The Python string type (usually abbreviated to str in the documentation) stores text strings. Text strings are just sequences of characters of any length. Thus, you can store your name in a string, or a whole book. In one extreme, a string might be empty (a text string of length zero), or it may hold the entire text of a Harry Potter book.
String variables store text. The text can be of any length: it may hold just a few characters, or the text of a whole book.
To get started with text analysis, we essentially have to get proficient with working with strings.
5.3.1. Counting characters
One of the simplest things we can do with the string is to count the number of characters in it. We will do this – and a number of other execises – using a simple starter project called text-analysis.
Exercise 5.1 Open the text-analysis project from the Chapter05 folder in the book projects. When you run the project, you will notice that it produces no output. Add a statement at the end to print out the content of the text variable.
Exercise 5.2 Change the content of the data string to your own name. Run the program again.
We can very easily count the number of characters in a string using Python’s built-in len() function. This function can count the length of various kinds of sequences that Python works with. Strings are one example; we will later see other sequences that we can count.
Calling this function with a string as a parameter is straightforward:

number_of_characters = len(text)In this statement, we call the len function with a string parameter, and the function returns a number of type int to us. Here, we store that number into a variable.
Exercise 5.3 Add code to your program to count the number of characters in your name and print out the result.
The len() function can be used to count the length of a string (the number of characters). len() is a built-in function that is always available; it does not need to be imported.
5.3.2. Formatting output
If we want to format text output in a specific way, we have several options that give us various levels of control over the exact appearance. Assume we want to embed the number of characters in the middle of a sentence. The intended output of our program might be:
Wolfgang Amadeus Mozart
The string contains 23 characters.
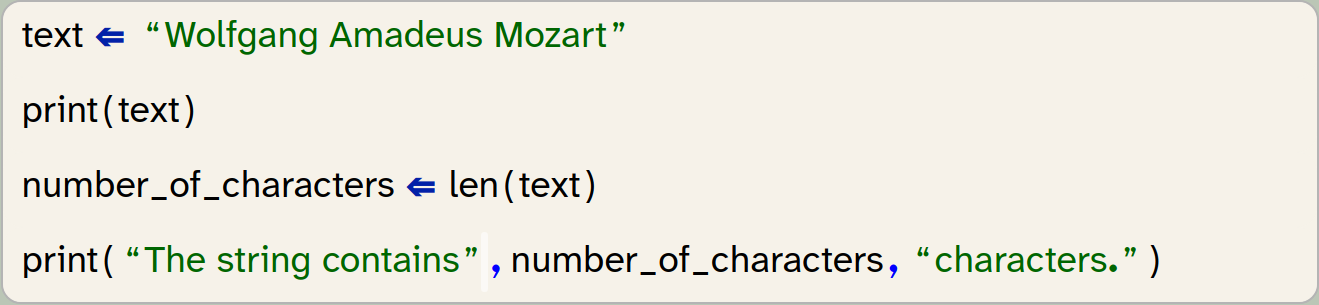
text = "Wolfgang Amadeus Mozart"
print(text)
number_of_characters = len(text)
print("The string contains", number_of_characters, "characters.")
Here we can see that the print statement accepts multiple parameters, separated by commas, and it will print out each parameter, on the same line.
Exercise 5.4 Experiment with using the print function with different parameter lists. Try, for example, print(1, 2, 3) and print(text, "text").
From this exercise we can see that the parameters to the print functions can be literals (strings or numbers), or they can be the names of variables. We could also write a function call directly into the print function. Let us consider these two lines from the previous code snippet:

number_of_characters = len(text)
print("The string contains", number_of_characters, "characters.")
If we do not need the number of characters again later, we can achieve the same task without the variable:

print("The string contains", len(text), "characters.")In this version, the len() function is called as part of evaluating the parameter list of the print() function, and the value it returns is passed straight to the print() function without assigning it to a variable. This is a perfectly valid alternative achieving the same goal.
One limitation when using this version of the print() function is the automatic insertion of spaces. If you paid close attention, you will have noticed that the print() function automatically added a space between each of its parameter outputs (before and after the number, in our example). What if we wanted our output in a slightly different format:
Wolfgang Amadeus Mozart
Length: 23.
If it is important to us to have the period after the number, then we now have a problem: Simply writing

print("Length: ", len(text), ".")does not do the trick, because it inserts a space between the number and the period. We might ignore the problem, because it does not seem terribly important. However, in some cases we care about the exact format of the output, and we want to have full control. For those cases, we can use an alternative mechanism: formatted strings (sometimes also called f-strings by Python programmers). We can write the following:

print(f"Length: {number_of_characters}.")Note the character f before the string. Adding this prefix, the string becomes a formatted string, and it can now include placeholders in parentheses: { }. Between these parentheses, we can write the name of a variable, and the placeholder will be replaced by the value of the variable. It is also allowed to insert a call to a function (or any other expression) directly in the placeholder, and the resulting value will be inserted:

print(f"Length: {len(text)}.")A formatted string can include any number of placeholders, and the programmer is in full control of the formatting and spacing of the resulting string.
Exercise 5.5 Rewrite the output of the length of the string in your program using a formatted string.
Exercise 5.6 Formatted strings can be used for more sophisticated formatting than we have discussed here. Find out about additional formatting options on the internet: do a web search for "Python f-strings" or "Python formatted strings" and find at least two other formatting options that are provided. Write them down.
A formatted string (f-string) can be used to include values from variables or computed values within a string. It also offers more detailed formatting options.
5.3.3. Processing individual characters
The next thing we might want to do is to access the individual characters in our string one character at a time. This, too, is fairly straight forward. We can use the for-loop, which we have already encountered previously:
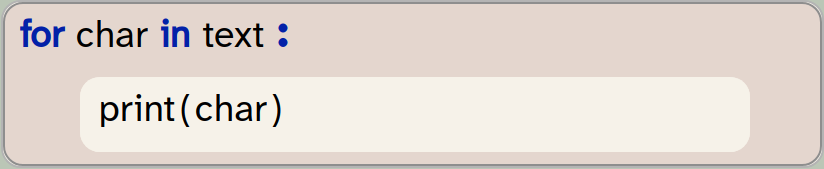
for char in text:
    print(char)
In this example, we assume that the variable text holds our string. In the for loop, we declare a variable called char to be used as our loop variable. The for-loop will assign each character of the string to the char variable in turn, and execute the loop body once for each character. Here, we just print out the character, but we could of course add more code in the loop body for more sophisticated processing.
A for-loop can be used to iterate over the characters in a string.
Exercise 5.7 Add the for-loop to your program as shown above. Test your program.
The project with the changes discussed thus far is available in the book projects as text-analysis-v2.
5.4. A first analysis: character statistics
Now that we know how to access and process characters in a string, we can start with some simple analysis. As a first step, we would like to print out information in the following format:
Text: "It was a bright cold day in April, and the clocks were striking thirteen."
Length: 74 characters
Characters without spaces: 60
Number of punctuation characters: 2
You can make a start towards this with the following exercises.
Exercise 5.8 From your existing program, remove the loop that prints out the individual characters. Write or copy/paste a sentence to be analysed and assign it to your text variable. Run your program to test.
Exercise 5.9 Modify the remaining code to produce the first two lines shown above. Make sure the format is exactly as shown there.
In the last exercise, you may have encountered a small issue: We would like to print out double-quotes around the actual text. Since we have used double-quotes to identify the string literal itself, we cannot simply write a double quotes inside the string. If we tried to use the following string:
"using "quotes" in a string - this does not work"
our program would fail, because the quotes intended to be within the string end the string itself, and we end up with invalid Python code. There are two possible solutions to this. The first one is to use a different string character. Since Python allows us to enclose strings with either single or double quotes, we can use single quotes to delimit the string if we wish to have double quotes within the string:
'using "quotes" in a string - now it works'
The second solution involves using a special character, the backslash: \. The \ character allows us to insert special characters into a string. Writing \" inserts a double-quote character into a string without ending the string:
"using \"quotes\" in a string - this works as well"
Using this second technique is useful if our string includes both single and double quotes.
Exercise 5.10 Make sure the output of your text is exactly as shown in the example above, including the double-quote characters.
5.4.1. Identifying spaces
Let us now work on producing the third line: counting the characters that are not spaces.
Counting all characters was very easy, since Python has a function built in that does the job for us. We only had to call len(text) and we were done. If we want to count the non-space characters, life is not quite so easy: Python does not have a ready-made function for this, so we have to do the counting ourselves.
We can do this by looping through all the characters in the string (we have done this before), looking at each character, and counting all the non-space characters. For the counting, we need to use a variable that we can increment for each non-space character:
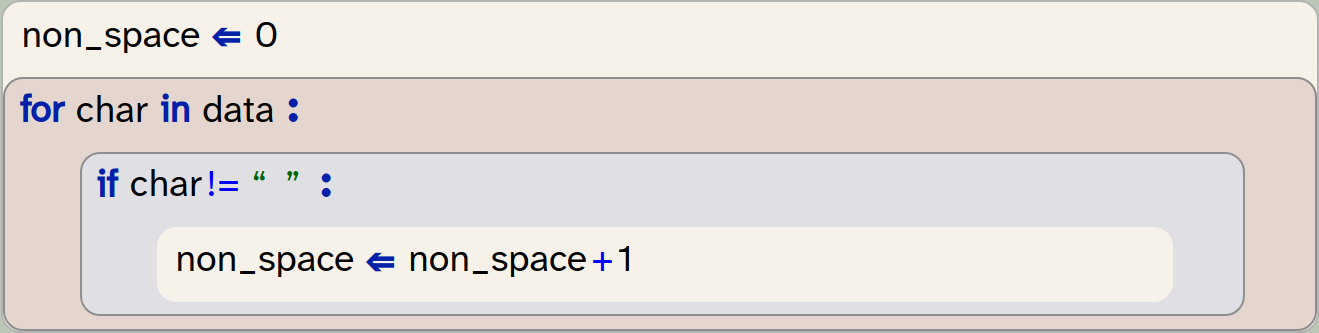
non_space = 0
for char in data:
    if char != " ":
        non_space = non_space + 1
In this code, we first initialise a counter variable to 0. We do this so that we can increment this variable for each non-space character that we find, thus counting the characters. Note that we have named the counter variable non-space – it is always good practice to name the variable as precisely as possible to express what we are using it for. This name indicates quite clearly what we are counting with this variable.
We then write a for-loop to go through all the characters of our string, as before. But this time we have an if-statement in the body of the loop: We check whether the character is "not equal to" a space, and if this is true, we increment our variable.
Two things are worth noting here:
-
The operator != means "not equal". So the condition
char != " "will be true if the variablecharis not equal to the space character. You can see a list of all Python operators in Appendix D: Python operators. -
The line
non_space ⇐ non_space + 1increments the variablenon_spaceby one. Since in an assignment the right hand side is evaluated first, this statement reads the current value ofnon_space, adds 1 to it, and then writes the result back into the same variable.
Exercise 5.11 In your own program, implement this functionality: Print out how many non-space characters your text contains.
5.4.2. Identifying punctuation
We can write similar code to count the punctuation characters. Again, we use a for-loop that iterates through the characters in our text, looking at each character in turn. The main difference is that we now need to check this character against a whole group of other characters.
We can do this by first creating a string that includes all punctuation characters we wish to recognise:

punctuation = ".,/-?;:"In the condition of the if-statement (inside the loop), we now check whether the current character is contained in our puctuation string:
if char in punctuation:
   pass
The in operator checks whether the character is included in the string, and returns True if it is.
Exercise 5.12 Implement the counting of punctuation characters in your own program. You can start by copying the counting of non-space characters and then making the modifications discussed above. Make sure to give your variables appropriate names!
One other small improvement we can make is to use a more complete set of punctuation characters. Luckily, we do not need to find out what they are and type them all in ourselves – Python already has a string variable with all punctuation characters in it. This variable is called punctuation and is defined in a separate module called string. We can use it by importing it from the string module:

from string import punctuationWhen you add this import to your program, you should remove your own definition of the punctuation string. Your program will now use the complete set of punctuations as defined by Python.
Exercise 5.13 Make the changes discussed above to import and use the pre-defined punctuation string. Test to make sure your program works again.
Exercise 5.14 Print out the punctuation string to see what characters it contains. How many characters are in it? (Then remove this print statement again from your program.)
Exercise 5.15 Test your program with a few different sentences. Does it count correctly?
5.4.3. Better structure: using functions
If we want our program to be able to easily do this analysis for different texts, we can now move our code into a function which we can call repeatedly, with different text as a parameter.
Exercise 5.16 Define a new function, called analyse_text, that takes one parameter called text. Move all your code that analyses your text from the "My code" section into this function.
Exercise 5.17 In the "My code" section, write a call to your analyse_text function that passes your test sentence as a parameter. Run your program. Make sure that it produces the correct output again.
Exercise 5.18 In your "My code" section, add two more calls to your analyse_text function, passing different strings as parameters.
An example of the project after these changes is in the book projects as text-analysis-v3. Compare your own version with this one.
5.5. Handling files
We have said above that an advantage of using computers is that they can do tasks very quickly, and with amounts of data that we would not want to process by hand. So let’s try this out: Before we go on to count words and sentences, let us first see whether our program can cope with larger text sizes.
Strype has a read-only file system that provides some data files to use with our projects, including the text of some books. One of them Pride and Prejudice by Jane Austen. The file is a plain text file, accessible at /books/pride-and-prejudice.txt. (This is the full text of the book.)
The project you have been working with includes a helper function called read_file(filename), which you can use to read a file from the file system. This function returns the content of the file as a string. So we can now easily read in this whole book from our file system, and then pass it to our analyse_text function:

text = read_file("/books/pride-and-prejudice.txt")
analyse_text(text)
Working with data files in Strype: To access data files in Strype, you have two options: You can read from the built-in file system or from your own cloud storage.
The built-in file system provides a fixed set of read-only files for your projects. You can explore what is available at strype.org/doc/filesystem. These files are also available for download in the Material section on the book website.
If you wish to use your own data files, your Strype project must be stored on a cloud file system (such as Google Drive or OneDrive), and the data file must be stored in the same folder as your Strype project. Then the data file will be accessible with its filename (without a path).
You cannot access data files on your local computer. The reason for this is security: web applications running in a browser are not permitted to access your local file system, so Strype cannot read from or write to your own local drive.
Exercise 5.19 Make the changes discussed above: Instead of using a string literal, read the text file from the file system, and store the text in a variable. Pass this variable to your analyse_text function.
Exercise 5.20 If you have run your program after the previous exercise you will notice that it takes some time to complete. This is because it prints out the complete text to the terminal! With a text of this length, this does not make much sense. Remove the printing of the actual text from your analyse_text function.
Exercise 5.21 Print the title of the text being analysed before its details are printed.
Exercise 5.22 The Strype file system contains the full text of two other books, in the files "/books/war-and-peace.txt" and "/books/winnie-the-pooh.txt". Add the analysis of these two texts to your program.
Exercise 5.23 One small improvement we can make is to print a comma as a thousand separator in our number output. For example, the number 2760512 would then be shown as 2,760,512. In a formatted string, this is easy: If we use the placeholder {number:,} in our f-string (that is: if we add :, after the variable name), then the number will be shown with a thousand separator. Make this improvement for all the number outputs in your own code.
Text files can be read from the file system. The content of a text file is usually provided as a string.
Code completion for data files: The names of the available data files in the Strype file system can be accessed via code completion: Place the cursor inside an empty string (within the quotes in this line):

text = read_file("")and then use Ctrl-Space to invoke code completion. The completion dialogue will show all available data files.
5.6. Linguistic analysis
We can see that we can quite easily process large amounts of text with our program. We would certainly not want to count the numbers of characters in War And Peace by hand, and getting a computer to do this for us helps.
But why would we want to know the amount of characters in the first place? In reality, the plain number of characters itself is not often that interesting. But it gets more interesting once we start counting words and sentences and analysing them. Then we get into the area of linguistic analysis, which can be used, for example, to draw conclusions about the author of a written work.
A famous case concerns the works of William Shakespeare. A passionate debate has raged on and off at least since the 19th century about the authorship of Shakespeare’s work. While theories that another author has written all of Shakespeare’s works are almost certainly untrue, and are usually dismissed by serious scholars, debates about individual works are quite valid. There are several written works where authorship is unclear: either works attributed to Shakespeare where authorship is not proven, or unattributed works that may have been written by him.
It gets even more complicated: In the 17th and 18th century, it was not uncommon for theatres to commission for existing plays to be padded out by paying other writers to add scenes or acts to other authors' plays to make them longer. Many scholars believe that Shakespeare’s plays contain parts that may not have been written by him.
Linguistic analysis has been used as one tool to provide some evidence in this debate. It is based on the observation that this analysis can detect a personal style in the use of words, which can then be used – in a way similar to a linguistic fingerprint – to identify the author. It alone cannot give conclusive answers, but it can add interesting pieces of evidence for scholars. See, for example, Shakespeare by the Numbers[1] from the Shakespeare Oxford Fellowship.
Another example where linguistic analysis is used is to determine the reading complexity of written texts. Various algorithms exist to determine a "reading ease score" for a given text which expresses how hard or easy it is to comprehend. This may be used to choose appropriate books to study at school for specific age groups, or to make sure that important instructions provided with medication are not too complicated to be understood by the majority of the population.
One thing all forms of linguistic analysis have in common is that counting characters is not enough. At a minimum, we have to be able to identify and count words and sentences. So let us go on and investigate how to do this now, and then calculate a "reading ease" score for our documents.
5.7. Analysing words, sentences and syllables
5.7.1. Counting words
Counting the number of words in a text is very easy, because Python strings have a method called split, which splits the string into words. It will return to us a list of strings in which every element is an individual word from the original string. We can use it like this:

words = text.split()Note that this is a method of the string object (not a free-standing function) so we call it using the string variable, a dot, and then the method name.
To be precise: The split method splits the original string at every occurrence of whitespace. Whitespace is any space, TAB character or line break. Punctuation characters will not be treated specially, so that, for example, this sentence would be returned containing the word "example," (including the comma as part of the word.) If we wanted to analyse specific words, we would have to remove the punctuation characters. However, for counting words, this is not a problem.
Once we have received the list of words, we can obtain the number of words just by looking at the length of the list – it has one element per word. The built-in len() function, which we have seen earlier to count characters in a string, can also tell us the length of a list:

number_of_words = len(words)This is all that is needed to count and then print out the number of words.
The built-in len() function can be used to return the length of a list.
Exercise 5.24 Implement the counting of words in your own project. Print out the number of words as part of your analyse_text function.
5.7.2. Again: using functions to improve structure
While we add functionality to our program, our functions tend to get longer and longer. In our case, the analyse_text function has now become quite lengthy.
Long functions (or a long sequence of code in the "My code" section) make a program hard to read and hard to understand. And if a program is hard to understand, it is much more likely that errors creep in, or that we have difficulty to extend or change the program.
Our goal should always be to write short, concise, focussed functions. (The technical term for this is "cohesion": we aim to write cohesive functions.) The guiding rule is that every function should be responsible for one single clearly defined task.
Every function should be responsible for one single well-defined task.
Looking at our analyse_text function, we can summarise what it does like this:
-
It prints out the length of the text (the number of characters).
-
It counts and prints the number of non-space characters.
-
It counts and prints the number of punctuation characters.
-
It prints out the number of words in the text.
As we can see, these are four separate tasks. None of them really depends on the others; they are quite separate.
Following our rule of functions doing a single task, it follows that these four tasks should all be in separate functions. Creating this structure does indeed create a much more readable program, which will be easier to understand and maintain. Make this improvement in your own code by doing the following exercises.
Exercise 5.25 Create four new functions for the four separate tasks listed above. Make sure you name these functions appropriately, so that the name describes what they do. Move the code to implement each task into the body of the corresponding function. Then rewrite your analyse_text function to call these four functions. Test your program to make sure it still works; it should now do the same it did before these changes.
One further improvement we can make is to modify our new helper functions to calculate their results and then return them (instead of printing them). This separates the calculation logic from the printing, and leaves it the task of the analyse_text function to decide how to print the results. The function to calculate the number of words, for example, might then look like this:
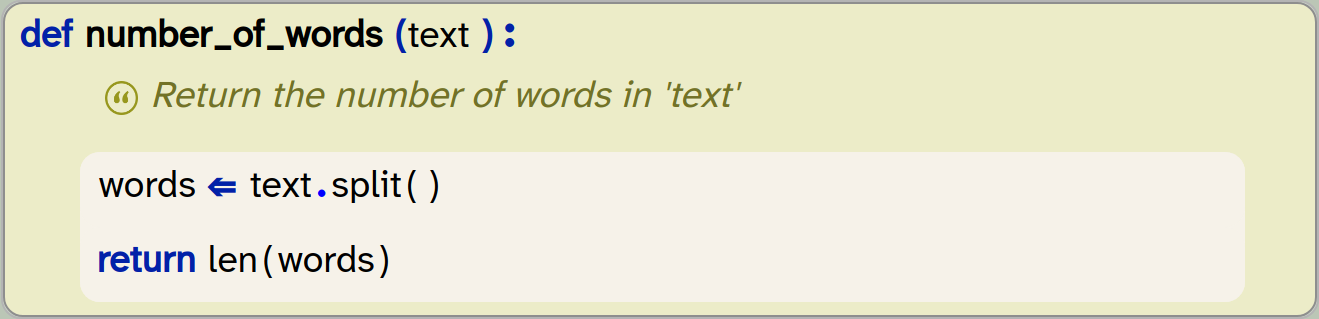
def number_of_words(text):
    """Return the number of words in 'text' """
    words = text.split()
    return len(words)
The analyse_text function can then simply call this function and print out its result.
Exercise 5.26 Modify your four new helper functions to calculate their results and return the result as a function result, using the return statement. Print out the result in the analyse_text function.
Exercise 5.27 You will notice that your own function to calculate the length of the text in characters just makes one call to an existing function (the len() function). In this case, your own function may not be necessary. You can remove this function and call the len() function in analyse_text instead.
Exercise 5.28 The project text-analysis-v4 in the book projects contains all the changes discussed here so far. Look at it and compare your own solution to this one. Have you done anything differently? Can you spot anything that you can improve?
The tasks carried out in this section of the book did not change the functionality of our program. It does exactly the same as before. So were they worth doing?
In these tasks, we did not add functionality, but we instead cleaned up the implementation and made our code more readable and easier to modify and extend. Just all-round nicer.
In general, when we are programming, we should alternate between these two phases: add new code, then clean up the code we wrote and make it as nice as we can. Many novice programmers do not bother to do this. The result would be that we end up with long, messy, hard-to-read code, and at some point we will get stuck with a program that we can no longer understand and maintain. Being a good programmer means not only to write correct code, but also to write readable code.
What we have seen here is that defining separate functions serves two distinct purposes: Firstly, when we have defined analyse_text as a separate function, we have seen that we can then call this function two or three times, without needing to write the code two or three times. Thus functions serve to support reuse: We can reuse the same code repeatedly and easily.
Secondly, with the functions we have created in this section, we have used them to support modularity. We divide our whole program into small and simple building blocks (the functions), which we can then assemble to solve larger tasks. This helps us solve problems by dividing larger problems into smaller sub-problems, and also serves to keep our code clear and readable.
Using functions supports code reuse: Once a function is written, it can be called multiple times, in different places, without the need to write the code twice.
Using functions supports modularity: Breaking up our code into separate functions structures our program into logical tasks. This makes the code easier to understand and easier to modify.
5.7.3. Counting sentences
Counting the number of sentences in a text is a bit more involved than counting words, because there is no built-in string function to do this. But it is not very difficult. In fact, it is quite siumilar to something we have already done: counting punctuation characters.
In this case, we do not want to count all punctuation characters, but only those that end a sentence. As a starting point, we can just assume that the full stop, exclamation mark or a question mark end a sentence, and thus just count those characters. We can do this again, as we have done before, by using a for-loop and an if-statement to count those characters:
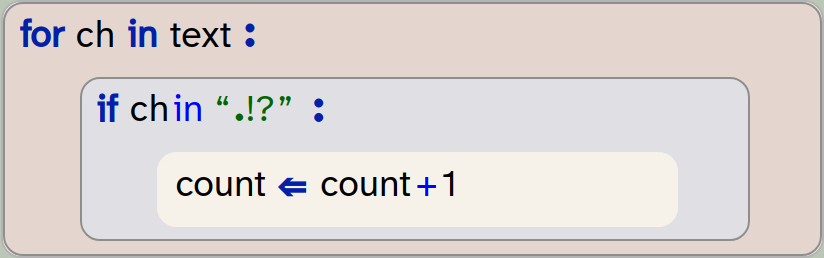
for ch in text:
    if ch in ".!?":
        count = count + 1
Exercise 5.29 Implement the counting of sentences in your project. Follow the same structure as before: Create a separate function that returns the number of sentences in a text as a return value.
Of course, the counting of sentences in this way is not entirely accurate. If, for example, the text includes three dots … – this would be counted as three sentences, which is not correct.
There are two ways to deal with this: The first is to refine the function that counts sentences to take this into account. The second is to live with this approximation. In a long text, this inaccuracy will be small, and for many purposes our approximate (almost correct) result will be good enough. So the solution to choose depends on the context.
What we intend to do is to calculate a text complexity score. For this purpose, this approximate result is good enough, and we choose to leave it as it is.
5.7.4. Counting syllables
Counting syllables in the English language (and most other languages) is much more complex than counting words or sentences. Because of this, we will use another approximation here: We will use a heuristic (which is essentially just a rule of thumb), which says that in the English language on average the number of syllables in a word is the number of characters, divided by 3.2, rounded to a whole number.
In Python, we can write this like this:

num_syllables = round(len(word) / 3.2)In this code, we can see that we again use the len() function to get the number of characters in a word, and that there is a built-in round() function to round the result to a whole number for us.
The round(n) function can be used to round a decimal number to an integer (a whole number).
Exercise 5.30 Do some research on the round() function. You can do this by doing a web search for "Python round". What is its optional second parameter?
Exercise 5.31 Implement a function in your code to calculate syllables in a word, using the formula above. Test it by calling it with some words. How often is it accurate?
Now that we can compute the number of syllables in a word, we can calculate the number of syllables in the whole text by just looping over all words again, and adding up the syllables of each word:
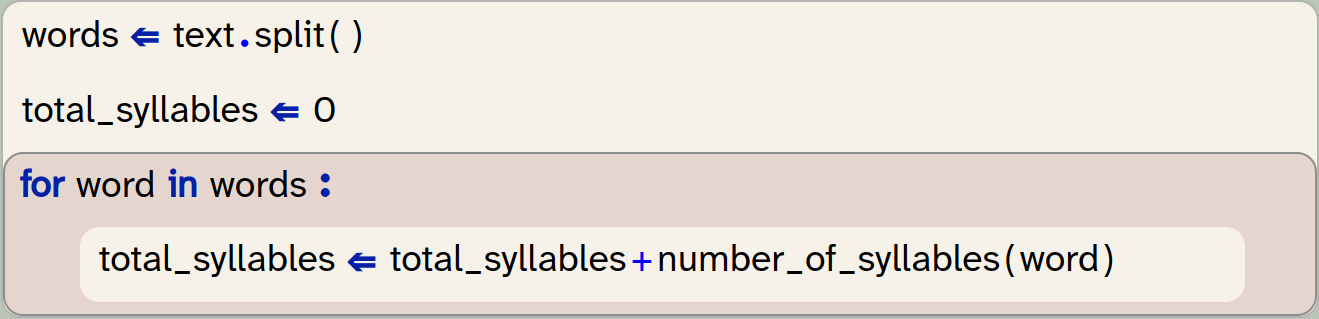
words = text.split()
total_syllables = 0
for word in words:
    total_syllables = total_syllables + number_of_syllables(word)
Note that this is different to just applying the formula to the length of the whole text, because the rounding for each word affects the result.
Exercise 5.32 Add code to your program to calculate and print the total number of syllables in your text.
5.8. Text complexity
The last thing we will do in this chapter is to calculate the text complexity using a reading ease score. Now that we can calculate all sorts of statistics of our texts, this is quite straight forward.
Several different formulas are in use by professionals to do this. We will use one of the most commonly used methods, the Flesch reading ease score. (If you want to find out details about this, do a web search.)
The Flesch reading ease score is calculatred with the following formula:

This formula will give us a score between 0 and 100. This score can then be used to classify the difficulty of the text, using the following table:
| Score | Readability | Who can understand it |
|---|---|---|
90–100 |
Very easy |
Understandable by an average 11-year-old student |
80–90 |
Easy |
Conversational English for consumers |
70–80 |
Fairly easy |
Understood by most 12-year-olds |
60–70 |
Standard |
Plain English. Easily understood by 13- to 15-year-old students. |
50–60 |
Fairly difficult |
School students in 10th to 12th grade |
30–50 |
Difficult |
University graduates |
< 30 |
Very difficult |
Specialists, experts |
Looking at the formula, we can see that we need only three values as input, all of which we have already computed: The total number of words, the number of sentences, and the number of syllables in the text.
This means that we can now write a function to calculate the reading ease score, and call it with these values:

def get_reading_ease(words,sentences,syllables):
    """Calculate the Flesch reading ease score"""
    return ...
The body of this method here is incomplete – we leave it as an exercise for you to fill it in.
Exercise 5.33 Write a function to calculate the Flesch reading ease score as shown here. Return the correct score using the formula shown above.
Exercise 5.34 The Flesch reading ease calculation regards parts of a sentence separated by a comma or a colon as separate sentences. Add these two characters (,:) to your program so that these create separate sentences for the purpose of our calculation.
Exercise 5.35 Print out the reading ease scores for the text documents analysed in your program. (Hint: the score for Pride and Prejudice should be 73.62. If you see this result, then your program is correct.)
Exercise 5.36 You may have noticed that the output for your reading ease score shows many digits after the decimal point – many more than is useful. Print the result rounded to two decimal places. You can achieve this in one of two ways: You can either use the round() function (round (value, 2) will round value to two decimal places), or you can add the formatting option :.2f after a value in an f-string (e.g. f"Value: {value:.2f}" will do the same.)
Exercise 5.37 What is the reading ease score of the sentences
"Programming is fun. I enjoy it."
What is the score for the sentences
"The systematic development of correct computer code instills feelings of pleasure. It creates unquestionable sensations of distinct and surprising enjoyment."
Exercise 5.38 Use some texts of your own, and run your analysis on those. You can either find the full text of books on Project Gutenberg, a website that provides out-of-copyright books, or you can use, for example, the last essay you wrote for school work. In each case, you have to make sure that the text is saved in plain text format. If the text comes from the web, make sure you download a "Plain Text" (or UTF-8) file. If it is your own document, and you wrote it in a word processor, make sure to save the file in plain text format before using it with your Python project. You can usually do this using the "Save As" menu item and selecting plain text format for saving. Also be aware that your project must be stored in a cloud file system to do this; see the Strype tip in Section 5.5, above.
As always, an implementation of the project as discussed here is available in the book projects; it is called text-analysis-v5.
5.9. Summary
In this chapter, we have concentrated on two areas. Firstly, we have worked with strings. Strings represent text, and when we can work with strings, we can analyse and manipulate text. Text analysis is a first example of data science, of which we will see a bit more in a later chapter.
In working with strings, we have seen how we can access individual characters and words, and how we can format strings to create output that looks exactly as we would like it to look.
Secondly, we have again seen examples of improving the structure of our code. We have used functions to create a program that is modular and readable. This is important to create code of good quality, as it makes it easier for others reading our code to understand it.
At the same time, we have also seen how to use variables to store values, count and make calculations. This will be of good use in many of our programs in future.
-
String variables store text. The text can be of any length: it may hold just a few characters, or the text of a whole book.
-
The
len()function can be used to count the length of a string (the number of characters).len()is a built-in function that is always available; it does not need to be imported. -
A formatted string (f-string) can be used to include values from variables or computed values within a string. It also offers more detailed formatting options.
-
A for-loop can be used to iterate over the characters in a string.
-
Text files can be read from the file system. The content of a text file is usually provided as a string.
-
The built-in
len()function can be used to return the length of a list. -
Every function should be responsible for one single well-defined task.
-
Using functions supports code reuse: Once a function is written, it can be called multiple times, in different places, without the need to write the code twice.
-
Using functions supports modularity: Breaking up our code into separate functions structures our program into logical tasks. This makes the code easier to understand and easier to modify.
-
The round(n) function can be used to round a decimal number to an integer (a whole number).
Particles
 Here is a project that shows a special effect. It is called
particles,
and it shows a sparkler effect around the mouse position. It demonstrates a few useful things: it shows how to create lots of actors to create a visual effect (and make them disappear just as quickly), it shows how to implement a gravity effect (the sparkles fall down, and accelerate as they do), and it demonstrates how to use a Gaussian distribution for random numbers (where more extreme numbers are less likely), and it shows how to read the mouse coordinates to use them in your program.
Here is a project that shows a special effect. It is called
particles,
and it shows a sparkler effect around the mouse position. It demonstrates a few useful things: it shows how to create lots of actors to create a visual effect (and make them disappear just as quickly), it shows how to implement a gravity effect (the sparkles fall down, and accelerate as they do), and it demonstrates how to use a Gaussian distribution for random numbers (where more extreme numbers are less likely), and it shows how to read the mouse coordinates to use them in your program.
Altogether it might give you ideas for visual effects you may like to add to your own games.
Chapter 6. Working with data: lists
In the previous chapter, we have seen that we can write programs that handle quite large amounts of data. In the example we have programmed, the data was text, and the individual data items were characters, which were held in a string. Almost all programs, in fact, work with collections of data, often very large collections, and the ability to process large collections of data is one of the core characteristics of computers.
In this chapter, we will investigate how we can work with other types of data – data that is not text. Once you start thinking of applications on a computer, you will notice that almost all of them have at their core the processing of collections of data: word processors handle collections of words and sentences; search engines process collections of webpages; social media apps handle collections of posts; games animate collections of game items; weather forecast programs process collections of environmental readings, and so on.
Think about the programs you use most often on your phone or your computer: there are very few programs that are not based, in some form, on the processing of collections of data.
In previous chapters, we have seen variables, which allow us to store data. We have also seen that variables can store data of different types – such as int, float, or str. However, each variable stores only one value. What if we want to work with hundreds, or thousands, of data items?
If would not be practical to use a thousand different variables. Instead, Python offers collection types – types of data that can store a whole collection of data items in a single object.
The most common of the collection types in Python are lists, dictionaries, tuples and sets. We will have to become familiar with all of them. We will start – in this chapter – by looking at lists.
6.1. The temperature dataset
We will investigate and practice working with a list using the temperature project from the Chapter06 folder of the book projects. This project provides a dataset of the average daily temperature (in degrees Celsius) in London, UK, for each day in 2025.
Let us start by looking at this data.
Exercise 6.1 Open the
temperature project from Chapter06 of the book projects. You will see that it reads a file called "/data/london-temperature-2025.txt" into a variable called data. Print out the data variable. What do you see?
With the previous exercise, you will have seen that data contains a long list of numbers, which are printed separated by commas, and enclosed in square brackets. This tell us that data is a list: Lists in Python are written in square brackets, and their elements are separated by commas. Each value in this list is the average temperature of one day, starting at 1st January.
Exercise 6.2 Add the following lines to your program:

numbers = [1,2,3]
print(numbers)
What do you see? Try this with values other than 1, 2, 3 – also use strings and floating point numbers in your experiments. Can you tell from the output what the type of the element is?
In Python, the square brackets [ ] create a list, and we can write the list elements between the brackets. So the expression [1, 2, 3] created a list with three elements in it, and printing out the list prints the elements to the console.
Python provides a list type, which can store a list of items. Lists are defined using square brackets and values separated by commas: [1, 2, 3].
If we are unsure about the type of one of our variables, we can inspect it in our code. The type() function tells us the type of data held in a variable. For example,

print(type(numbers))will print out the type of the variable numbers.
Exercise 6.3 Print out the type of the numbers variable. What is it?
Exercise 6.4 What is the type of 5, the type of 5.0 and the type of "5.0"?
We can find out the type of a data item using the built-in type() function.
6.2. Fundamentals of lists
6.2.1. Accessing elements
Once we have a list, we can easily access individual list elements using square brackets and an index after the list name. For example

data[1]accesses the element number 1 from the list. Let’s try this out.
Exercise 6.5 Remove your numbers list from your program again if it is still there, and go back to working with the temperature data. Print out element number 1 from that list using the following statement:

print(data[1])Compare this to the elements you see when you printed the whole list. Can you see the individual value you printed in the list? Which element did you print?
Exercise 6.6 Print out the fourth element of the list. Then print out the first element.
We can access individual elements in a list by providing an index in square brackets, in the form list[index].
6.2.2. Index numbering
When you did the previous exercises, you will have see that printing data[1] does not print the first element of the list, but the second. This is because element numbering in lists starts with 0. We call the position of a list element its index, and Figure 6.1 shows a list with the assigned index numbers. In this diagram, we can see that we need to print out the element at index zero if we want to see the first element.
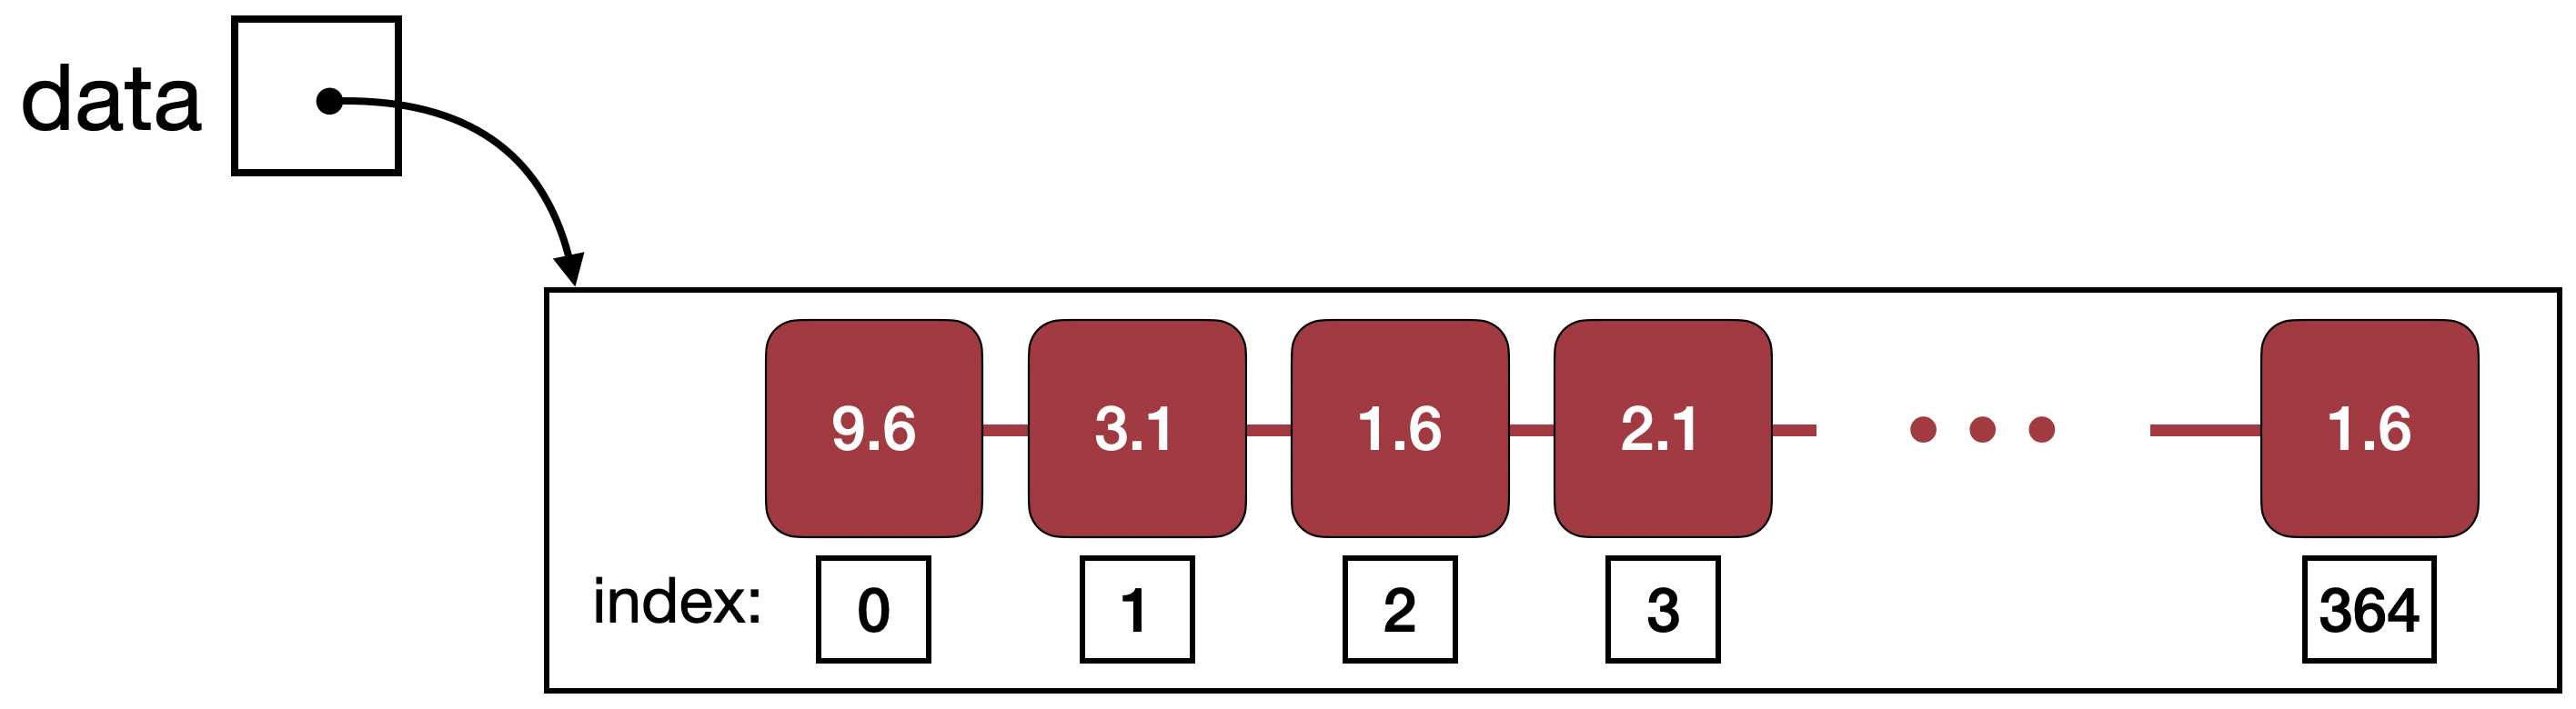
Exercise 6.7 In a list with 32 elements, what is the index number of the last element?
Exercise 6.8 In a list of length n, what is the index number of the last element?
Index numbers in lists start with index 0.
6.2.3. Element types
We can now start writing code to do some analysis of the temperature data. We might, for example, like to know what the lowest temperature of the year was, or the average temperature in July.
Once we start doing this, we will notice a small problem. To illustrate this problem, let us start by doing a very simple exercise.
Exercise 6.9 Add the first and the second element of the list together and print out the result. What do you see? Is this what you expected?
If you have done this exercise, and if you have written data[0] + data[1] to add the two values, you will have noticed that the output is not what we would expect.
The two first values in the list are 9.6 and 3.1, so we would expect to see a result of 12.7. This is not what we saw. So what is going on here?
The reason for the unexpected result is that the elements in the list are not numbers, but strings. So the first element is not the number 9.6, but the string "9.6". We get a clue to this fact from the output: if you pay close attention, you notice that the values in the printed-out list are all enclosed in quotes: '9.6' instead of 9.6. Remember that strings can be written with double quotes or single quotes – so this tells us that the elements are strings.
The + operator, which is performing addition when the operands are numbers, actually performs string concatenation if the operands are strings. String concatenation just glues two strings together. For example, the result of
"Cat" + "Fish"
is
"CatFish"
(Note that Python does not automatically add a space when concatenating strings.)
The reason that our data is represented in strings is that it was stored in a textfile. The content of a textfile, when we read it, is always delivered to us as strings when we read a file. In our case, we know that the file content is a set of numbers, but to get it into a number format in our program, we first have to convert the strings back into numbers.
String concatenation joins two strings together into a single string. It is written with a + sign: string1 + string2.
Exercise 6.10 The type() function which we have seen above can also be used to check the type of the individual list elements. Try this by printing the type of the first element in the list. What is it?
6.2.4. Type conversion
When we see the values, 5, 5.0 or "5", we tend to read them all as "five". In Python, these values represent an int, a float and a string, respectively, and they are internally stored in completely different ways.
We have also seen that performing operations on these different types can do entirely different things. For example, 5+5 is 10, but "5"+"5" is "55". On the other hand, "5"-"5" will produce an error (since the minus operator is not defined for strings), but this is a perfectly valid thing to do with ints or floats.
In short: the fact is that the number 5 is not the same as the string "5".
We can, however, convert values of one type to another type. We do this by using functions that have the same name as the type we wish to convert to. For example:

number_string = "13.7"
number = float(number_string)
In this example, the str type is converted to a float, and the type of number will be float. Equally, we can use the functions int(n) and str(n) to convert values to the int or str types. We have to take care, though: if we try to convert a string to a number, and the string does not actually contain a number, we will get an error.
Values can be converted from one type to another by using built-in type conversion functions. The most commonly used conversion functions are int(n), float(n) and str(n).
Exercise 6.11 Write some code to convert the string " 001.00300" to a float and print the result. What is the value?
Exercise 6.12 What happens when you convert 3 to a float and print it? What happens when you convert 3.8 to an int? What are the resulting values?
6.2.5. Building a new list
The last two sections serve to illustrate just one important insight: to use our list of temperature data properly, we need to convert our list of strings to a list of floats.
We do this by building a new list. We iterate (loop) over the original list, read every element in turn, convert it to a float, and add it to our new list of floats. The code to do this looks like this:
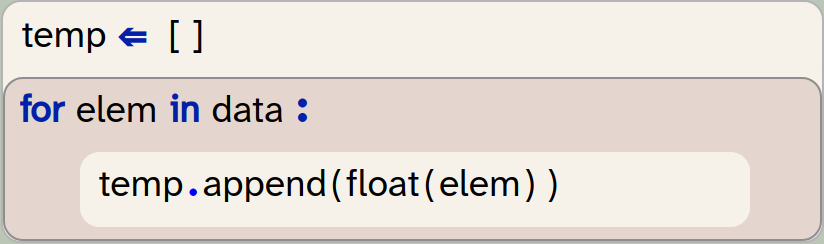
temp = []
for elem in data:
    temp.append(float(elem))
In this code snipped we do several things:
-
We create a new, empty list by using the square brackets:
[ ]. This list will initially have no elements in it, but it is still a valid list. We assign it to the variabletemp(short for temperature). -
We iterate through the
datalist. This take each list element in turn, convert it to a float, and append it to thetemplist.
We can see that list objects have a method called append(n). This method adds its parameter to the end of the list it is called on.
At the end of this, we expect the temp list to have the same number of elements as the data list, but holding floats instead of strings. Check this by checking the length of each list. Remember, we have seen in the previous chapter that we can use the len(list) function to get the length of a list.
Exercise 6.13 Implement the conversion of the list of strings to a list of floats, as shown above. To test whether this was successful, print out the temp list. Can you tell whether the elements are now numbers?
Exercise 6.14 Print out the length of both lists. Are they the same? How many elements are in the list?
Exercise 6.15 If you prefer to work with degrees Fahrenheit, rather than Celsius, you can do the following: Convert the temperature list to Fahrenheit. Do this by building a new list, where each element is calculated from the existing list. The formula to calculate degrees in Fahrenheit (F) from Celsius (C) is F = (C × 9/5) + 32.
We can create an empty list by writing just a pair of square brackets: [ ].
The list method append(n) adds an element to the end of the list it is called on. It is called in the format list.append(elem).
Precision of decimal numbers: If you look carefully at the printed list of numbers, you will see that some elements have unexpected values. For example, we see 9.300000000000001 where we would expect 9.3, or we see 8.69999999999999 instead of 8.7.
This is caused by the way floating point numbers are stored in computers: Decimal values in computers all have limited precision. That means that they cannot store an arbitrary number of decimal places – they are all rounded at some point. And because they are internally stored in a binary format – different to the decimal format we write – what appears as a simple number for us, 9.3, is sometimes "rounded" to a surprising binary value internally.
The lesson to take away from this is: working with floating point numbers is always imprecise, and small rounding errors creep in in all floating point calculations. Often, however, the result is precise enough for what we need.
We can round the value before we print it out to remove extra decimal places.
6.3. Operations on lists
Now that we have a list of numbers, rather than a list of strings, we can start looking at values in a more meaningful way.
6.3.1. Finding elements: hottest temperature of the year
The first thing we might ask about the London temperatures is: How hot was the hottest day of the year? How cold was the coldest?
We can find the answer to both of these questions quite easily now: Python has built-in min(list) and max(list) functions, which find the minimum and maximum values in a list.
Exercise 6.16 Print out the temperature of the coldest day of the year. Print out the temperature of the hottest day of the year. Make sure you print some text as well to state what the values are.
Note that the data is the average temperature for each day, with the first data point the average for the 1st of January, and the last the average for 31st of December. So the minimum we see here is not the coldest temperature recorded in the year, but the coldest daily average.
The min(list) and max(list) functions can be used to find the minimum or maximum value in a list.
6.3.2. Finding the index of an element: When was the hottest day?
We can now see what the minimum and maximum temperatures were – but on which day did they happen?
To answer this question, we need to know where in our list the maximum value was found. We can find this out using the index method. For example

temp.index(13.6)will return the index of the value 13.6 in the list temp. (We have to be careful with this: If the value we are searching for is not found in the list at all, then this will be an error. So we should call the index method only if we know the element exists.)
We can now find the index of the hottest day by writing

max_index = temp.index(max(temp))This statement first finds the maximum value, and then finds the index of that value.
Exercise 6.17 Write code to find the index number of the hottest and coldest days. Print out the results. Make sure to print your output with information what the number means.
Currently, we only get the index of the day in our list, rather than a properly formatted date. The index identifies the day (we know that index 0 is the 1st of January, and index 364 is the 31st of December, and we could count out the days inbetween), but it is not a convenient format.
For now, we will leave it as it is – just printing out the day number is a decent start. We will look a little later, further down in this chapter, at how to convert this to a date.
Another limitation worth mentioning is that the index method only finds the first occurrence of a value in a list. So if the maximum temperature was reached twice, at exactly the same value, we will find only the first of these days.
The list.index(n) method can be used to find the index of the first occurrence of element n in the list. The element must exist in the list when this is called.
Functions versus methods: Python makes use of both functions and methods in the functionality it provides for lists. This can be a bit confusing.
Functions are called in the format
function_name(list)
while methods are called in the format
list.method_name(param)
For list functions, we pass the list into the function as a parameter, while for list methods, the list is named first, in front of the dot.
The reason is partially historic, and partially pragmatic. Functions are typically used when the operation can also be applied to types other than lists. len(n), for example, can be applied equally to a list and to a string. Methods, on the other hand, belong to the list type.
The most important list functions are:
len(list), min(list), max(list), sum(list), sorted(list)
The most important methods are:
list.append(), list.clear(), list.copy(), list.count(), list.extend(), list.index(), list.pop(), list.remove(), list.reverse(), list.sort()
You can find a description of these methods in Appendix E: Built-in functions.
6.3.3. Slicing: Looking at individual months
The next thing we may want to do is to analyse specific months.
Taking a specific sub-list out of an original list is called slicing: We are taking a slice out of a list. Slices are written in square brackets, with the beginning and end index specified. For example

jan = data[0:31]creates a new list with the first 31 values copied from data and assigns it to the variable jan. If we want a slice from the start or to the end of a list, we can just leave off the lower or upper bound. For example

jan = data[:31]does the same thing: it creates a slice from the start of the list to index 31. If we leave off the end index, then we get a list with all values from the start index to the end of the list:

rest_of_year = data[31:]Exercise 6.18 Add code to your project to create a temperature list for January and print it out.
Exercise 6.19 Print out the warmest day in January.
It is worth looking very carefully at the indices used in the slicing operation. In the slice above, we specified 0 as the lower boundary, and 31 as the upper boundary. When creating slices, the element at the lower boundary is included, while the element at the upper boundary is excluded. In other words: the new list will hold a copy of the elements 0 to 30 from the original list. These are 31 elements. In any slice [n:m], the value of m-n will tell use the number of elements we will receive.
Exercise 6.20 Print out the warmest day in February. Then the warmest day in March.
We can create a slice of a list by providing two indices separated by a colon: list[start:end]. This will create a new list holding the elements from start (inclusive) to end (exclusive). We can leave out the start index (list[:end]) to create a slice starting from the beginning of the list, or leave out the end index (list[start:]) to create a slice that reaches to the end of the list.
When we want to slice the data for later months in the year, determining the beginning and end of the slice becomes quite tedious. Counting or calculating the numbers by hand quickly gets annoying. We will come back to this later in this chapter, where we will implement a solution to deal with this problem.
First, however, let us look at one more list method: sorting.
6.3.4. Sorting: Finding the 10 coldest days
In the next step, we would like to find the 10 coldest temperatures of the year. There is no built-in function to find the 10 most minimal values, so we will have to think of something else.
We could, of course, write a loop and iterate over the list, look at each element, and try to identify the 10 smallest numbers. There is, however, an easier solution.
Part of the solution is the built-in sort() method of the list type. The statement

temp.sort()will sort our list, with the smallest value first and the largest at the end. We can also sort the list in descending order by providing a parameter:

temp.sort(reverse=True)With the knowledge of sorting and slicing, we can now solve our problem: To print out the 10 coldest days, we can sort the list and then take a slice of the first 10 elements.
Exercise 6.21 Print out the temperatures of the 10 coldest days of the year.
Exercise 6.22 Print out the temperatures of the 10 warmest days of the year.
Did you manage to print the 10 coldest days? If you did – very good. There is, however, a potential problem. To discover what it is, do the following exercise.
Exercise 6.23 Run your program again. Make a note of the day number of the hottest day of the year and/or the warmest temperature in January, which your program should still print out.
Then move the code to print the 10 coldest days up in your program, so that this information is printed first, before the other lines of information. Run your program. Inspect the data for the hottest day and the warmest January day and compare them with the values you had noted before. What do you observe?
With the exercise above, you should have noticed a problem: all the computations after printing the 10 coldest days are wrong. This is because the sort function has sorted the list, and we have now lost the order of the original list. We can no longer use it for our calculations, because it no longer in its original order.
The solution to this is to take a copy of the temperature list before sorting it, so that we leave the original list intact:

sorted_temp = temp.copy()
sorted_temp.sort()
We can then use the sorted list for the 10 coldest days, while still being able to do further investigations with the original list.
Exercise 6.24 Change the calculations of the 10 coldest days to work with a copy of the original list. Test your program: are the other values shown correct again? Once they are, you can move the printing of the 10 coldest values down in your program again.
The list.sort() method sorts a given list. The list.copy() method creates a copy of a list.
A version of the project with the implementation discussed thus far is in the book projects as temperature-v2.
6.4. Processing lists
So far, all the operations we needed were available in ready-made functions. We used, for example, the min(), max() and sort() operations for our purposes, and it will often be the case that much of what we need is already available in the standard functions provided. Even if the exact function we need is not available, the existing functions often help doing a large part of the work. Assume, for example, that we want to calculate the average (mean) temperature for the year. There is no ready-made average function in Python, but we can quite easily compute the result using the sum() and len() functions. (Strictly speaking, this is only half true: there is an average function available in a standard module that we could import, but let us ignore this for now and work with the sum() and len() functions.)
Exercise 6.25 Calculate and print the average temperature for the year.
Sometimes, however, we have tasks where the pre-made functions do not directly help us. In those cases, we typically have to process the list ourselves. This often involves a loop iterating over the list elements, and one or more variables to compute the result.
We will investigate this first by implementing two of the exising functions ourselves: sum() and max().
6.4.1. Calculating the sum
Let us consider the sum() function first: We can calculate the sum of a list using the following algorithm:
-
Create a variable
totaland initialise it to0 -
Loop over the list; for each element:
-
Add the list element to total
-
Try to write this function yourself.
Exercise 6.26 Implement a function called my_sum() that takes a list as a parameter and returns the sum of its elements (without using the built-in sum() function). Print out the sum of your list of temperatures using your function. Also print out the sum using the built-in sum() function. Compare the results. Are they the same?
6.4.2. Finding the maximum
A similar pattern can be used to find the maximum in a list. Here, however, we have to add an if-statement to our algorithm to solve the problem. The idea looks like this:
-
Create a variable called
maximumand initialise it to the first element of the list. -
Loop over the list; for each element:
-
If the element is larger than
maximum:-
Assign the current element to
maximum
-
-
Exercise 6.27 Implement a function called my_max() that takes a list as a parameter and returns the maximum of its elements. Print out the maximum of your list using your function. Also print out the sum using the built-in max() function. Compare the results. Are they the same?
Exercise 6.28 Why did we initialise the maximum variable to the first list element? Why did we not just initialise it to 0? Would it work the same if we initialised it to 0?
Exercise 6.29 Are there cases where our function would fail?
6.4.3. Finding the biggest change
Next, we would like to answer the question of the biggest swing in temperature: On which day did we see the largest temperature difference from the previous day?
There is no ready-made function available to compute this, so we will have to write a function ourselves. This one is a bit more involved than the previous two we looked at.
Let us start with some observations:
-
To investigate the largest temperature difference, we have compare each day to the previous day.
-
This means that we have to start at the second day; the first day has no previous day.
-
It also means that we need the day index: we can compare a day to the previous day by comparing
temp[n]totemp[n-1]. This only works when we have the index available.
In the previous exercises, we wrote loops over the elements of a list using a for loop like this:
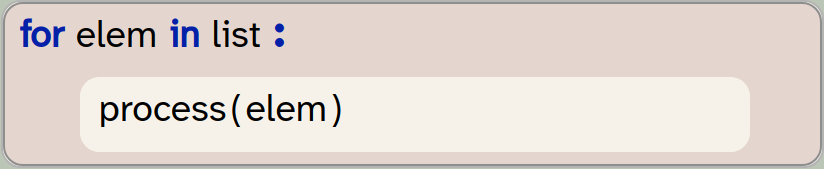
for elem in list:
    process(elem)
This is fine when we can process every element separately, in isolation, but is not sufficient when we need to compare the element to other neighbouring elements. In that case, we should use the loop with an index:
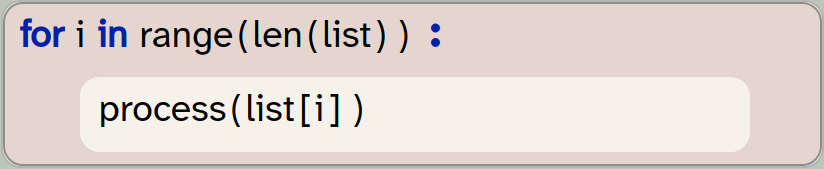
for i in range(len(list)):
    process(list[i])
Here, the loop variable does not iterate over the list elements. Instead, the loop variable is an int, and it iterates over all the valid indices of the loop. (Remember: range(n) includes all values 0 .. n-1, and list indices are 0 .. len(list)-1, so range(len(list)) gives us exactly all the valid indices.)
Iterating over the indices of a list (rather than the elements themselves) gives us more flexibility to access several different elements in each iteration.
An advantage with this loop now is that we can also access list elements other than the current one by writing, for example, list[i-1].
If we want to use this pattern for finding the temperature differences, as discussed above, we have to modify it slightly, since we would like to start the loop with the second element. We can achieve this by using the range function with two parameters, for the lower and upper boundaries:
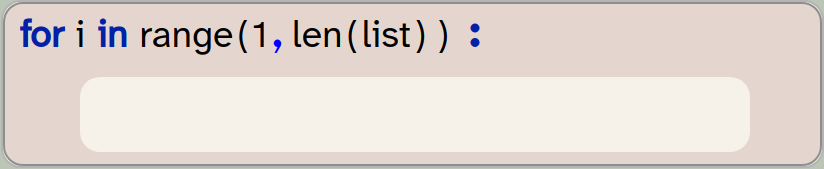
for i in range(1, len(list)):
    pass
In this variant, the first time the loop body executes, it will access list[1], which is the second element.
Next, we look at how we can tell the difference between the current and previous days. To compute the difference between two values a and b, we can subtract the values from each other and then use the abs(n) function. abs(n) is a built-in function, and it returns the absolute value of n (that is, the positive equivalent, if n was negative). It is necessary to use the absolute value, as the temperature may go up or down, so the value of a-b might be positive or negative.
The built-in abs(n) function return the absolute value of n.
Putting these pieces together, we get a loop that looks like this:
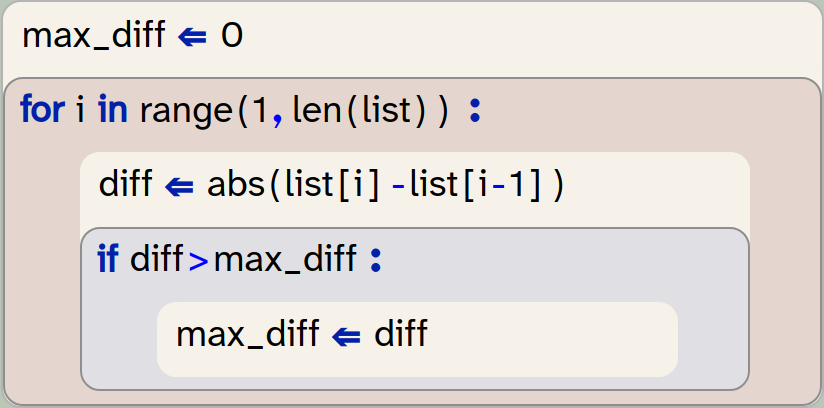
max_diff = 0
for i in range(1, len(list)):
    diff = abs(list[i] - list[i-1])
    if diff > max_diff:
        max_diff = diff
Exercise 6.30 Look at the code above and explain it in your own words. Write down this explanation.
Exercise 6.31 Implement the code above in your own program and print out the biggest temperature change in the year.
Exercise 6.32 If you have not already done so, make sure that the code from the previous exercise is in its own function (perhaps called biggest_change(list)).
Exercise 6.33 Change your code so that it does not find the biggest temperature change, but instead the day number on which the biggest change occurred. Print it out. Which day is it?
Exercise 6.34 Change your function again so that it finds both, the largest temperature change and the day on which it occurred. (Hint: The return statement used in a function can return more than one value: return a, b.)
Names of loop variables: We have previously said that you should always choose meaningful names for variables. Yet in the code above, we have used the name i for the loop variable. This is not an accident: Traditionally, i is often used for a loop variable of type int if it is used as an index. This is so common, that i for an index loop variable is actually a meaningful name – every practiced programmer will understand it. This also means that you should use i as the name only if the variable is a loop variable used as an index.
An implementation of the exercises discussed in this section is in the project temperature-v3.
6.5. Calculations with lists
In the chapter this far, we have deferred two problems for later: the first was translating a day number to a more readable date format. We can print out the day number of a day, but we don’t really know what date this represents.
The second problem was that we had to know the day numbers of the start and end date to specify months for slicing. Again, using a different format for accessing months would be preferable. Let’s start by looking at the second problem.
We start our solution by creating a list that holds the numbers of days for each month. (This is slightly simplified, because we are ignoring leap years. But it works for our data, since 2025 was not a leap year.)

month_lengths = [31,28,31,30,31,30,31,31,30,31,30,31]What we actually need, however, is not the length of every month, but a list with the day number of the start of every month. We can create such a list by going through our list of month-lengths and adding up the day numbers. Figure 6.2 illustrates this idea.
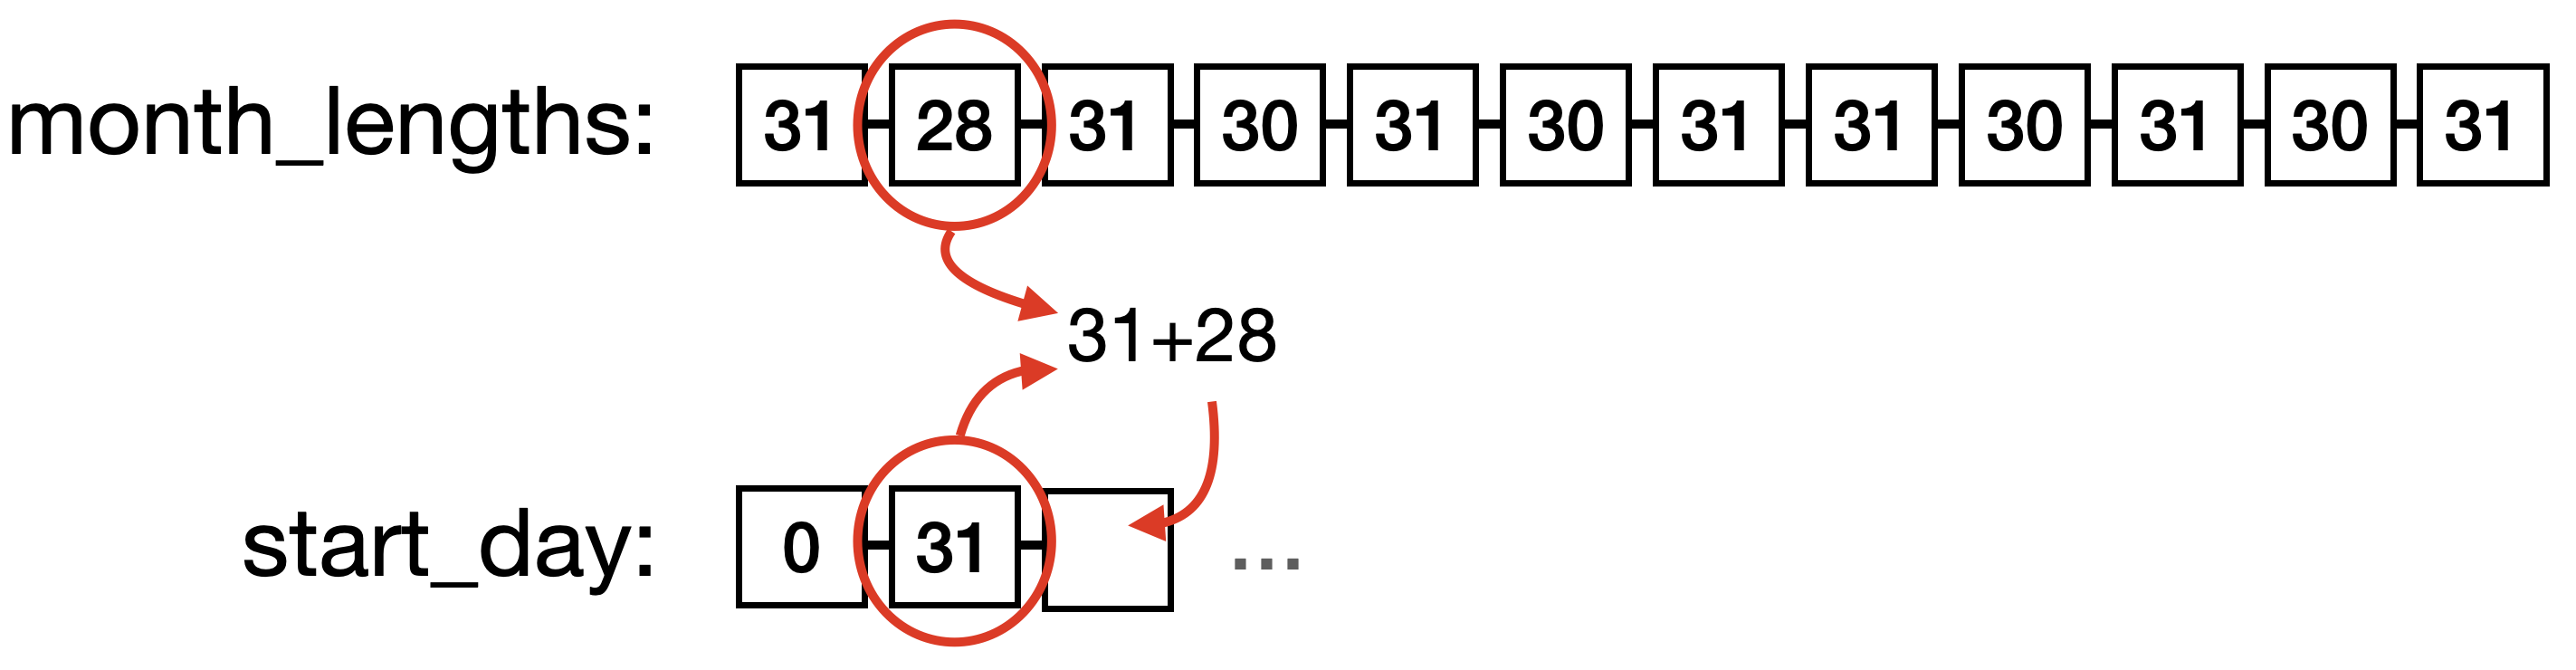
In our new list, start_day[0], for example, is that start of January, start_day[2] is the start of March, and start_day[11] is the start of December.
To create this list, we start with a list that just contains 0 as the start index for January. Then we create the rest of the list by adding the number of days of each month to the last value in our new list, as shown in Figure 6.2. The code to achieve this looks like this:
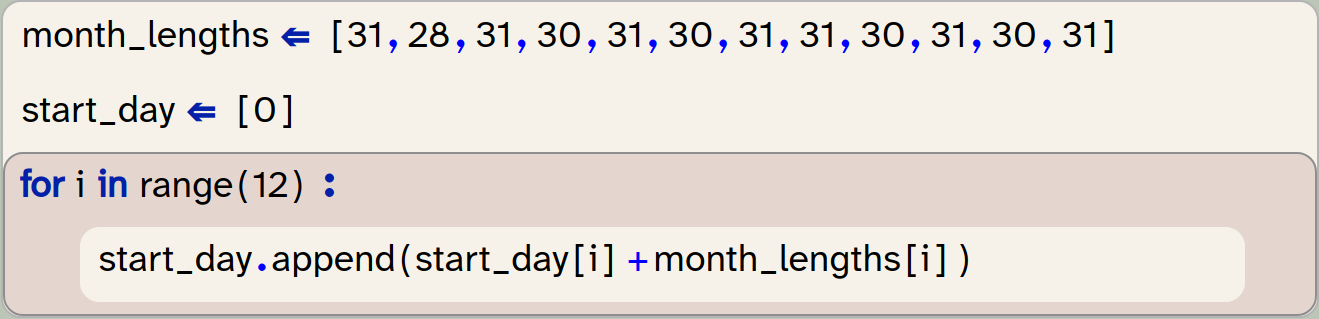
month_lengths = [31,28,31,30,31,30,31,31,30,31,30,31]
start_day = [0]
for i in range(12):
    start_day.append(start_day[i] + month_lengths[i])
You may have to think carefully about this idea to fully understand it.
Exercise 6.35 Play the algorithm above through using pen and paper. Draw the month_lengths list. Then draw the start_day list as it is at the beginning. Then go step by step through the code above and modify your drawing with every step to show the effect of that code.
Exercise 6.36 Implement the code above in your own program. At the end, print out the start_day list – does it look like you expected?
Exercise 6.37 How long is this list? Do you have an idea why we made it this length?
This list is now very useful for creating slices of data for a specific month. Every entry in this list, together with its next value, now tells us exactly the start and end of the slice for a month. Note that we have created this list with 13 values (not 12), so that December also has a following value to mark its end.
We can now write a function that gives us a slice for a given month:
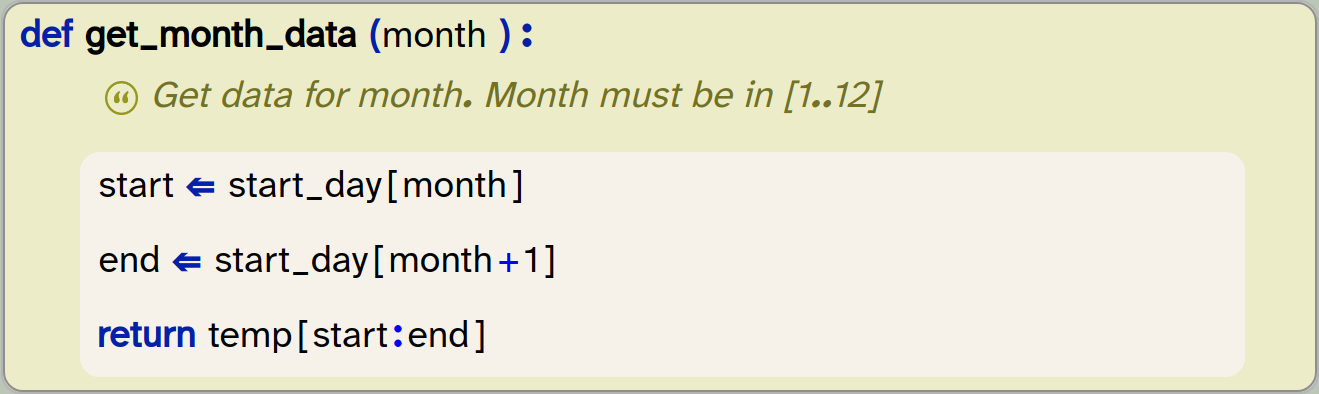
def get_month_data(month):
   '''Get data for month. Month must be in [1..12]'''
   start = start_day[month]
   end = start_day[month+1]
   return temp[start:end]
This function can be called with a number for a month, and it will return the sliced list with the temperature values for that month. For example, get_month_data(0) will return the data for January.
Exercise 6.38 Implement the function shown here in your own program. Test it by printing out the values for December. The temperature for the 1st of December should be 10.7 degrees.
Exercise 6.39 Find and print the temperature of the warmest day in December.
Exercise 6.40 One minor annoyance is that the month numbers are out by 1 compared to what we commonly use. For example, we have to write 2 for the March data, but we normally refer to March as 3. Modify your get_month_data function so that we can use normal month numbers (i.e. 1 for January, 12 for December, and so on).
Exercise 6.41 You can now call your get_month_data function with values 1 to 12 as parameters. What happens if you use an invalid parameter, for example 14, or -1? Try it out.
Exercise 6.42 Modify your function so that it prints out an error message if it is called with an invalid parameter and works as before if the parameter is valid.
An implementation of the exercises in this section is in the project temperature-v4.
There are many possible extensions to this project. We could, for example, modify our function to accept names of months, rather than a month number, and then use another list of month names to find the index of a given month by searching for the name. We can also use the same start_day list that we have used here to write a function that maps a day number to a date as a day/month pair. These are somewhat advanced exercises, and we leave it to the curious reader to work on them.
Instead of discussing more possibilities of processing our list of numbers, we will – in the next chapter – look at how we can use lists for other types of data. We will do so by looking at some graphical programs again.
6.6. Summary
In this chapter we had a good look at lists and some of their operations. We worked mostly with a list of numbers – floats, to be precise – and we have seen that we can find specific elements, sort or slice the list, and write loops that process every element.
Many convenient list functions are provided in Python by default, and it will be very useful to become familiar with them. In the next chapter, we will see other situations in which these are very useful.
-
Python provides a list type, which can store a list of items. Lists are defined using square brackets and values separated by commas:
[ 1, 2, 3]. -
We can find out the type of a data item using the built-in
type()function. -
We can access individual elements in a list by providing an index in square brackets, in the form
list[index]. -
Index numbers in lists start with index
0. -
String concatenation joins two strings together into a single string. It is written with a
+sign:string1 + string2. -
Values can be converted from one type to another by using built-in type conversion functions. The most commonly used conversion functions are
int(n),float(n)andstr(n). -
We can create an empty list by writing just a pair of square brackets:
[ ]. -
The list method
append(n)adds an element to the end of the list it is called on. It is called in the formatlist.append(elem). -
The
min(list)andmax(list)functions can be used to find the minimum or maximum value in a list. -
The
list.index(n)method can be used to find the index of the first occurrence of elementnin the list. The element must exist in the list when this is called. -
We can create a slice of a list by providing to indices separated by a colon:
list[start:end]. This will create a new list holding the elements from start (inclusive) to end (exclusive). We can leave out the start index (list[:end]) to create a slice starting from the beginning of the list, or leave out the end index (list[start:]) to create a slice that reaches to the end of the list. -
The
list.sort()method sorts a given list. Thelist.copy()method creates a copy of a list. -
Iterating over the indices of a list (rather than the elements themselves) gives us more flexibility to access several different elements in each iteration.
-
The built-in
abs(n)function return the absolute value ofn.
Graphical plotting
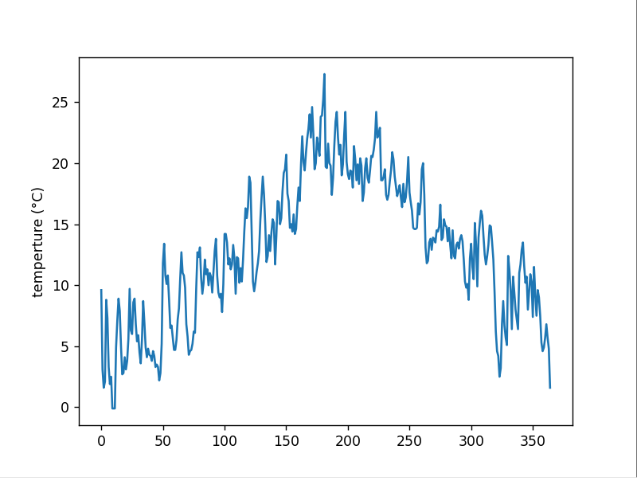 One thing we have not yet done with our temperature data (but which is quite an obvious idea) is to plot the data as a graph.
Here is a project that does just that: temperature-plot.
This project uses the same temperature data we have used in this chapter, and then turns it into a graph. Plotting the data graphically is easier than you might expect, as there are good libraries available that do all the hard work for you. In this case, we use the library matplotlib.pyplot, which does the work for us.
If you want to do more with this, have a look at the pyplot documentation here (or search the web for "Pyplot tutorial" if you are reading this on paper). You will see that you can generate sophisticated graphs quite easily.
Kaggle
 In this chapter, we have started to analyse some data, and we have used a London temperature dataset for this. Of course, you can analyse all sorts of other data.
A good source to find interesting data files is Kaggle. It is a website where people share all sorts of interesting data, and you can usually find something that interests you. The available data is very wide-ranging, from most-streamed songs on Spotify, via mental health data, sports statistics, transport data, environmental data to crime data, and much more inbetween.
Have a look, pick something that interests you, and start to analyse.
Chapter 7. Doing more with lists
In the previous chapter, we had a first experience of working with lists. Lists are so central to programming in Python that we will spend a bit more time with them: we will look at other uses of lists in this chapter to get a deeper understanding of working with them.
We will do this with two different examples: First, we will see how we can use lists in our games, and then we will process sound files using list operations. Both of these examples will teach us something more about handling list, and data in general.
Let us start by getting back to our game from the early chapters of this book. When we implemented that game, we have seen that our graphics program deals with actors (objects of the Actor class) to show various elements on screen. Using lists of actors enables us to improve our game.
We will start by looking at a variation of our Yellow Fish game; it is named Space Rescue.
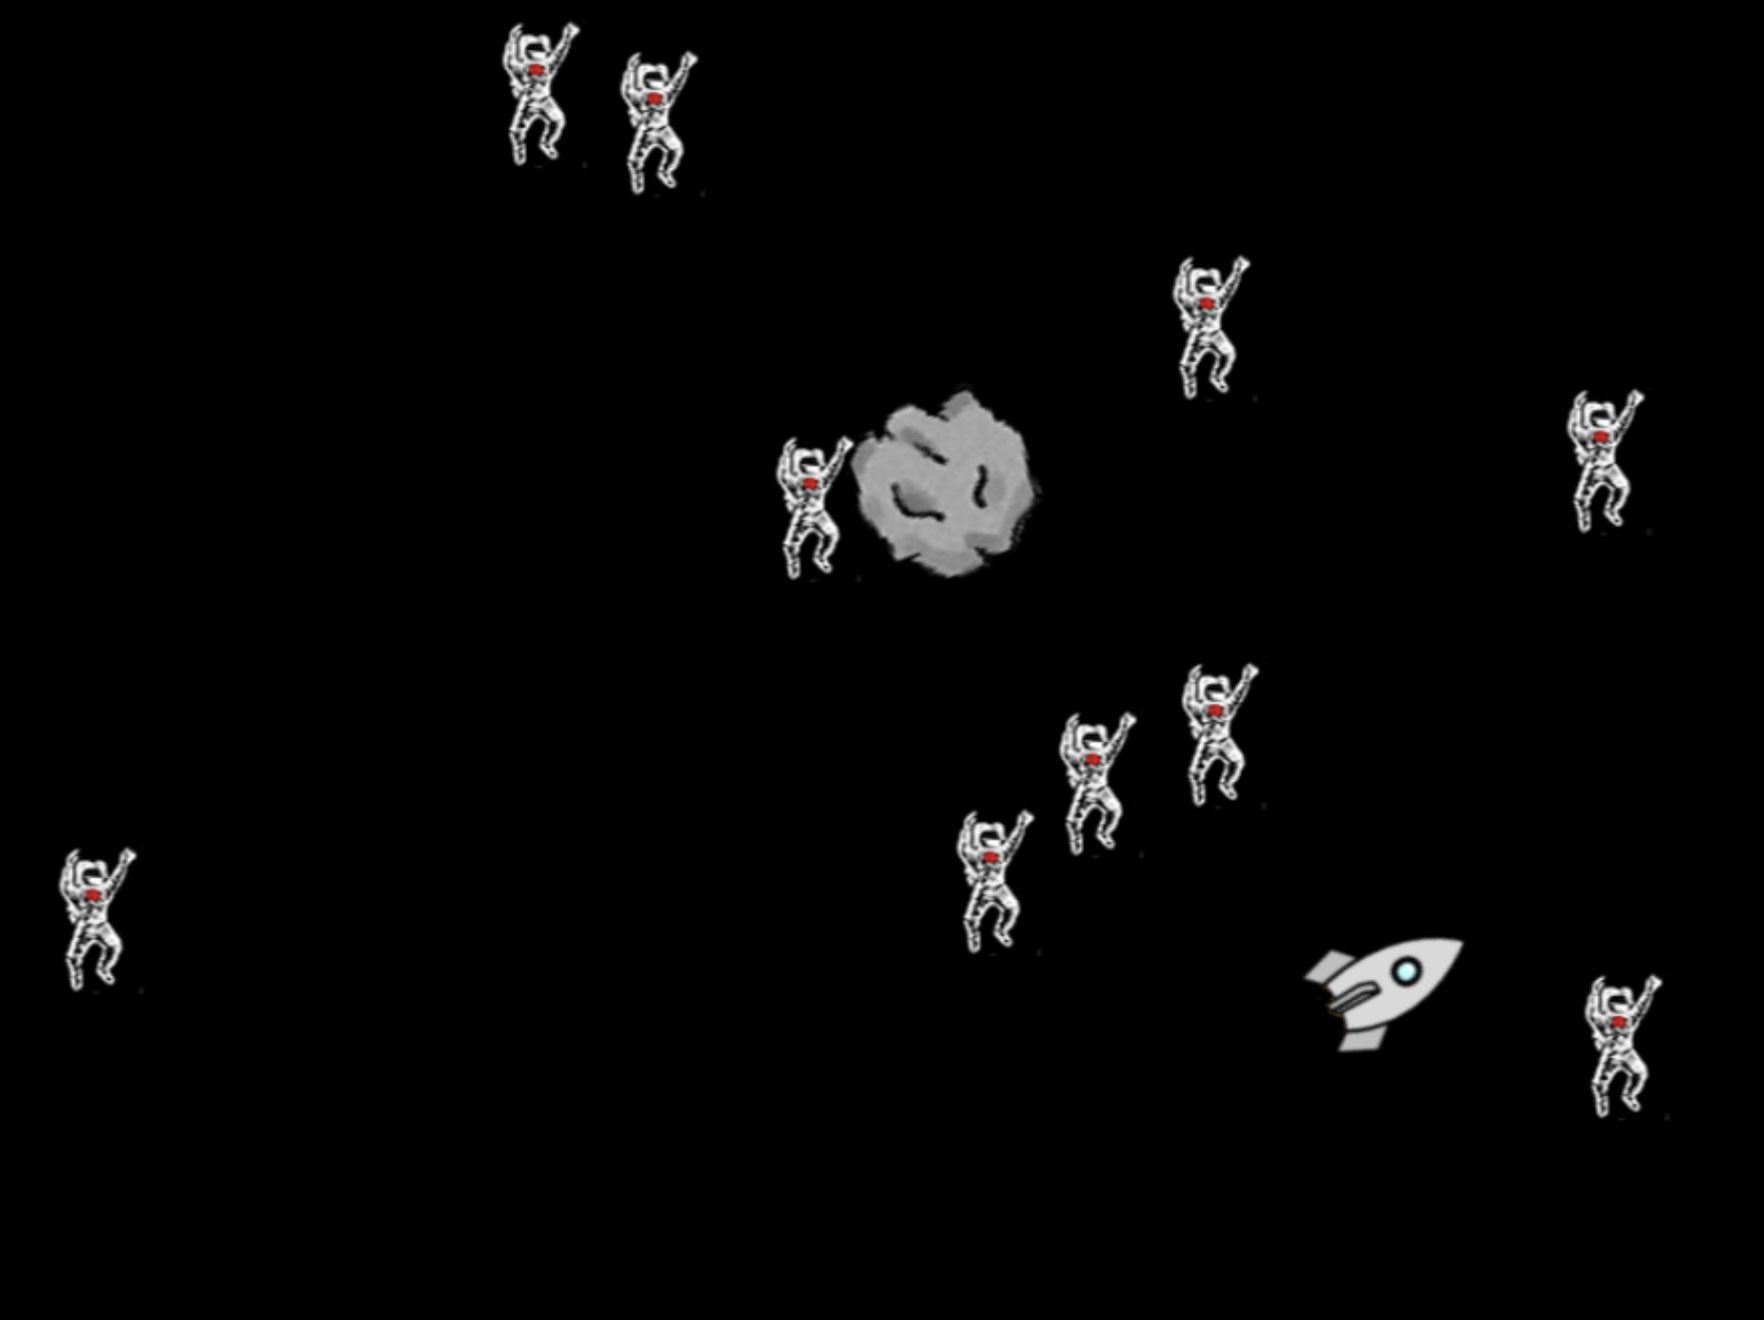
7.1. Lists of actors
The Space Rescue project (Figure 7.1) is essentially a copy of the Yellow Fish game with different graphics. Start by investigating it.
Exercise 7.1 Open the space-rescue game from Chapter 7 of the book projects. Run the program and investigate it. How is it similar to the yellow fish game? How is it different?
You will have seen when you tried out the program that it is essentially the same as yellow fish. We have changed the colour of the background, the graphics and some of the sounds, but the code is almost identical. The only two changes to the functionality are:
-
The asteroid (which previously was the shark), does not turn when it reaches the edge of the screen, but instead appears on the opposite edge.
-
We have added an end-of-game scene that lands the rocket on a planet when the player wins the game.
Exercise 7.2 Examine the source code of the new game version. Find the place where the new behaviour of the asteroid at the edge of the screen is implemented. Make sure that you understand this code. Explain how it works.
Exercise 7.3 Find the code that implements the end-of-game landing scene. What is the function called that implements this?
Exercise 7.4 Does this function use any constructs you are not familiar with?
7.1.1. Creating the astronauts
One small improvement to the game we can now make is to animate the astronauts. Currently, they do not move at all, which makes the scene very static. Since they are floating in space, we might start by making them slowly turn on the spot.
Exercise 7.5 Find the place in the program where the astronauts are created. What variable is the astronaut actor assigned to? Where else is that variable being used?
With the investigation in the previous exercise, you will have seen that the astronaut actor is being created and assigned to a variable, which is then never used. The variable is essentially discarded in our program. This is not a problem: The astronaut actors remain in the game, because they are held in the graphics world, and we can later get them back from there.
Let us prepare our task by initially rotating every astronaut to a different value, so that they are not all facing the same way.
Exercise 7.6 In the loop that creates the astronauts, use the set_rotation(rotation) method of the astronaut actor to assign a random rotation to the actor immediately after it is created. The rotation is specified in degrees, so the random value should be between 0 and 359. (360 would be the same as 0.)
7.1.2. Accessing the astronauts
We can now make all astronauts slowly turn by calling the turn method on each actor in every step of our main loop. To do this, we first need to get access to our astronauts again. Luckily, this is quite easy: the graphics world maintains a list of all actors in the world, and the strype.graphics library includes a function called get_actors() that can be used to get access to this list. We could, for example, get a list of all actors by simply writing

all_actors = get_actors()The function has an optional parameter to provide a tag. If a tag is provided, only actors tagged with this tag will be returned. If you check the line where we created the astronauts, you will see that we used the tag "astronaut" for each of our astronaut actors, so we can now use this in our function call:

astronauts = get_actors("astronaut")This call will give us a list of all astronaut actors.
The graphics system maintains a list of actors. We can obtain a list of all actors, or of selected actors, by using the get_actors() function.
Exercise 7.7 Find the get_actors() function in the library documentation. What is the default value of its parameter?
Exercise 7.8 Create a new function move_astronauts() (to mirror the move_rocket() and move_asteroid() functions). The function body can initially be empty. Make sure to call this function from your main loop.
Exercise 7.9 In this new function, use the get_actors() function to get a list of astronauts. Then write a for-loop that iterates over the astronauts list and makes each astronaut turn 1 degree. Test your program. Do the astronauts turn?
Exercise 7.10 Write an appropriate function comment for your new function.
Your astronauts should now be slowly turning while they are floating in space. One last thing that we will add is to make them all re-appear on the surface of the planet after the rocket has landed. One problem with this in our current version is that we do not keep hold of the astronauts after they have been collected, so we are not in a position to re-add them into the world. We will first change this by keeping a list of all astronauts, and then we can add them again later.
Exercise 7.11 Add a variable called astronauts and assign an empty list to it. The place to create this variable is at the beginning of the "Definitions" section (where the score variable is also initialised).
Exercise 7.12 In the loop that creates the astronauts, add each new astronaut to the astronauts list.
Now we are in a position where we have kept our own list of all astronauts (independent of whether they were already collected or not), and we can now put them back into the world at the end of the game.
Exercise 7.13 Add a for-loop to the landing function, after the rocket has landed, to add the astronauts from our list back into the world. To place an actor back into the world after it had been removed, you can use the re_add(x,y) method of the actor:

astronaut.re_add(randint(-360,360),randint(-260,260))Choose your values for the randint function so that they are placed at random locations on the surface of the planet.
When you run your program, you will notice that the 10 astronauts all appear at once. This is because the for loop is so quick that we see them all appear at essentially the same time. To make this visually more interesting, we can slow down the execution of this for loop, using the pace function, to make the astronauts appear more slowly, one after the other.
Exercise 7.14 Set the pace of this new for-loop to 5, so that it executes slowly enough for you to see the astronauts appear one at a time.
Exercise 7.15 Add the playing of the click sound (the one that is used when an astronaut is picked up) into this loop. (You can do this by duplicating this line and then dragging it into place.)
A copy of the project with these changes implemented is in the book projects as space-rescue-v2.
When you carefully inspect the creation of the astronauts and compare it to the creation of the shrimp in our earlier version, you might have noticed one further small difference: In the fish version, we wrote:

for count in range(0, 15):
    shrimp = Actor(image_literal,randint(-360,360),randint(-260,260),"shrimp")
while in the space version we changed this to

astronaut_image = image_literal
for count in range(10):
    shrimp = Actor(astronaut_image,randint(-360,360),randint(-260,260),"astronaut")
The main change here is the assignment of the image outside the loop. If we use the image literal inside the loop, we are creating 15 separate shrimp images. They all show the same picture, but they are all separate image instances. If, on the other hand, we use the image literal outside of the loop, only one image is created. This same image is then used for all the different actors. This is much more efficient than using multiple images unnecessarily. Using many separate images can slow down the execution of your program, especially if the images are large.
With this series of exercises, we have seen how the graphics world uses lists to work with the actors and how we can use these lists to deal with more than one actor at a time. We can also use our own lists of actors if we want to keep them when they are no longer in the world. Again, lists are useful here to process a collection of items.
There are, however, two more things to discover in this project, which we should discuss before we move on.
7.2. Constants
One thing you may have noticed if you read the code carefully is that we have a variable that is written in capital letters:

NUM_ASTRONAUTS = 10This style looks different from the way we have named our variables previously, and in Python it has a special meaning: it means that this value is a constant.
A constant is very much like a variable – it holds a value that you can assign to it – but the difference is that this value is intended to never change. It will always be the same throughout the whole execution of the program.
Many programming languages have a special language construct to declare a constant. You can then assign a value once, and never change it after that. The system would report an error if you tried.
Python does not have such a construct. Instead, we use a convention. By convention, when variables are written in capitals, they are intended to be constants. This is a very common and very widely used convention: just about all Python programmers follow it. This means two things for you:
-
First, when you see a name in capital letters, you can usually assume that it is constant.
-
Secondly, you should follow those rules in the code that you write: Use capital letters for your own constants, and never change the value of a constant.
Python does not prevent you from changing the value – technically, constants are just variables – but you will confuse every Python programmer if you do.
There are several reasons why you might want to use a constant in your program. The first is that it can make your code more readable. Imagine you read this fragment of code:
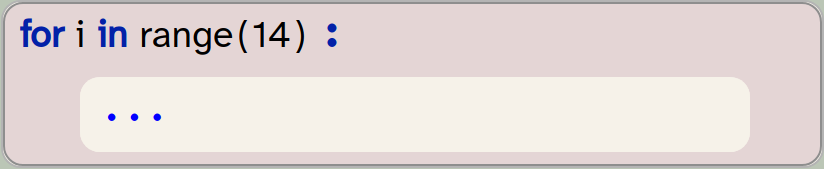
for i in range(14):
   ...
In this case, you do not immediately know what the number 14 means. Why 14?
If instead, it says
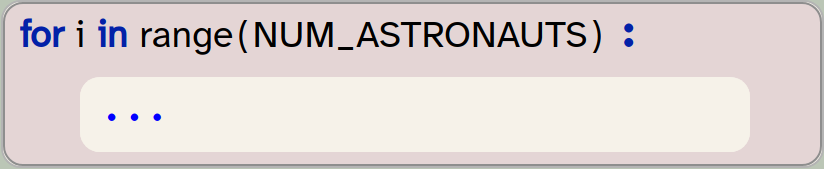
for i in range(NUM_ASTRONAUTS):
   ...
then it is much clearer. The value itself may still be 14, but you now know immediately that this loop is linked to the number of astronauts in the game. Constants can give names to your values, and make your code easier to read.
Secondly, you may have used the number of astronauts at multiple places in your program. Should you later change your mind and decide to show more astronauts, you now have to find all the places in the program where that number is used, and change it in each place. In larger programs, this can be challenging.
If, instead, you used a constant, you can change the value one single time, and it will automatically be used wherever it is needed.
Exercise 7.16 Is there another variable in this program that could or should be a constant? Discuss.
A variable written in capital letters is considered a constant. Values of constants should never be changed. Python does not enforce this, but it is bad practice to do so. Using constants can make your program more readable and easier to maintain.
Good programming practice: Use named constants when possible
Use named constants to attach names to specific values. Try to avoid having arbitrary numbers in your code; instead, name them to describe what they are and use the named constant where the value is needed.
7.3. Global and local variables
The other new construct you may have noticed in the source code of the space-rescue program is the use of the term global:
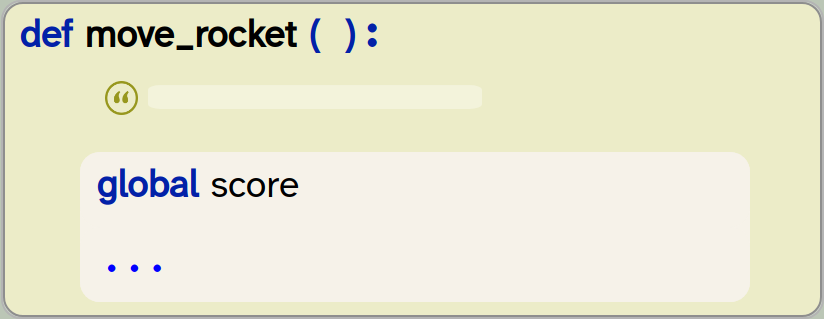
def move_rocket():
    global score
    ...
This construct has to do with the difference between global variables and local variables.
Python distinguishes global and local variables and keeps them separate. Local variables are those declared inside a function. If you introduce a variable inside a function body, it is automatically local, and it can only be used inside that function. In fact, it does not survive after the function ends: when the function exits, the local variable is deleted (and next time the function runs, and entirely new variable is created).
Global variables, on the other hand, exist for the whole time the program runs. They are the ones that are created outside of functions (in the "My code" section or directly in the "Definitions" section, outside of a function definition).
A global variable is a variable declared at the outer level of your program (outside of function or class definitions). Global variables hold their value throughout the entire run of a program.
A local variable is a variable that is declared inside a function. It is created every time the function executes, and is destroyed when the function ends.
Exercise 7.17 In the space-rescue program, find an example of a global variable. Find an example of a local variable.
To investigate the relationship if global and local variables a bit more, consider this code:
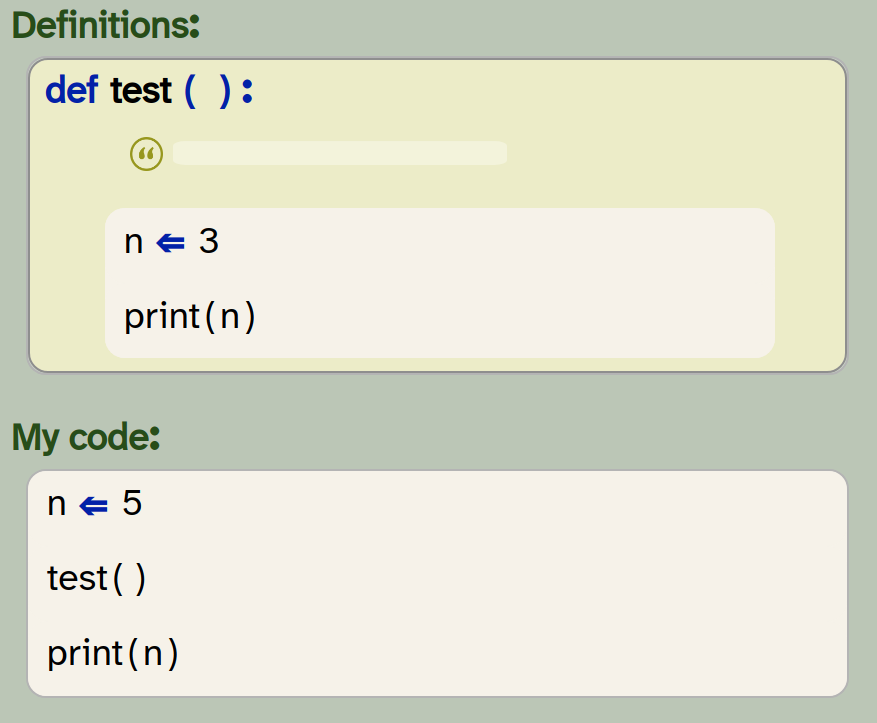
def test ( ) :
    n = 3
    print(n)

n  = 5
test()
print(n)
Exercise 7.18 For the code shown above, predict what the program will print.
Exercise 7.19 Create a new project for this experiment and type in the code shown above. Run the program and compare the output to your prediction. Were you right?
Exercise 7.20 Try to explain why the output is what it is.
The result of this experiment can be puzzling at first. The reason we see two different values printed is that Python keeps global and local variables completely separate. As you can see here, you can even have two variables with the same name! The assignment n ⇐ 5 creates a global variable, and the assignment n ⇐ 3 creates a local variable (because it is inside a function). The fact that these have the same name does not matter – they are two separate variables.
Now insert the declaration global n at the beginning of you function:
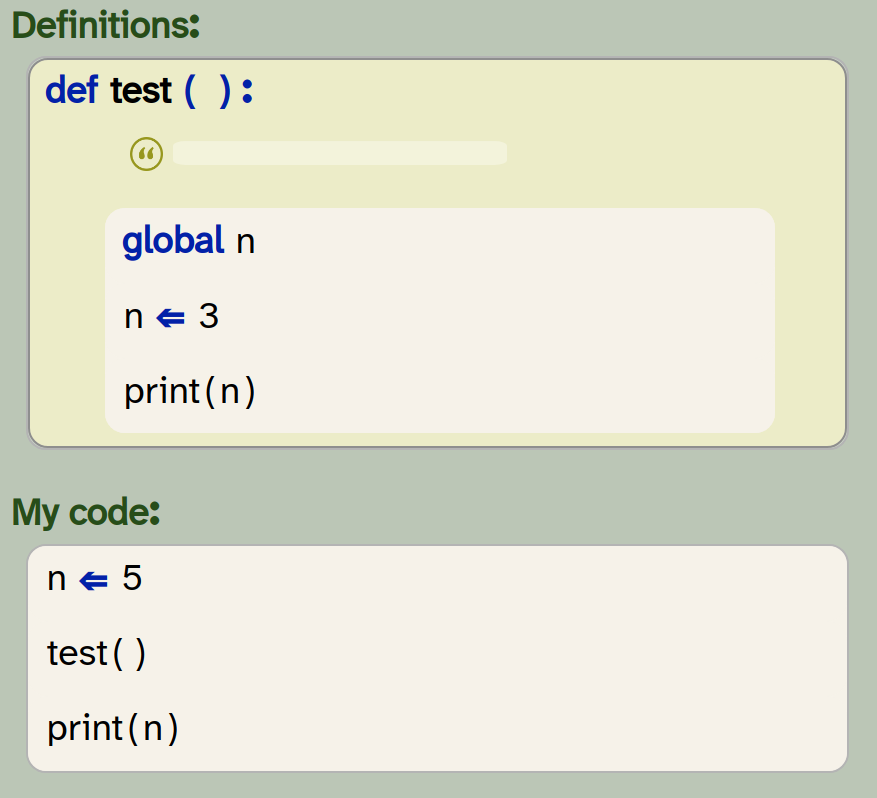
def test ( ) :
    global n
    n = 3
    print(n)

n  = 5
test()
print(n)
Exercise 7.21 Predict what will happen when you run your program after the change shown above.
Exercise 7.22 Try it out: make this change in your code and run your program. Discuss what you see.
Exercise 7.23 What happens when you change the assignment in the test function from n ⇐ 3 to n ⇐ n + 1? Predict the outcome, and then test it.
Exercise 7.24 What happens when you now remove the global n declaration again? Try it out.
When we use the global n declaration inside the function, we are saying that we want to use the global variable n, instead of creating a new, local variable.
The result of the last exercise can be quite confusing. The reason here is the following:
-
We now have no
globaldeclaration in our function. Therefore,nis a local variable. -
Local variables are created when the function starts. Initially, they have no value (until you assign a value to them).
-
In the assignment
n ⇐ n + 1, Python first evaluates the right-hand side of the assignment:n + 1. Here, we try to read the value ofn, but this variable does not yet have a value – we have not assigned one yet. Thus, it causes an error when we try to read this variable.
The error you see here is called an UnboundLocalError (you can see this in the error message). It is useful to remeber this error and its cause – you are likely to see it again.
The declaration global var_name used inside a function makes every use of the variable name var_name afterwards refer to the global variable var_name instead of referring to a local variable.
Exercise 7.25 In the space-rescue-v2 program, find a use of the global declaration. Explain why it is needed here.
Exercise 7.26 Remove the use of the global declaration from the program and run it. Explain the error you see.
Good programming practice: Keep variables local
A good rule to improve the quality of your code is to use local variables whenever you can. If a value is used only inside a function, you should use a local variable. Use global variables only when necessary. Use of global variables has the effect that your program is harder to understand, and harder to adapt. You can often avoid global variables by passing values into functions as parameters when you need the value.
7.4. Manipulating sounds
For the remainder of this chapter, we will work with sound files, and we will see that sounds, too, can be viewed as lists – in this case, lists of samples.
A sample is a reading of the sound input (the microphone), and it is stored as a number. When these samples are read and stored quickly enough, we get a sound recording, and we can play it back later. Thus, a stored sound is a list of samples, which is a list of numbers.
Start by opening a project with a sound in it. We have provided such a project in the Chapter07 folder; it is called sounds.
Exercise 7.27 Open the sounds project. Add a statement to play the sound in it.
7.4.1. Sounds as lists of samples
In our project, we have a sound object. We can get the list of samples that makes up this sound by using the sound’s get_samples method.
Exercise 7.28 Look up the get_samples method in the library documentation. It is a method in the Sound class. What is the type of each element in the list it returns? What is the range of possible values?
Exercise 7.29 Write some code to get the samples from the sound in the project. Print out the length of the list. How many samples does it contain?
Exercise 7.30 The sample rate is the number of samples that is recorded per second. Calculate and print the sample rate for our sound. You can do this by dividing the number of samples by the length of the sound in seconds. (You can see the length in seconds when you hover with the mouse pointer over the sound literal in the editor.)
A sound is stored as a list of samples. We can get the list of samples from a sound object using the get_samples() method.
7.4.2. Playing backwards
The first experiment we can do is to reverse the sound to play it backwards. We can do this by reversing our samples list – a first attempt might look like this:
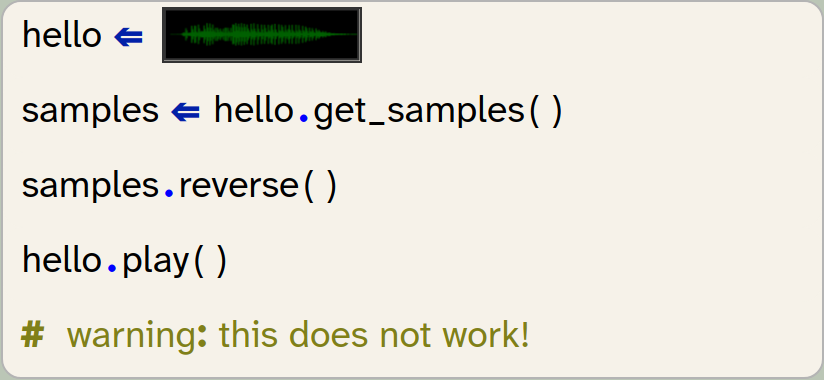
hello = image_literal
samples = hello.get_samples()
samples.reverse()
hello.play()
# warning: this does not work!
As the comment in the code snippet says: this does not work. The reason for this is that the get_samples() method gives us a copy of the sound’s samples. So by reversing the list, we are not changing the original sound.
We can fix this problem by creating a new sound from the reversed sample list and then playing the new sound:
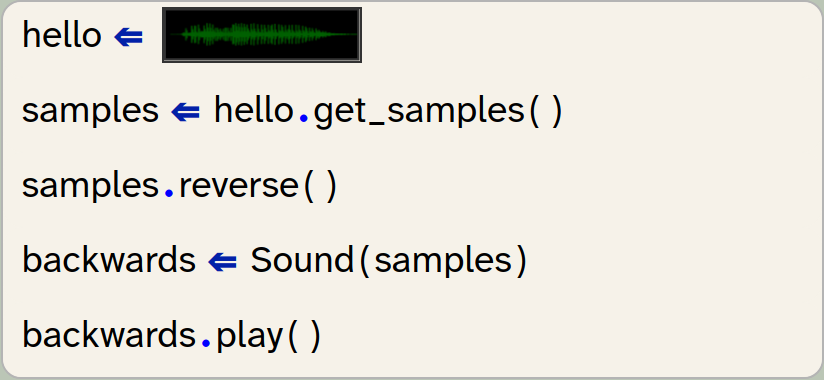
hello = image_literal
samples = hello.get_samples()
samples.reverse()
backwards = Sound(samples)
backwards.play()
We see here that we can create a sound, using the Sound class’s constructor (writing the class name Sound with a parameter list), and providing the list of samples as the parameter.
A sound object can be created from a list of samples by using the statement Sound(sample_list).
Exercise 7.31 Implement the code shown above: reverse the sound and play it backwards.
In the following sections, we will do a series of exercises where we manipulate sounds. You can make this much more fun by recording and using your own sounds, instead of the one we provided.
7.4.3. Recording your own sounds
We have seen previously how we can record sounds directly in Strype. Delete the sound literal that is currently in your program, and leave the cursor in the value slot on the right-hand side of the assignment:

hello = ___strype_blankYou can then press Ctrl-Shift-U to record your sound. Once you have done this, play the sound back (and re-record it if necessary, until you are happy with it).
When you record a sound from a microphone, it usually has some silence (or unwanted noise) at the beginning and end. Use the trimming function (the red handles at the sides of the sound graph, Figure 7.2) to cut off the unwanted parts; only the section between the red bars will be used. If we do not do this, the sound will appear to play with a slight delay, because it will play the initial silence as well.
Once you press OK, the sound will be inserted into your code.
Exercise 7.32 Record your own sound, trim it, and insert it into your code. Play it forwards and backwards.
7.4.4. Repeating a sound effect
We are now ready to make modifications to our sound by modifying the sample list, and then creating a new sound from the new samples.
Let us start by duplicating the sound. We can duplicate a list by using the multiplication operator: *. For example:

my_list = [1,2,3]
my_list = my_list * 2
will duplicate the list so that it contains its elements twice. The list then is:
[1,2,3,1,2,3]
We can also use the plus operator to append one list to the end of another:

my_list = [1,2,3]
my_list = my_list + [6,7,8]
Let us experiment with this. Write some test code for the exercises below.
Exercise 7.33 Create a short list of numbers. Use the * 2 operation to duplicate the list and print it out.
Exercise 7.34 Try the same with multipliers other than 2.
Exercise 7.35 Use the + operator to add two lists together. Print out the result.
Exercise 7.36 Let’s get back to out sound sample list. Duplicate the sample list and create a new sound with the new list. Play the sound. What happens, compared to the original sound?
We can join two lists together to form a single list by using the + operator: list1 + list2.
List elements can be repeated multiple times to form a new list by using the * operator: list1 * 3. For example, [0, 1, 2] * 3 will produce [0, 1, 2, 0, 1, 2, 0, 1, 2].
7.4.5. Stutter effect
An effect that is often used as part of music is to play the start of a word repeatedly before playing the whole word. For example, if your original sound is the word "Hello":
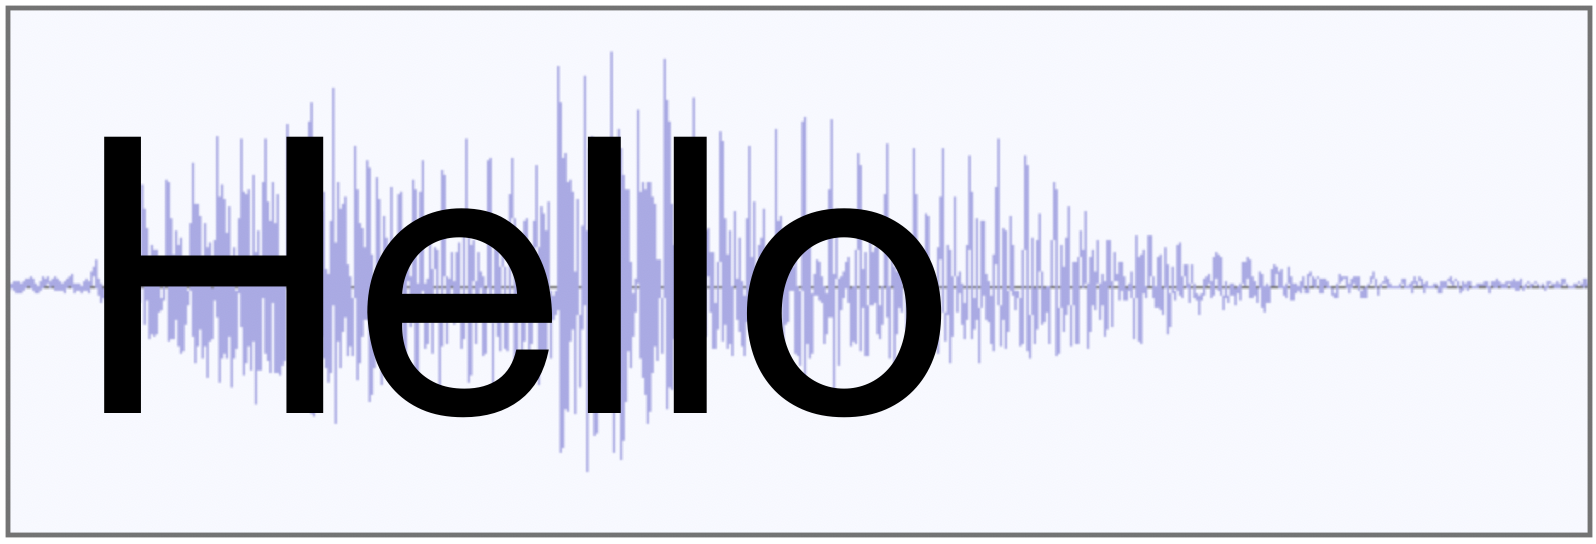
then the stutter effect turns it into this:
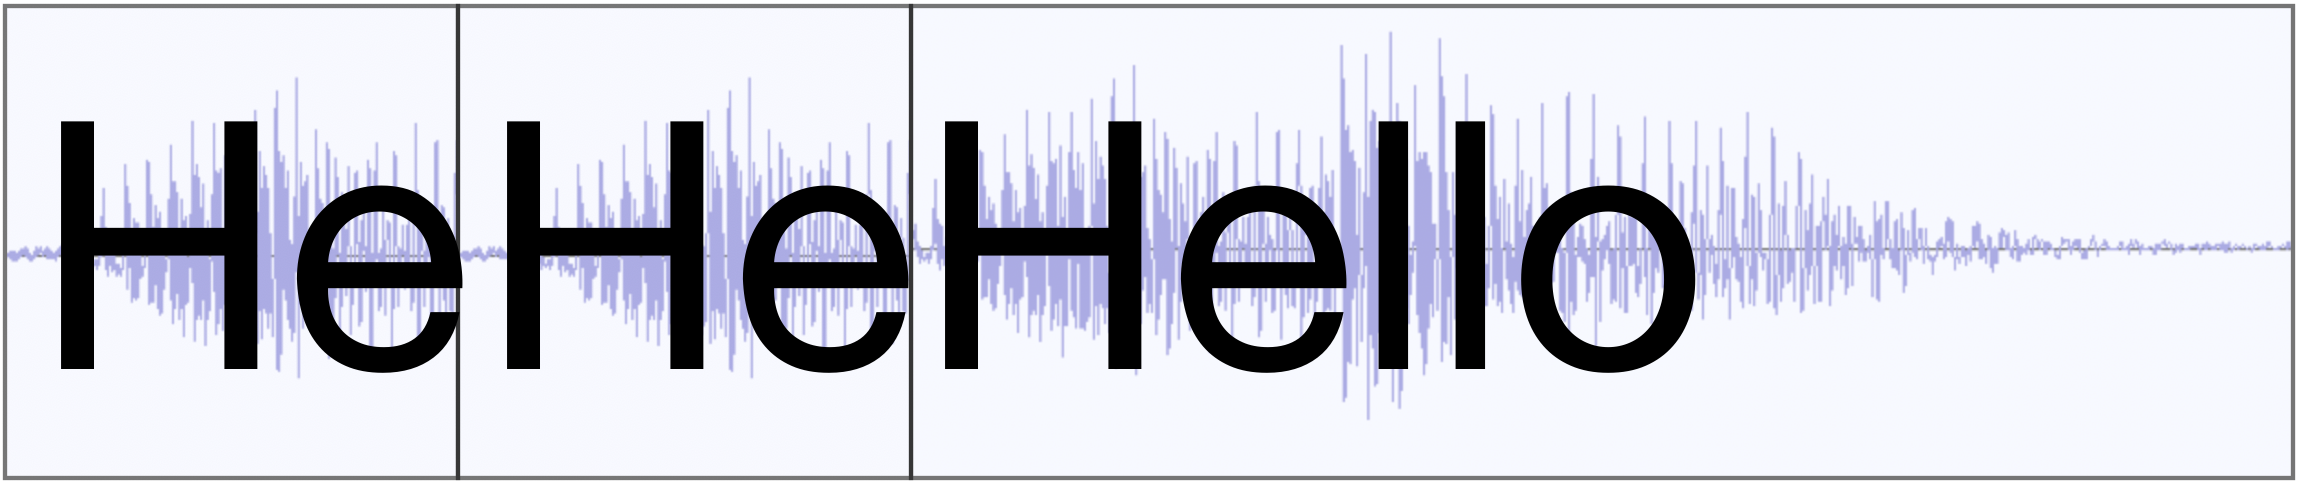
As you can see, we will have to take a copy of the first part of our sound, multiply it to play it several times, and then append the original sound.
Remember that we can use slicing to create a copy of a part of a list. For example samples[:9000] will create a list holding the first 9000 elements of the samples list.
Exercise 7.37 Implement the stutter effect in your own project. Use slicing to create the prefix sound, multiplication to repeat the prefix, and addition to append the whole sound. Test it and make sure that it works.
Exercise 7.38 Try the effect with different numbers of repetitions for the prefix.
Exercise 7.39 Make a function for producing and playing the stutter effect. The function should have two parameters: the original sound object, and a parameter called count which specifies how often the prefix sound should be repeated. For example, play_stutter(hello, 4) would play the hello sound with 4 repetitions of their partial word first. In your 'My code' section, just call this function.
Exercise 7.40 Add another parameter to your function to specify the length of the prefix part of the effect (the number of samples for the prefix). Test it.
Exercise 7.41 If you still have the code for the backwards playing in your project, it is time to clean up now: Make a separate function for backward playing as well and move your code into it.
Exercise 7.42 Add an infinite loop in your code (like in the game examples). In this loop, check the keyboard: if the 1 key is pressed, play your sound backwards. If the 2 key is pressed, play the stutter effect.
A version of this project with an implementation of these effects is available in the Chapter07 folder as sounds-v2.
Exercise 7.43 Make a program that plays different sound effects in reaction to different key presses.
7.4.6. Pitch change: double speed
Next, we will create a "cartoon voice" sound effect. This effect plays the sound sample at double speed. This has two consequences: the sound will be shorter, and the pitch will be higher. (The pitch is how high or low a voice sounds.)
Looking at our sound sample list, the idea is very simple: we can simply delete every second sample in our list. If we then play the remaining samples at the same frequency, the sound is half the length, and we can observe how this changes the pitch.
Thus, for our program, the obvious question becomes: How do we best create a list that includes only every second element from the original samples?
It turns out, slicing comes to the rescue again.
The slicing operator has a third optional parameter which we have not used yet. A full slice definition with this parameter looks like this:
list[start:end:step]
As we have seen previously, the first two parameters specify the beginning and end of the slice we wish to create. The third parameter is a step size: A step size of 2, for example, will select every second element, a step size of 3 selects every third element, and so on.
Consider, for example, the following code:

my_list = [1,2,3,4,5,6,7,8,9,10,11,12]
print(my_list[2,9,2])
This code snippet will select elements from index 2 to index 9, with step size 2. Thus, it will print
[3, 5, 7, 9]
To fully understand this, we have to recall some details about lists and slices:
-
The first list index is 0, so by using 2 as the start of the slice, we are starting with the third element (not the second).
-
The end index of a slice (we have used 9) is not included in the slice.
-
The step with here is 2, so we get every second element.
Exercise 7.44 Assume a list my_list holds the numbers [4, 5, 6, 7, 8, 9, 10, 11, 12, 13, 14]. What is the list resulting from the expression my_list[2,9,2]? What is my_list[2,9,3]?
Exercise 7.45 Write a short test program to check your answer.
With just one more bit of information, we are ready to solve our problem: We know that we are permitted to leave out the start or end value of a slice. If we leave out the start, the slice starts at the beginning of the list; if we leave out the end value, the slice extends to the end.
The new bit of information is this: When we use a step value in a slice, we are permitted to leave out both the start and the end value. We then select elements at this step interval from the entire list. In other words

my_list = [1,2,3,4,5,6,7,8]
every_second = my_list[::2]
has the effect that every_second is a new list which holds every second element from our original list, starting with the first: [1, 3, 5, 7].
Since our original goal in this section was exactly this – creating a list with every second sample – this is now very straightforward.
Exercise 7.46 Implement a pitch_up function in your sounds project. Test it.
Slices from lists can include a step value. The syntax is list[start : end : step]. When we use a step value, the slice is created by copying elements from start to end, using the step size to advance. All three slice values are optional. If we want to use a step size across the entire list, we can write list[::step].
7.4.7. Pitch change: half speed
The next obvious thing to do is the opposite: Playing the sounds more slowly to lower the pitch. Once we have understood the pitch-up idea, it is quite obvious how we can do this: We just duplicate every sample in our list so that it appears twice in succession. In effect, the list [3, 7, 4] would become [3, 3, 7, 7, 4, 4]. If we do this to the samples list, the list is twice as long, the sound plays more slowly, and the pitch lowers.
Unfortunately, in this case, there is no ready-made operation in Python that achieves this in a single statement. As a result, we will have to write a loop that iterates through our original samples list and creates the new list we need.
The concept for this is quite straight forward: We iterate through the list of samples, and for every sample, add it twice to a new list:
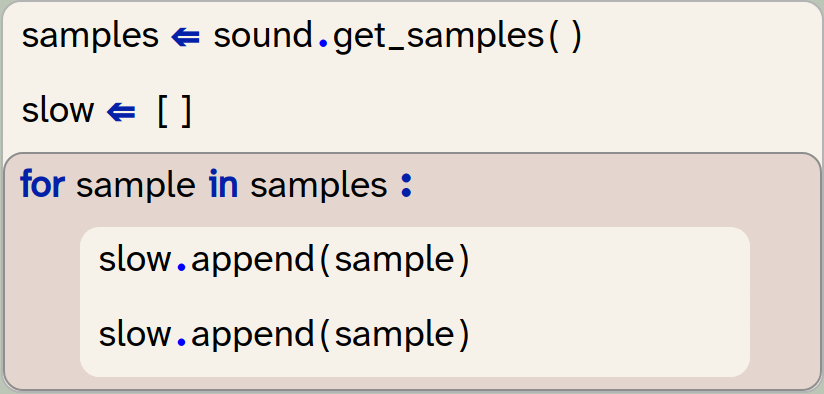
samples = sound.get_samples()
slow = []
for sample in samples:
   slow.append(sample)
   slow.append(sample)
We are starting here with an empty list. The append method adds a single element to the end of the list, and we can see that we are doing it twice to duplicate every element.
We could add both elements in a single statement if we make a short 2-element list from our two samples and then attach this list, using the extend method:
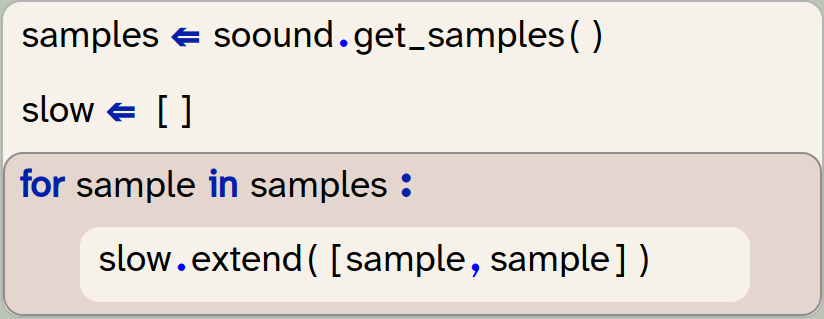
samples = soound.get_samples()
slow = []
for sample in samples:
   slow.extend([sample, sample])
We have to be careful here: If we tried to add the [sample, sample] list using the append method, we would not get an error, but it would not do what we intend to do. It would instead add the 2-element list as a single element into our new list, which is not what we need. To add each element separately, we must use the extend method.
Exercise 7.47 The difference between append and extend can be quite subtle. Research and explain the difference between slow.extend([sample, sample]) and slow.append([sample, sample]). Draw a diagram to aid your explanation.
Exercise 7.48 Implement a function to play the sound at half speed.
We can append a single element to a list using the list.append(elem) method. We can append every element from another list by using the list.extend(list2) method.
There are various other interesting sound effect we can create, now that we have seen how changing the samples list can create a new sound. We will suggest a few at the end of this chapter. Before we do this, however, it would be useful to create a simple interface for the user to more easily activate these effects.
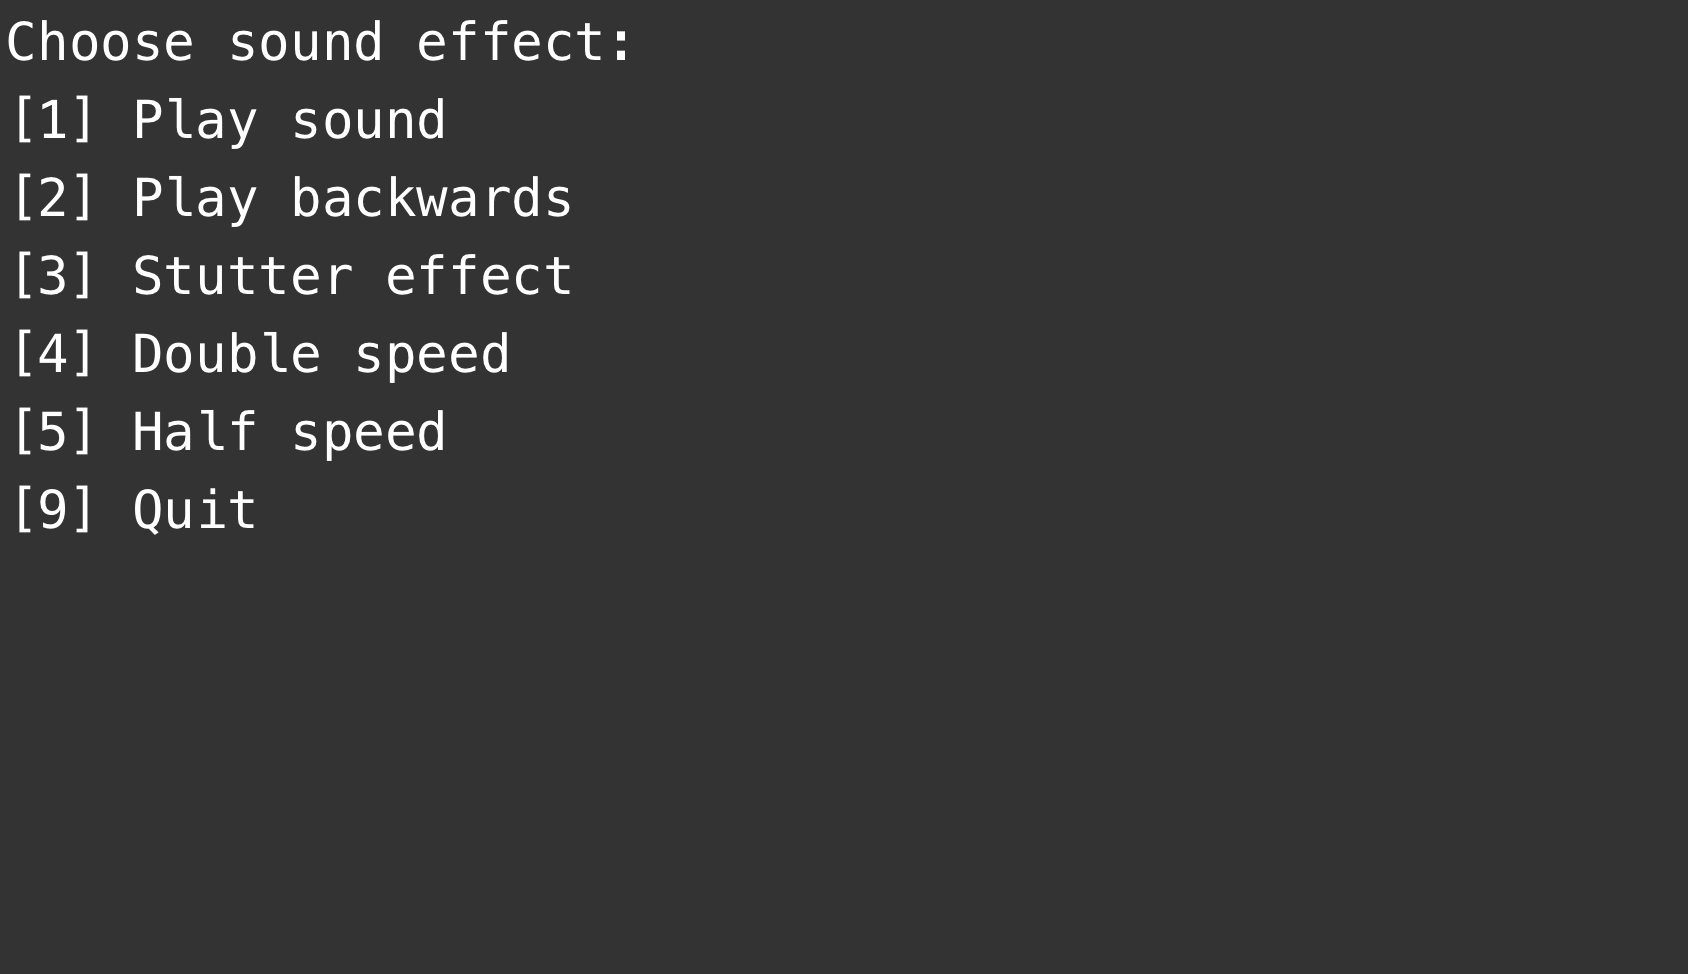
7.5. A simple text-based menu
In our current implementation, playing the sound effects was hard-coded in our program. Perhaps you wrote your code to play a single effect, disabling the calls that played the previous effects. Or perhaps you tried to play all effects one after the other – in this case, you will have discovered that the program does not actually wait for the sound to finish before continuing, and the sounds likely played overlapping. That is not a great effect.
It would be more useful to let the user choose an effect, in any order they like, from a list of available effects.
Implement such a choice now. Your task it to show a menu on the screen that looks something like the one shown in Figure 7.3.
For the main structure, use a while loop with a boolean variable exit that controls how long the loop continues. Then, in the loop, you can react to key presses, playing sound effects when needed, or setting this variable to True to exit:
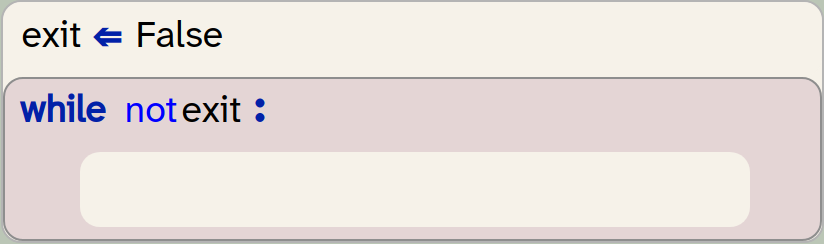
exit = False
while not exit:
    pass
Exercise 7.49 Write a function to display the menu on screen. Make sure to choose an appropriate name for the function, and to write a good function comment. Call this function from your main code section.
Exercise 7.50 In your 'My code' section, write a loop that reacts to key presses (using the get_key() function from the strype.graphics library). If a specific key is pressed, play the appropriate effect. Do this for all the effects you have implemented.
A version of the program with these exercises implemented is available in sounds-v3.
There are, however, many more experiments that we can do with our sounds. Some things you can try are suggested in the following exercises, but you are also encouraged to think about your own effects and trying them out.
Exercise 7.51 Implement a change in volume. You can decrease the volume by decreasing the values of each sample, for example dividing each sample value by 2 or by 4. You can increase the volume by multiplying the sample values. (However, you should be careful not to increase any value above 1.0, since sample values must be in the range -1 to 1.)
Exercise 7.52 Implement an echo effect. You can do this by chopping off the last half of the sound and attaching it to the end of your original sound multiple times. But each time it is repeated, it should have a lower volume than before.
Exercise 7.53 Give your echo effect function a parameter that specifies how often it should echo. And make sure the reduction in volume is such that the last echo is just about audible.
Exercise 7.54 Give your user a choice of multiple different sounds to apply the effects to.
Exercise 7.55 Experiment with producing sounds from scratch by creating lists of numbers and playing them as sound samples.
Exercise 7.56 Use graphics to make an interface for this program. Use several actors showing icons for effects, and play the effect when the user clicks the icon.
Exercise 7.57 If you feel very adventurous (this is an advanced exercise): Create a visual waveform representation of your sound in your graphics interface, similar to the one used in Strype’s own built-in sound editing dialogue.
7.6. Summary
In this chapter, we have seen some more uses of lists in Python.
First, we have seen that the graphics world uses lists to manage the actors in it, and that we can obtain lists of actors from it (either a list of all actors, or lists of selected actors).
Then we have seen that sounds can also be represented as lists: lists of samples. Samples are numerical values, and by manipulating the list of samples, we can change a sound. Along the way, we have encountered several useful operations on lists, such as joining and repeating lists, and slicing with step values.
-
The graphics system maintains a list of actors. We can obtain a list of all actors, or of selected actors, by using the
get_actors()function. -
A variable written in capital letters is considered a constant. Values of constants should never be changed. Python does not enforce this, but it is bad practice to do so. Using constants can make your program more readable and easier to maintain.
-
A global variable is a variable declared at the outer level of your program (outside of function or class definitions). Global variables hold their value throughout the entire run of a program.
-
A local variable is a variable that is declared inside a function. It is created every time the function executes, and is destroyed when the function ends.
-
The declaration
global var_nameused inside a function makes every use of the variable namevar_nameafterwards refer to the global variablevar_nameinstead of referring to a local variable. -
A sound is stored as a list of samples. We can get the list of samples from a sound object using the
get_samples()method. -
A sound object can be created from a list of samples by using the statement
Sound(sample_list). -
We can join two lists together to form a single list by using the
+operator:list1 + list2. -
List elements can be repeated multiple times to form a new list by using the
*operator:list1 * 3. For example,[0, 1, 2] * 3will produce[0, 1, 2, 0, 1, 2, 0, 1, 2]. -
Slices from lists can include a step value. The syntax is
list[start : end : step]. When we use a step value, the slice is created by copying elements from start to end, using the step size to advance. All three slice values are optional. If we want to use a step size across the entire list, we can writelist[::step]. -
We can append a single element to a list using the
list.append(elem)method. We can append every element from another list by using thelist.extend(list2)method.
Piano
 We worked a lot with lists in this chapter, and you may have got an understanding how to use lists and what they can do. Here, we have a project called
piano
which shows some other ways to use lists. The project implements a simple piano (which you can play with your keyboard), and in doing so it makes use of lists of strings, actors and sounds.
We worked a lot with lists in this chapter, and you may have got an understanding how to use lists and what they can do. Here, we have a project called
piano
which shows some other ways to use lists. The project implements a simple piano (which you can play with your keyboard), and in doing so it makes use of lists of strings, actors and sounds.
You may like to study this project code to see how this is done.
Breakout
 Breakout is another classic arcade game. (Again, search online for "breakout game" if you are not familiar with it.)
In this version, only the paddle and the ball have been implemented so far. To complete the game, you would have to add the rows of bricks at the top and implement the game logic. Of course, many visual and audio effects can be added.
Chapter 8. Thematic text analysis
In Chapter 5, we had a first look at text analysis. We gathered various statistics about a text, such as the numbers of characters, words and sentences. This then allowed us to calculate a reading ease score. All the analysis in that project, however, was numeric: it looked at the number of words and sentences, but not at the content of the text. It did not matter what the words were, or what the text was about.
In this chapter, we will go a little deeper into analysing a text by looking at the actual words being used. We will see that a very simple idea can give us a reasonable sense of what a text is about: We can find out what words are being used much more than we would expect from an average text, and these frequently used words can give us a hint at the theme of the document.
This approach can also be taken further: We can build on this and use a similar idea not to analyse, but to generate text. This may be used to predict the next word in a sentence, as is sometimes done in phone texting applications, or even to generate entire sentences or documents, as Large Language Models (LLMs) do.
We will leave the text generation to the next chapter, and first concentrate on analysing the content of a document.
In the process of doing this, we will introduce a very useful new data structure: a dictionary. Through the project in this chapter, we will understand what a Python dictionary is and how we can use it.
8.1. Counting words
We can achieve our content analysis in three steps:
-
First, we count how often each word is used in our text.
-
Secondly, we compare the frequency of each word that was used with the frequency we would expect in an average English text.
-
And thirdly, we find the most-overused words – the ones that were used much more than expected – and print them out.
We will take this entire chapter to complete this task; here, we start at the beginning: counting how often each word is used in a text. This is also known as the frequency of the word.
To start this task, we have prepared a starter project named thematic-analysis, which you can find in the Chapter08 folder in the book projects. This project includes only two helper functions which we will use later, but no code to help us with the initial task.
In previous projects, we have seen how useful it is to use functions in our programs to do specific subtasks. So this time, we will start by writing a function to count the frequency of a given words in a text.
Exercise 8.1 Open the thematic-analysis project. In this project, add a new function named count_word with two parameters: count_word (search_word, text). The purpose of this function is to count how often the word search_word appears in the text text. Initially, leave the body empty, but write a comment describing what the function will do.
Exercise 8.2 Start implementing the function: Split the text into a list of words and store this list in a variable named words. If you have trouble doing this, look back at Chapter 5 for details.
Exercise 8.3 Test your code so far. Do this by printing out your words list inside the count_word function, and adding a test call to this function in the My code section. If all went well, your program should print out a list of all words in the second parameter.
Exercise 8.4 Once you have convinced yourself that the word-splitting works, remove the print statement again. Instead, add a loop to count how often search_word appears in your words list. Remember, you can check whether a given word is the search-word by using the double-equal sign:
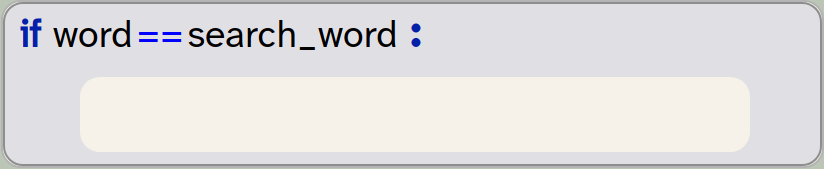
if word == search_word:
    pass
You will need to use a variable to do the counting.
Exercise 8.5 Return the correct count from your function. That is: your function should return the number of times the search word was found (an integer). Adapt your test code accordingly to receive and print out the result.
Exercise 8.6 Your function should now work. Test your function with different data (different search-words and different sentences). Does your function work correctly?
If you have reached this stage in the project, you will have seen that we can now count the frequency of a given word in a text. You may have noticed, however, that some problems remain that can result in incorrect counting. If not, you should be able to see the problem with the following exercises.
Exercise 8.7 Test your function with the search-word "say" and the text "You say Yes I say No You say Stop and I say Go go go". Then test it with the search-word "go" and the same text. What do you observe?
Why does the test work correctly for the word "say", but not for the word "go"? You have probably worked out that this is because of the uppercase character in one of the "Go" occurrences in the text.
For our purposes, we do not care about the upper- or lowercase nature of the words – we would like to count them in any case. We can easily achieve this by first converting our entire text to lowercase before starting our counting:

text = text.lower()The lower() method is a built-in method of the string class that returns a new string with all characters converted to lowercase. Note that it does not modify the original string. Thus, we have to assign the result back to our string if we want to keep it.
Exercise 8.8 Look up the documentation for the string method lower(). (You can do this by doing a web search for "Python string lower".) What will happen with numbers in the string?
Exercise 8.9 Research the methods provided in Python for the string class. How many methods are there? What is the name of the method you could use to check whether a string consists only of a number?
Exercise 8.10 What does the string’s count() method do?
With these exercises, you will have discovered two things: First, there are many useful string methods available which can save us a lot of work of writing code ourselves. Knowing what methods are available is important to becoming a good programmer. You do not need to memorise all methods, but you should have a link to the documentation page readily available when you work, so that you can look them up whenever you need them.
And secondly, we can see that a count method is available that is somewhat similar to the count_word function we are currently writing. The reason we are writing our own is two-fold: The built-in count method does not find words, but substrings. Thus, "car", for example, would also be found if the actual word is "scarlet". Also important is our goal to modify and extend this function to count not one word, but all words (and there is no ready-made method for this). So our counting function is a stepping stone for more powerful functionality.
The Python string class has many ready-made library methods that provide useful functionality. It is useful to be familiar with these methods, and to look them up whenever you need to manipulate strings.
Exercise 8.11 Modify your count_word function so that it converts the text to lowercase before searching. Run your test again. Make sure that the last test case given in the earlier exercise returns 3.
Exercise 8.12 Run another test: Count the occurrences of the word "say" in the string "You say, Yes, I say, No. You say, Stop and I say, Go, go, go"
Again, you may have noticed that your function does not count correctly. This time, it is the punctuation characters that are throwing a spanner in the works. When we split the text, we separate the original string at space characters, but all other characters are left in the words. Thus, our list of words contains the word "say," (including the comma), instead of the word "say".
To fix this, we will need to remove the punctuation characters from each word.
Exercise 8.13 Research the strip() method of Python’s string class. What does it do? What are its parameters?
Exercise 8.14 Consider the statement

word = word.strip(string.punctuation)What does this line do? How does it work? What does string.punctuation refer to? What do you have to import to make this work?
Exercise 8.15 Modify your function to strip punctuation characters from the words before comparing them. Test your function again. Make sure all words are now correctly found, even if the original text includes punctuation.
Exercise 8.16 Your project includes the read_file function that we have used in Chapter 5 to read in a contents of a book. We can use the same files again to test our program. Use the read_file function to read in the book "/books/winnie-the-pooh.txt", then use your count_word function to count how often "piglet" is mentioned in the book.
The project with all the changes made so far is available in the book projects as thematic-analysis-v2. If you are unsure about any of your own code, you can compare your project to this one.
Let us pause for a moment and take stock of what we have achieved so far. We can now count the number of occurrences of a given word in any given text. We do this ignoring the case of the letters. That is a good start. But a major problem remains: We would like to count all the words in a text, not only one given word. We know from previous chapters that we can hold a count in a variable, but the challenge here is that we need a count for each different word in the text.
It is not feasible to create a separate variable for each word. There may be thousands of different words, and we do not know in advance how many variables we would need. A list is also not directly suitable because we need to hold two pieces of information: the word, and its count, together.
The solution to this problem lies in a new data structure: a dictionary. In the next section, we discuss what a dictionary is, how we use it, and how it can help us to solve this problem.
8.2. Dictionaries
A dictionary (or dict, as Python calls this type internally) is a data structure that stores key/value pairs.
Every entry in the dictionary associates a key with a value, and we can look up the value by providing the key. An example is a list of phone numbers for your friends (Figure 8.1).
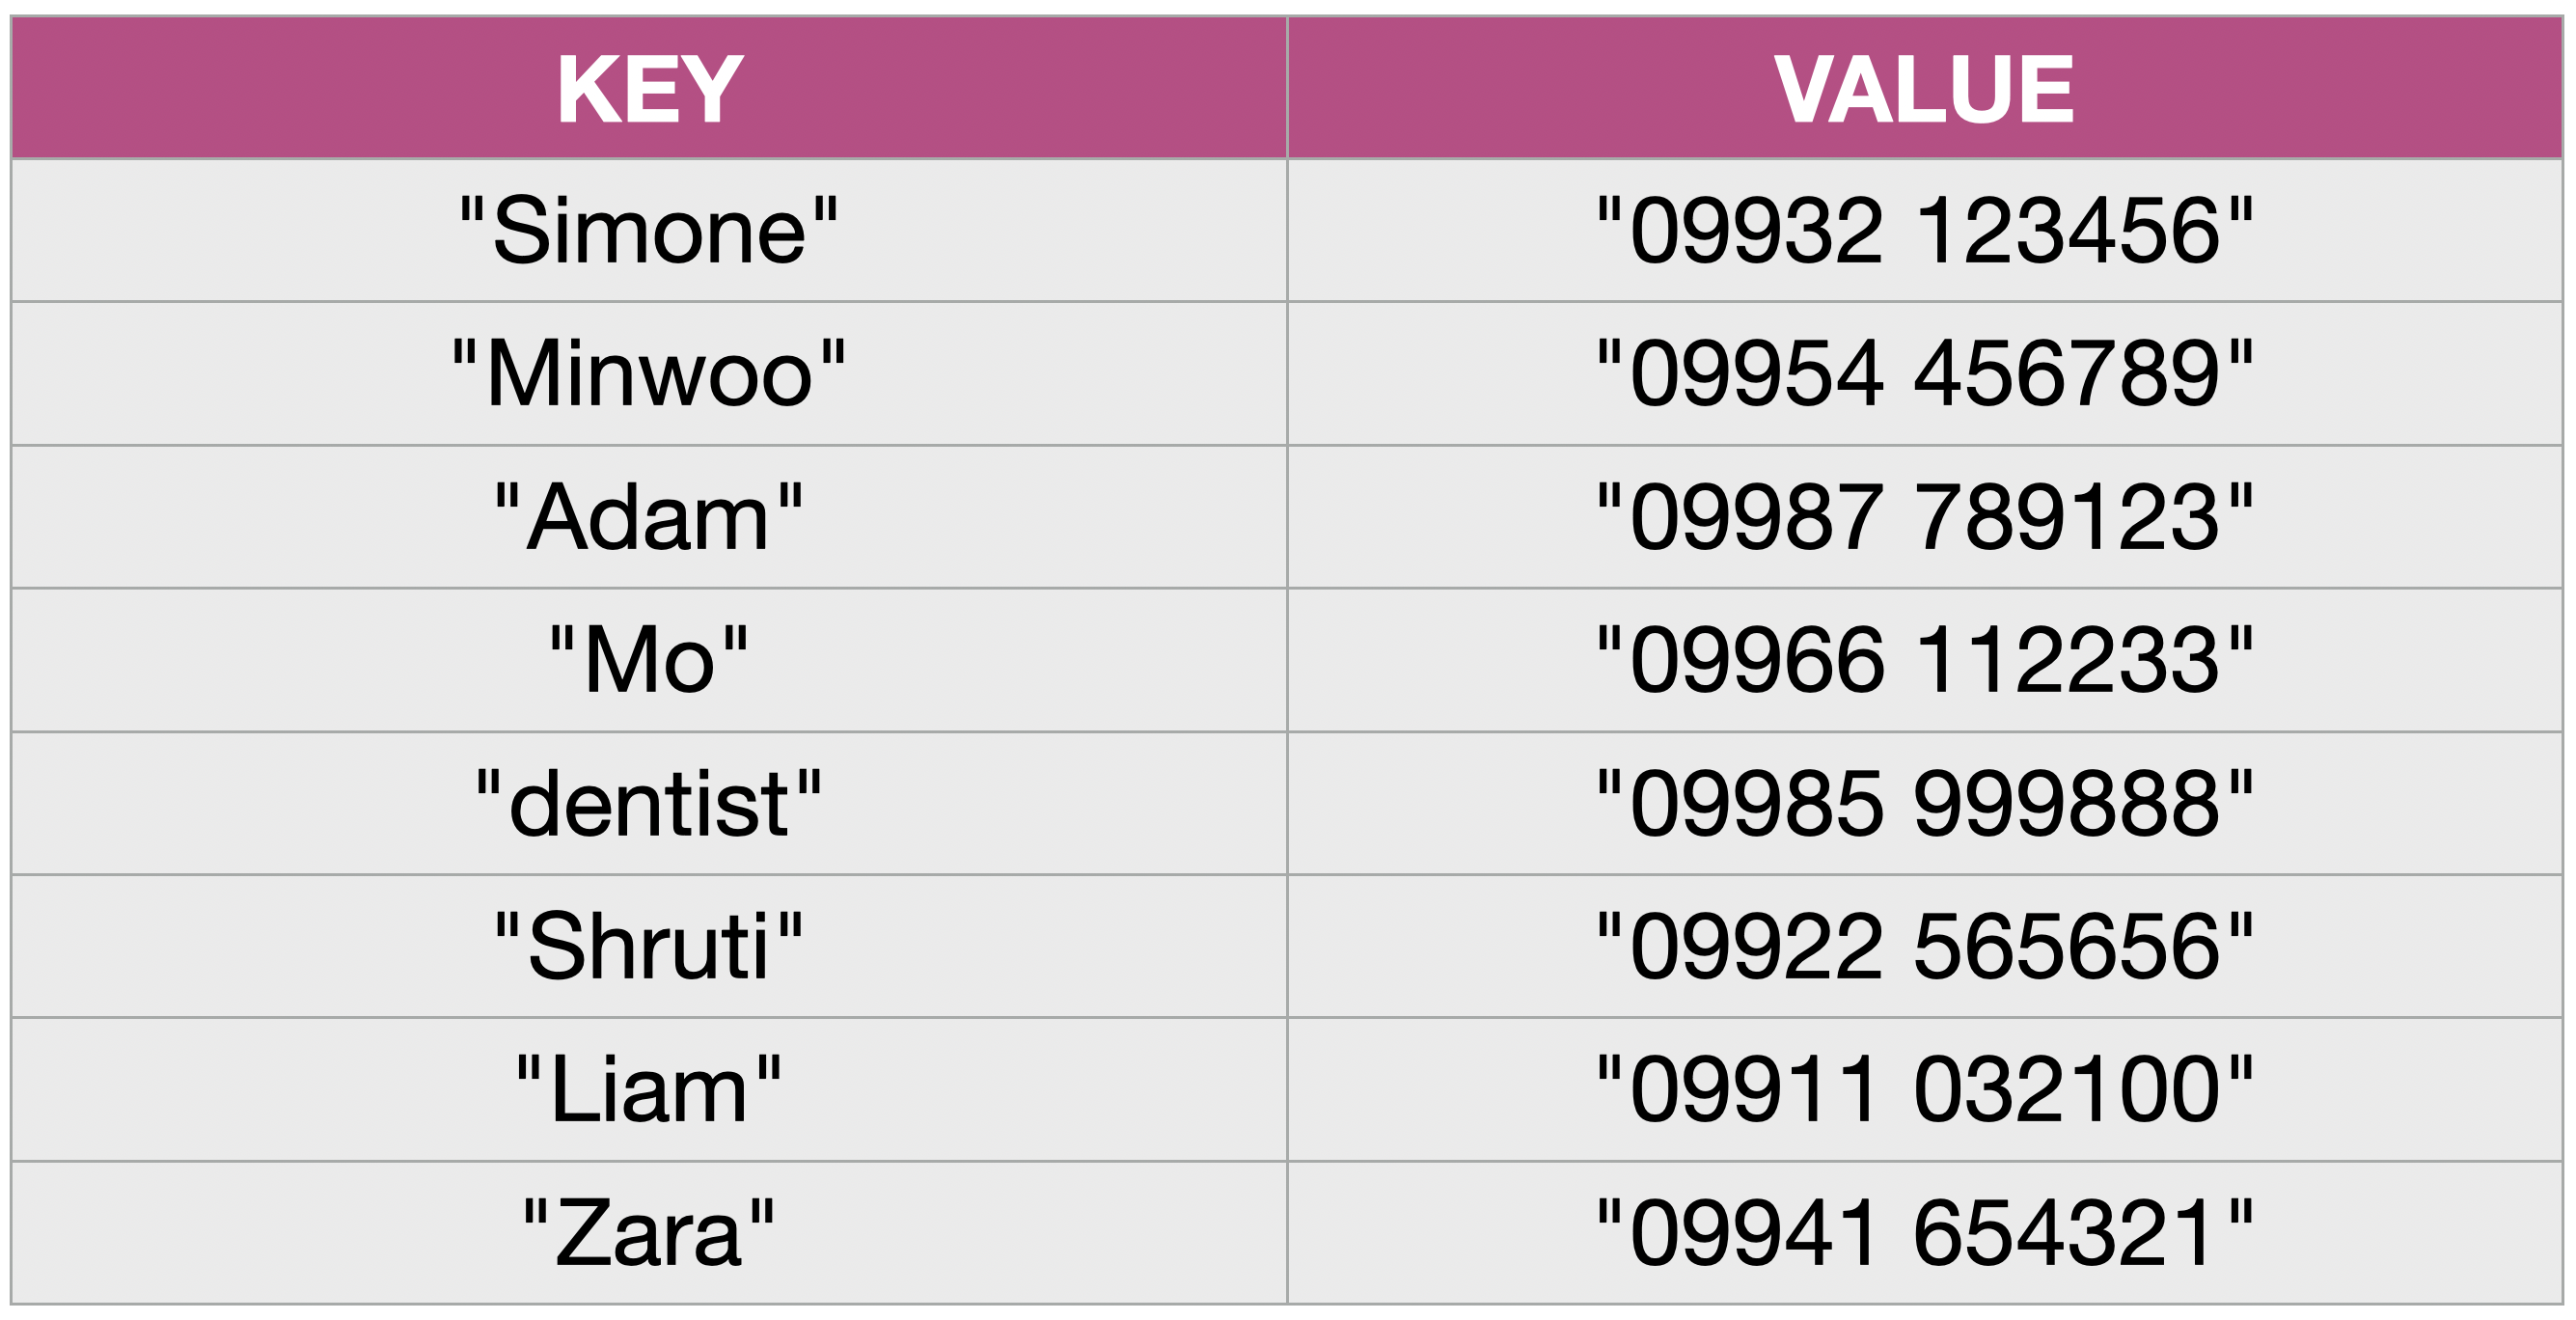
We see that we can think of a dictionary as a table with two columns. The first column holds the keys (here: the names), and the second column holds the values (the phone numbers).
We can then look up the value by providing the key. Let us look at an example how this works. Assume we have the dictionary shown in Figure 8.1 stored in a variable called phonebook. We can then write

number = phonebook["Adam"]
print(number)
This will print Adam’s phone number. We use the key like an index in the dictionary, and we receive the associated value. This makes looking up a particular entry in the dictionary very easy.
We can also add more entries to our dictionary. For example

phonebook["Zola"] = "099777 885557"will add a new entry in the dictionary (a new row in the table) with the phone number for Zola. Again, we see that we use the intended key like an index in square brackets, and we just assign the value to create the entry.
Dictionaries are useful in many situations, and we are familiar with the concept from our daily lives. One important aspect is that they do not only work with strings. Both the key and the entry may be any type we choose.
For example, your contacts app on your phone holds a dictionary that uses the name of a person as a key and the address details as the value. (Here we can see that the value can be more than a single string: it can itself be a complex data type with several types of information). You use it by looking up the name, and it shows you the associated detail (the value).
Another example is a password file on a computer (associating usernames with passwords). Perhaps the most familiar example is an English language dictionary (from which the Python data structure gets its name): The key here is a word, and the value is its definition. We can find a word in the dictionary to look up its definition.
A dictionary is a data structure that holds key/value pairs. We can look up a key to find the associated value.
The last thing we need to know is how to create a dictionary. Python dictionaries are written with curly brackets: { }. Writing the curly brackets on their own creates an empty dictionary:

phonebook = {}We can also create a dictionary pre-filled with some data using a colon to separate keys and values, and a comma to separate the entries:

inventory = {"apples": 5, "oranges": 3, "kiwi": 8} Python dictionaries are written using curly brackets: { }. Writing a pair of curly brackets on their own creates an empty dictionary.
Before we go on to use a dictionary in our word counting function, let us do some simple exercises to become more familiar with dictionaries.
Exercise 8.17 Close your current project for the moment and create a new project for these exercises. In your new project, create a variable names phonebook and assign to it an empty dictionary. Print this variable to the console. What is the output?
Exercise 8.18 Add to the phonebook three entries with names and phone numbers of three of your friends or family. Print the phonebook again. What does the output look like?
Exercise 8.19 What does the len function return when you use it to check the length of your phonebook?
Exercise 8.20 What happens when you add an entry with a key that already exists? Experiment with this and then describe what happens.
Exercise 8.21 What happens when you add an entry with a value that already exists? Try this out.
Exercise 8.22 What happens when you try to look up a key that does not exist in the dictionary?
Exercise 8.23 What is the output of the following code:
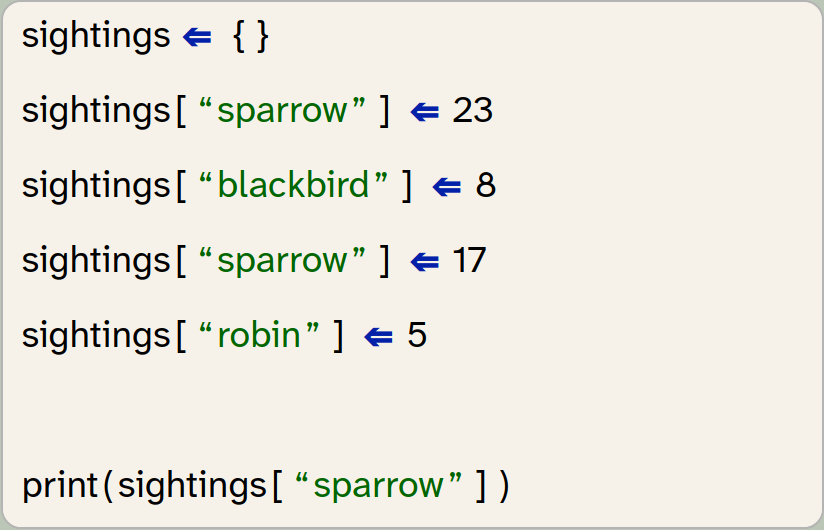
sightings = {}
sightings["sparrow"] = 23
sightings["blackbird"] = 8
sightings["sparrow"] = 17
sightings["robin"] = 5

print(sightings["sparrow"])
Exercise 8.24 With the same code as in the previous exercise, what is printed by the following line:

print(len(sightings))Exercise 8.25 How do you remove an entry from a dictionary? Do some research to find the answer.
A key in a dictionary is unique, but values can appear repeatedly. Inserting an entry with a key that already exists replaces the existing entry.
8.3. A dictionary of word counts
Let us now get back to the word counting problem in our thematic-analysis project. We were at the point where we could count the frequency of a single word, and we need to figure out how to count the frequencies of all words. As we have stated above, a dictionary can help with this.
The idea is that we use a dictionary – let’s call it counts – with an entry for each word. We can use the word itself as a key, and use the value for the count (the number of times we have found the word).
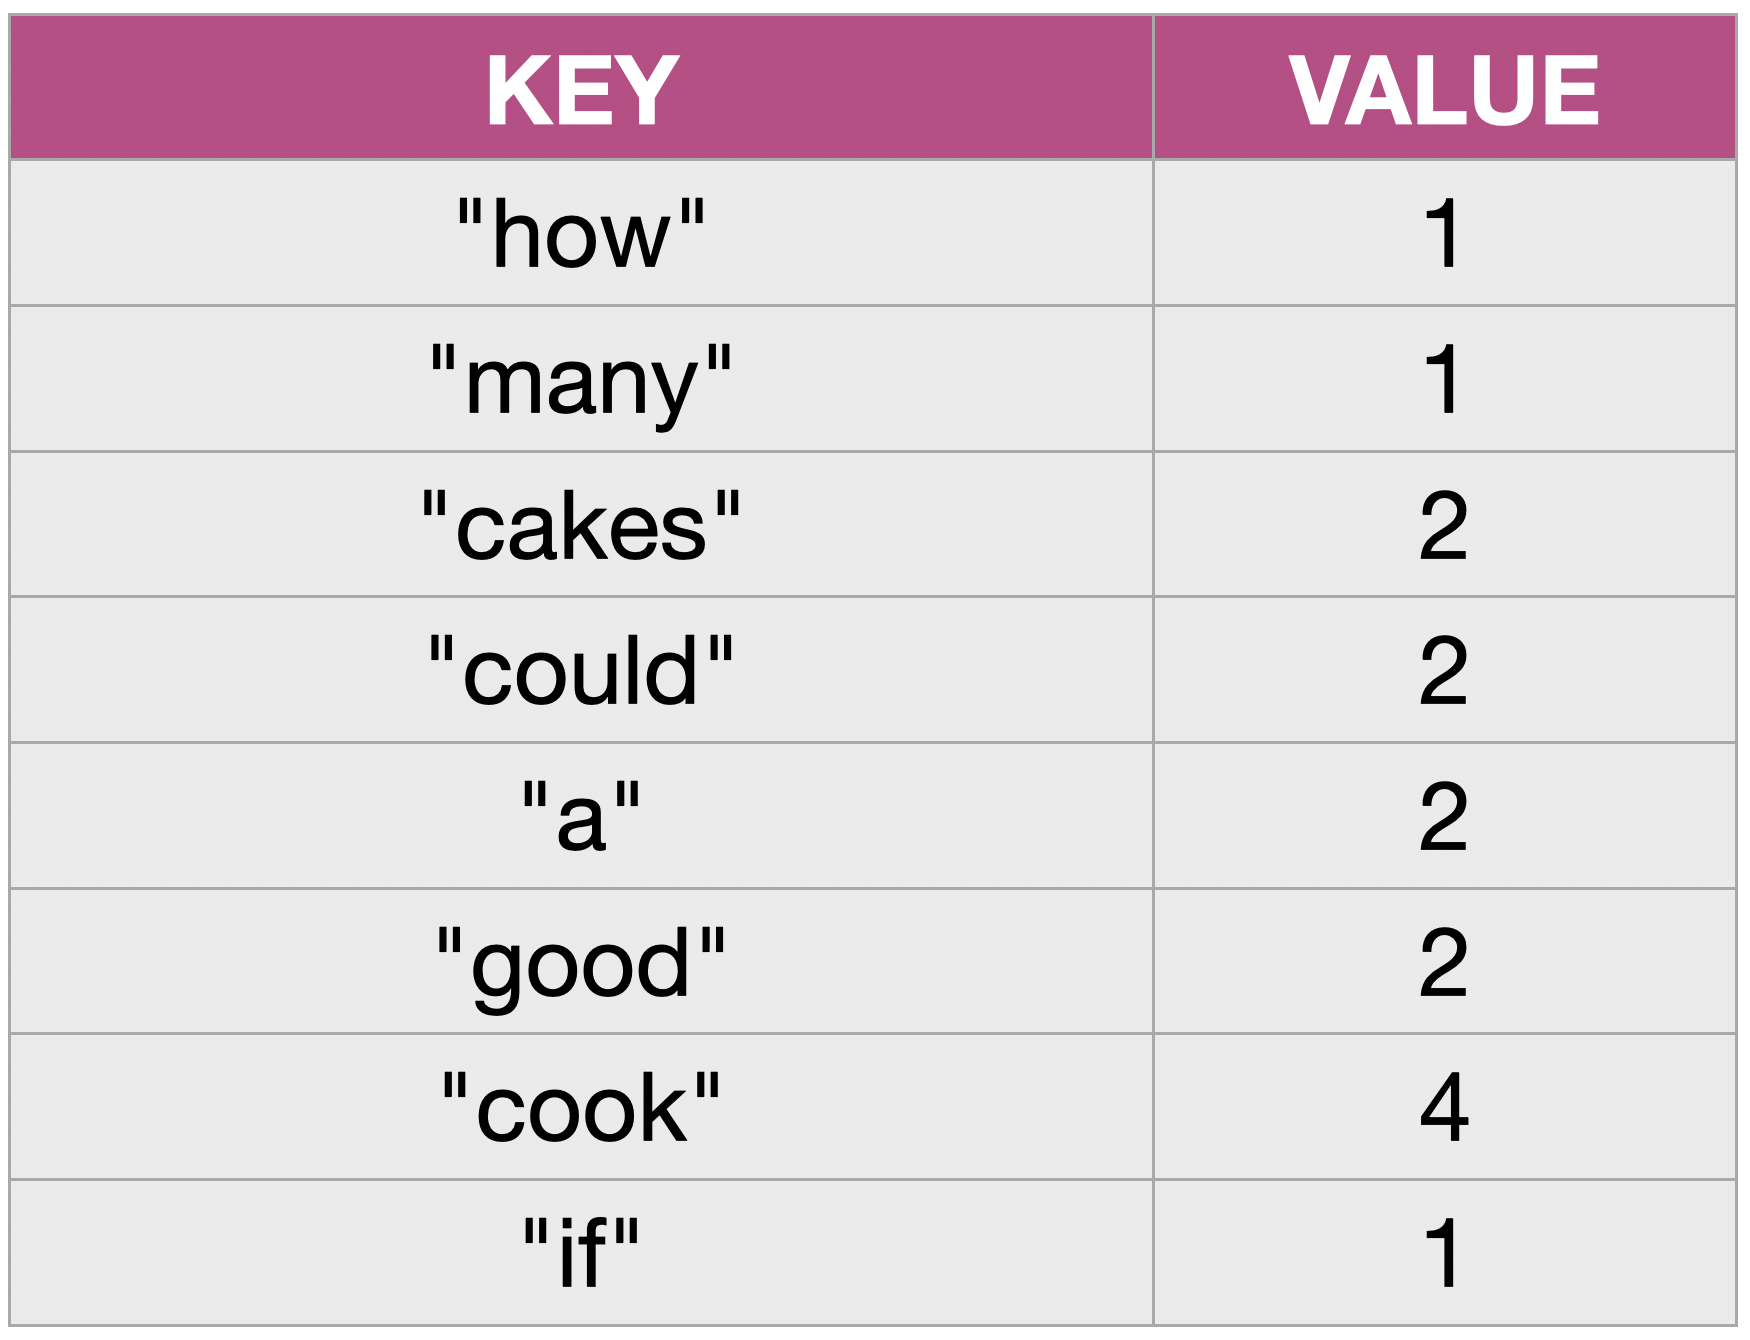
For example, a word count of the words in the sentence
"How many cakes could a good cook cook if a good cook could cook cakes?"
would result in the dictionary shown in Figure 8.2.
In other words: we will create a dictionary with one entry for every unique word in our text, where the value holds the number of times each word was used.
It is useful to remind ourselves that this dictionary – if we do a word count for a whole book – will hold thousands of entries. This, however, is not a problem: computers are good at dealing with large amounts of data.
The algorithm we will use can be informally described as follows:
You can modify your existing program to implement the algorithm described above by working step by step through the following exercises.
Exercise 8.26 We no longer wish to search for a single word, but count all words. Therefore, rename the count_word function to count_words and remove the first parameter (search_word).
Exercise 8.27 We leave the first two lines of the function intact (the conversion to lowercase and creating a list of words in the text). We change the next line: instead of creating an integer variable count, we now create an empty dictionary called counts.
Exercise 8.28 We can leave the loop that iterates over all words in the text. We can also leave the code that strips the punctuation from the word.
Exercise 8.29 We need to change our if-statement to do what the algorithm description above indicates: We need to check whether the word is already in our dictionary. We can do this using the in operator to check:
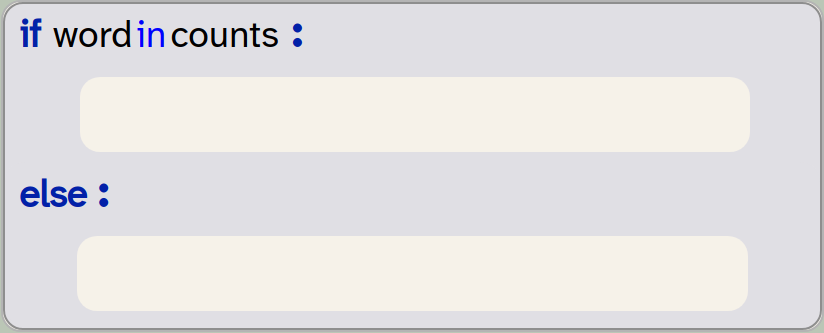
if word in counts:
    pass
else:
    pass
Exercise 8.30 We need to fill in the if-part of the if-statement: In this case, we need to increment the existing count for the word. We do this by reading the value for the word, adding 1, and writing it back into the dictionary:

counts[word] = counts[word] + 1Exercise 8.31 We then fill the else part with code to create a new entry for the word, with the value 1.
Exercise 8.32 At the end of the function, we now need to return the dictionary counts.
Exercise 8.33 Do not forget the comment: Modify the function comment to describe what your function now does.
Exercise 8.34 Test your function by modifying the code that calls it in the "My code" section. First, use a short test sentence, and print out the resulting word count dictionary.
Exercise 8.35 Now test the function on a whole book. Use, for example, the "/books/winnie-the-pooh.txt" file to count all the words in that book. Print out the dictionary.
A version of the project that implements these changes is available fo you to study in the project folder as thematic-analysis-v3.
We can check whether a given key is present in a dictionary by using the in operator, like this: if key in dict. The in operator will return True or False.
Exercise 8.36 Look up what methods are available for Python’s dictionary class. What is the name of the method that returns a list of the keys in a dictionary? What is the name of the method returning only the values? What is the name of the methods that lets you delete an entry with a given key?
8.4. Iterating over dictionaries
We have seen that printing out the dictionary using a simple print call works, but the output is not very readable. The list of word counts is very long, and the formatting is not very readable. Let us improve this by implementing a custom printing function for our word count table.
Exercise 8.37 Create a new function called print_dict(dict) in your program. Its purpose is to print out a dictionary in a nicer layout. Write an appropriate function comment.
Exercise 8.38 In the body of this function, have a first try at printing out the dictionary entries. Test your function.
A first attempt at printing out the entries in our dictionary might involve printing each entry on a separate line:
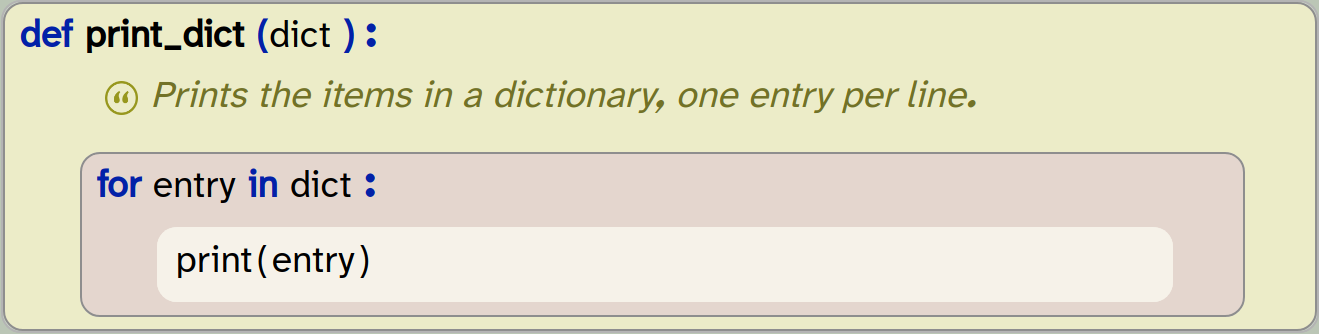
def print_dict(dict):
    '''Prints the items in a dictionary, one entry per line.'''
    for entry in dict:
        print(entry)
Exercise 8.39 Implement and test the print_dict version above. What do you observe?
With the above exercise, we can see that this version prints out the words in the dictionary, but not the counts. In other words: it prints the keys, but not the values of the dictionary.
How does this happen? Let us step back and take another look at the methods from the dictionary class that allow us to access its entries. There are three methods that give us lists of the dictionary contents:
| Method | Description |
|---|---|
|
Returns a list containing the dictionary’s keys |
|
Returns a list containing the dictionary’s values |
|
Returns a list of tuples of the dictionary entries, where every tuple contains a |
The first two of these show us that we can get a list containing just the keys or the values. This means that we could print out either the keys or the values, line by line, using these two loops:
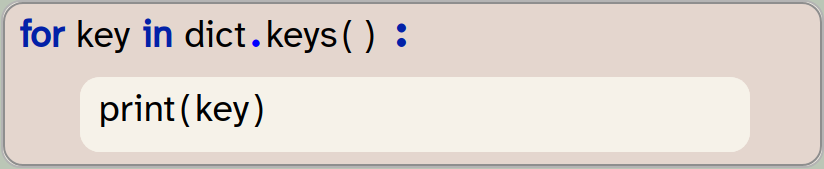
for key in dict.keys():
    print(key)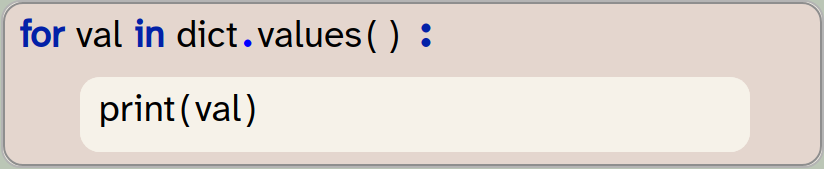
for val in dict.values():
    print(val)
Try this out. What we observed with the last exercise above is the following: If we just iterate over dict, without stating whether we want to get the keys or the values, we will get the keys by default.
Let us look at the third method: items(). This method states that it returns a tuple with the key and value. A tuple is another of Python’s collection types. It can hold multiple arbitrary data items to group them together. We will discuss tuples in more detail in the next chapter; for now it is sufficient to know that it consists of multiple data items and is written using round brackets:
( "Let It Be", "The Beatles", 1970 )
When we think about our dictionary, we can view a dictionary as a list of tuples. The first two entries of the dictionary shown in Figure 8.2, for example, can be regarded as two tuples:
( "how", 1 )
( "many", 1 )
Let us now try to use the items() method in our loop:
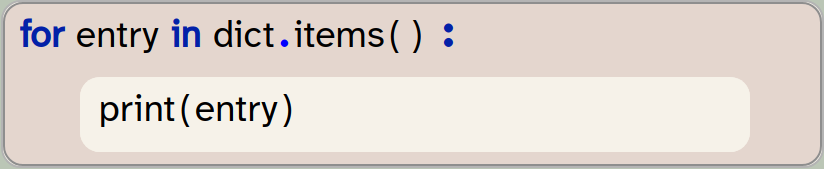
for entry in dict.items():
    print(entry)
Try this out. You will see that this loop prints each entry of the dictionary as a tuple.
Exercise 8.40 Implement and test the loop using the items() method.
This is, so far, the most useful method for us: it allows us to get the full data (key and value), and print them out line by line. But we can get even more control using an additional feature of the for-loop.
If we use a Python for-loop to iterate over a collection, and the item type of the collection is a tuple, then the loop can contain multiple loop variables:
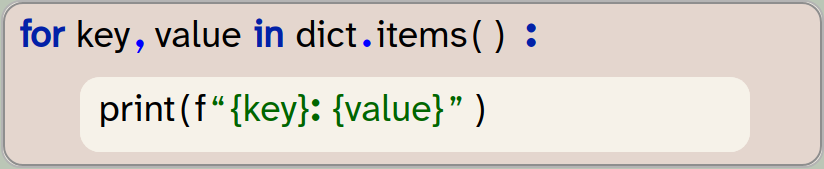
for key, value in dict.items():
    print(f"{key}: {value}")
The rules for this type of for-loop are quite straight forward:
-
The loop can provide a comma-separated list of loop variables.
-
Each item of the collection we iterate over must itself be a collection.
-
The number of loop variables must match the number of data items in each collection item. (In our case: Since each tuple in
dict.items()holds two pieces of data, we need exactly two loop variables.) -
The individual data items of each collection entry will be assigned to the loop variables for each iteration.
We can iterate over the entries in a dictionary by using the dict.items() method to get a list of all entries.
A for-loop can have multiple loop variables. In that case, the collection it iterates over must itself hold collections (tuples, sets or lists) of a matching length.
Using this variant of the for-loop allows us to get access to each key and value individually, and we are free to format the output ourselves. In the code example above, we have done this using an f-string.
Exercise 8.41 Implement this latest version of the for-loop. Test it with one of the full book texts as input.
Our output is now more nicely formatted. It is, however, still very long, and identifying frequently used words is still tricky. Change this by doing the following exercises.
Exercise 8.42 Change your print_dict function so that it prints out entries only if the word count is greater than 30.
The list is now much shorter, but it still contains a lot of very common words, such as "a", "to" and "the" – words that do not tell us much about what the text is concerned with. Let’s do a first attempt at identifying interesting words by dropping all short words.
Exercise 8.43 Modify your print_dict function so that words shorter than five characters are ignored.
We can see that we are getting a bit closer. If you run this version of your program on one of the book texts provided, you can see that a list of words slowly emerges that may characterise the book. But the rules we have used to select the words (filtering by a word count that is more than a fixed value, and by length of the word) are not really good enough.
What we need to do instead is not look at the absolute frequency of a word (the number of times it appeared), but look for words that appear more often than they would in a typical English text. The word "the", for example, may appear very often, but it does so in all English writing, so this does not make it an especially interesting word.
This will be our goal in the next section: We will use existing statistics about expected frequencies of words in the English language to identify "over-used" words in our text: words that are used more often in this text than they are used in average English texts.
8.5. Over-used words
In our project, we have provided a helper function called get_expected_frequencies(). This function returns a dictionary that lists the expected frequencies for the most common words in an average English language text. (It uses a dictionary of about 64,000 words.)
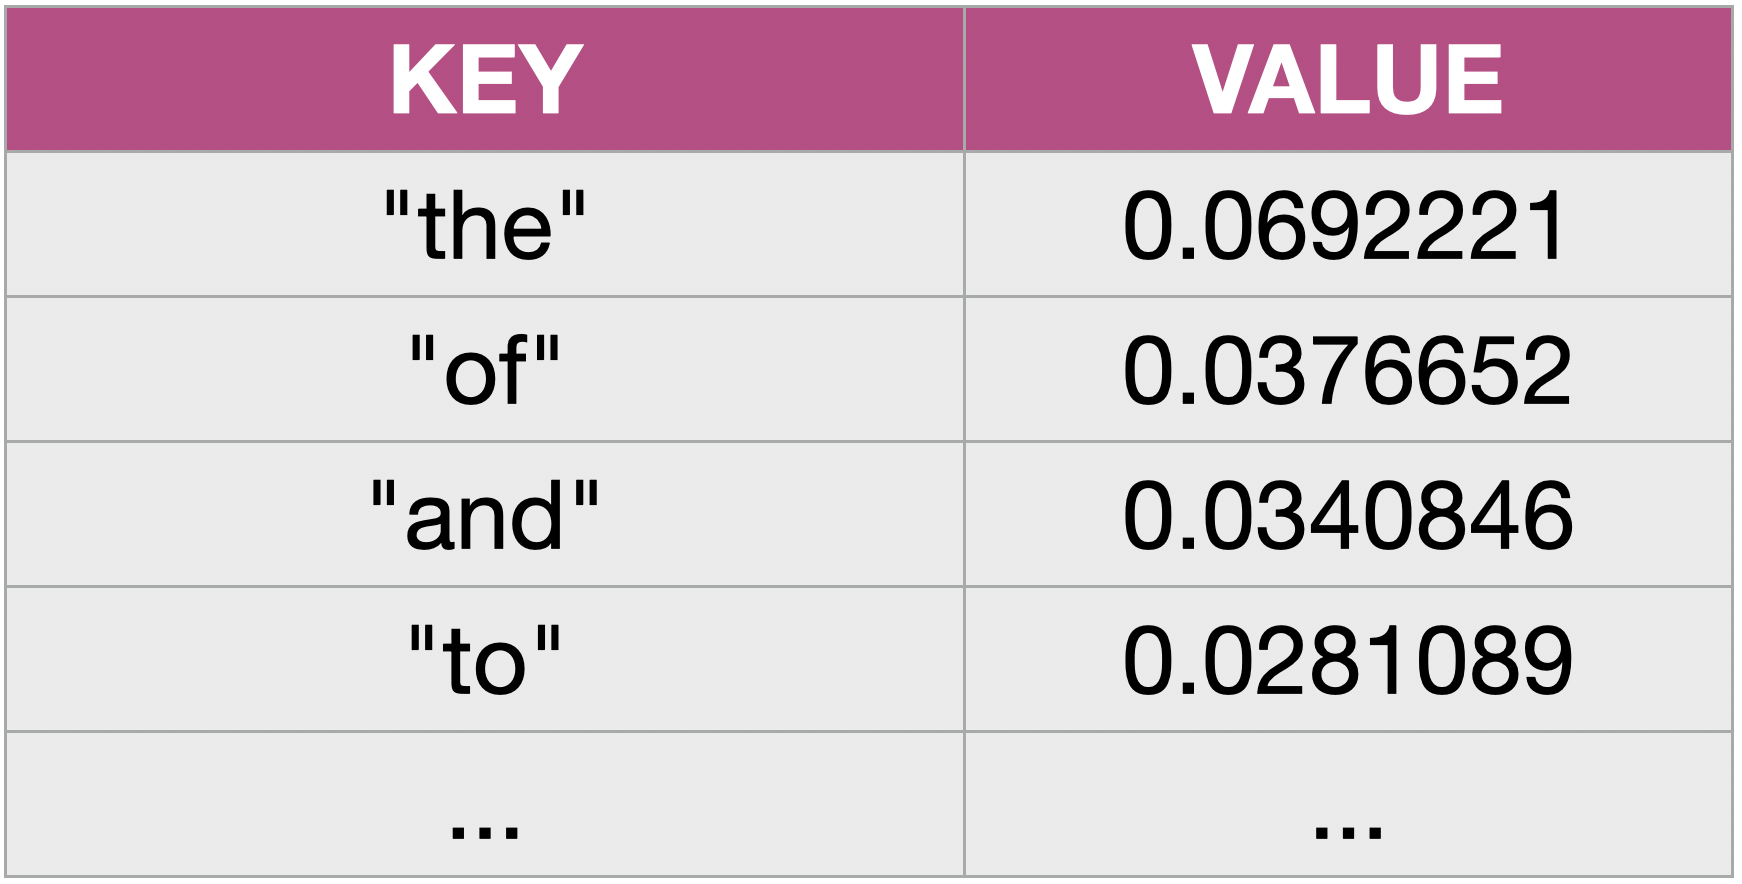
The dictionary has a word as its key, and the expected frequency as its value (Figure 8.3). The frequency is the ratio of occurrences of the word relative to the length of the text. It can be computed by dividing the word count by the total number of words in a text:

Using this formula, we can easily calculate the frequency of each word in the text we wish to analyse and then compare it to the expected frequency. Those words that are used far more often than expected are the "interesting words" – the words that might give us a clue to what the text is about.
Let us go ahead and implement this idea. We will identify the frequent words, which we define as words with a frequency that is at least 10 times the expected frequency and which were used at least 10 times.
Exercise 8.44 Add a new function called get_overused_words that takes three parameters: an observed_counts dictionary of word counts in the text under investigation, the total number of words in our text (total_words), and an frequencies dictionary of word frequencies in the English language:

def get_overused_words(observed_counts, text_length, frequencies):
    pass
Add an appropriate comment.
Exercise 8.45 Add a loop inside the function that iterates over the entries in the observed word list. We can use the pattern with two loop variables, as discussed above:

for word, count in observed_counts.items():
    pass
Exercise 8.46 Inside the loop, add an if statement that checks if the word is in the frequencies dictionary. If it is, compute the actual frequency of the word in the text (count / total_words) and store it in a variable.
Exercise 8.47 At the beginning of your function, create an empty dictionary called frequent. This will be used to collect the frequent words and their word counts. Inside the loop, add each word to this dictionary if it is used at least 10 times, and if its frequency is at least 10 times the expected frequency. At the end of your function, return this dictionary.
Exercise 8.48 In the "My code" section, add code to call and test this function. To do this, you will need to calculate the total number of words on your text. You can do this easily as follows:

total_words = len(text.split())Print out the dictionary of frequent words.
With the code so far, we can print out the dictionary of frequent words. We have, however, no direct control over the exact number of words we will receive. This will depend on the length of the actual text and the words within it.
Let us make one last improvement to specify exactly how many words we wish to see. To do this, we will sort the frequent words by their word count, and then select the top words from this list.
We can do this by making good use of Python’s built-in sorted function:

frequent_words = sorted(frequent, key=frequent.get, reverse=True)We can add this statement to our get_overused_words function to create a list of the frequent words, sorted by their word count.
This is quite an advanced use of this function, so let us investigate that line in some detail.
-
We use the built-in
sortedfunction. This function takes a list and returns a sorted copy of that list. (It is important to note that it does not sort the original list, but returns a sorted copy.) -
We pass a dictionary to this function, which expects a list. If this function receives a dictionary, it will sort just the keys from the dictionary.
-
The
sortedfunction allows us to specify akeyas a parameter. The key is a function that is used to sort the list. Here, we usefrequent.getas the key; this is the dictionary method that returns the value from the dictionary, thus the keys will be sorted by their associated value. -
We set the
reverseparameter toTrueto sort the list in descending order, with the highest values first.
The sorted function returns a sorted copy of a list. It has optional parameters to specify a sort function and the sort order.
After doing this, we can use a slice to take the first few elements. For example

frequent_words[:12]will give us the 12 most frequent words. We can then return this list from our function.
Exercise 8.49 Make the changes discussed here to your code. Add another parameter to your get_overused_words function to specify how many words you wish to receive. Note that the function now returns a list, not a dictionary! You will need to modify your test code accordingly.
Exercise 8.50 Format the output of your program nicely, so that it prints the title of the book you are evaluating (or the name of the file), and then the most over-used words as identified by your function.
In making these changes, it is likely that you ran into a number of errors. This is to be expected. We have made many changes, and we will always make errors along the way. It is not the goal to write our code error-free at the first attempt, but to get to know Python well enough that we can identify and fix any errors that occur. Remember, you can refer to Appendix C: Dealing with Errors to get some more information about errors and error messages.
Exercise 8.51 Try your code on the other books provided in Strype’s "/books" folder. (They include, for example, "/books/three-men-in-a-boat.txt" and "/books/war-and-peace.txt". See strype.org/doc/filesystem for a complete list). Also try some text you have written yourself, such as a story or essay (we explained how to do this in Chapter 5).
Once you manage to complete these tasks, you will see that you can now get a vague impression what a book is about. You can see that War and Peace is about a prince, a princess, an emperor and Napoleon, or that Three Men in a Boat is about a boat, a picture, locks and rowing.
A version of this project that includes all the changes discussed here is available as thematic-analysis-v4; you may like to compare your own version to this one.
8.6. Summary
In this chapter, we have learned how to use dictionaries to achieve more advanced functionality.
Dictionaries are perhaps a little more unusual than lists, but they are equally useful. To become a good programmer, it is important to become familiar with dictionaries, and fluent in using them. They should be one tool in your standard toolbox, so that you can use them whenever they can help to solve a problem. You will see that they come in handy more often than you initially expect.
-
The Python string class has many ready-made library methods that provide useful functionality. It is useful to be familiar with these methods, and to look them up whenever you need to manipulate strings.
-
A dictionary is a data structure that holds key/value pairs. We can look up a key to find the associated value.
-
Python dictionaries are written using curly brackets:
{ }. Writing a pair of curly brackets on their own creates an empty dictionary. -
A key in a dictionary is unique, but values can appear repeatedly. Inserting an entry with a key that already exists replaces the existing entry.
-
We can check whether a given key is present in a dictionary by using the in operator, like this:
if key in dict. The in operator will return True or False. -
We can iterate over the entries in a dictionary by using the
dict.items()method to get a list of all entries. -
A for-loop can have multiple loop variables. In that case, the collection it iterates over must itself hold collections (tuples, sets or lists) of a matching length.
-
The
sortedfunction returns a sorted copy of a list. It has optional parameters to specify a sort function and the sort order.
Top 10 songs
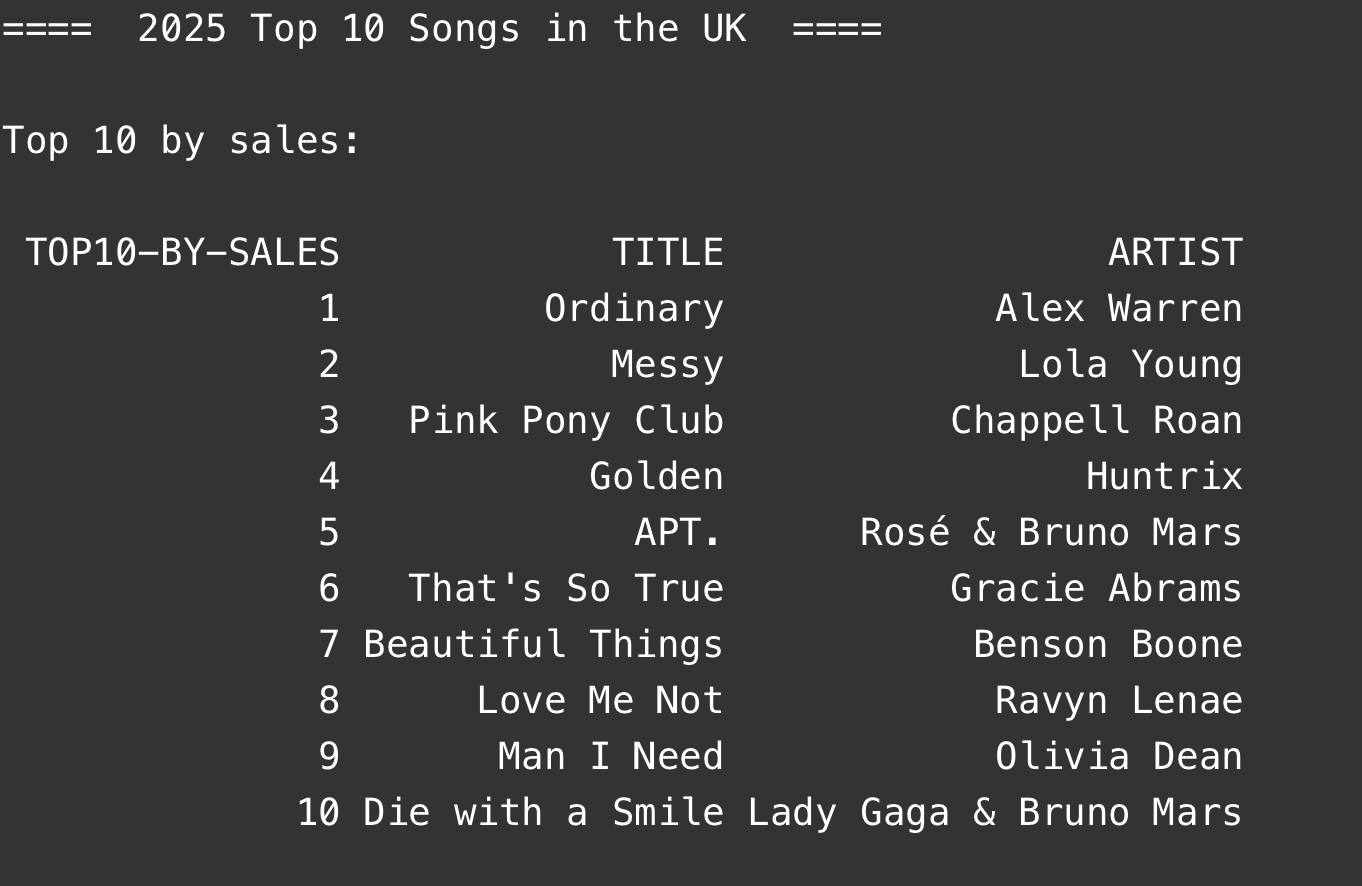 We have now seen – in this and the previous chapters – how we can analyse some data. In the case of the initial text analysis (chapter 5) and the analysis in this chapter, the data source was English text. In the case of the temperature data (chapter 6), the data were numbers, but the data was also read from a plain text file.
In real life, data is often stored in specific formats, and one of the most common is a file of comma-separated-values (in a file with a .csv suffix). Python has powerful libraries to read and analyse those files. This project, top-10-songs, shows how to use the pandas library to read and analyse such a file. And all without writing a single loop! If you are interested in more sophisticated data analysis, it is worth getting to know this library.
If you would like to research this further, you may also be interested to look at the (much more sophisticated) "renewables" project shown in Chapter 12.
Chapter 9. Collection classes – a summary
This chapter is different in nature to the previous chapters in this book. We will not present a programming project for you to work through – instead, we will summarise and discuss a topic which we have mentioned previously, but not discussed in detail: collection classes.
We have seen that Python provides built-in classes for collections of data, and we have seen that these classes are very useful for our projects. The two collections we have used to far are lists and dictionaries. We have also briefly mentioned a third class: a tuple. Python has, in fact, another important built-in collection which we have not yet mentioned: a set.
In this chapter, we will investigate the characteristics and differences of these collections, so that we can make an informed choice when we need to use one of them in our future projects.
9.1. The four collections
Python has four main built-in collection classes that every programmer should know: list, set, dict and tuple. (There are other collection classes, but these four are the most important ones.) All of these serve to collect several items of data into a single grouping, which we can then store in a single variable. They differ in their characteristics and their uses .
All of these classes have methods that allow us to perform useful operations on them.
Let us have a quick look at each of these four classes before we describe them in more detail.
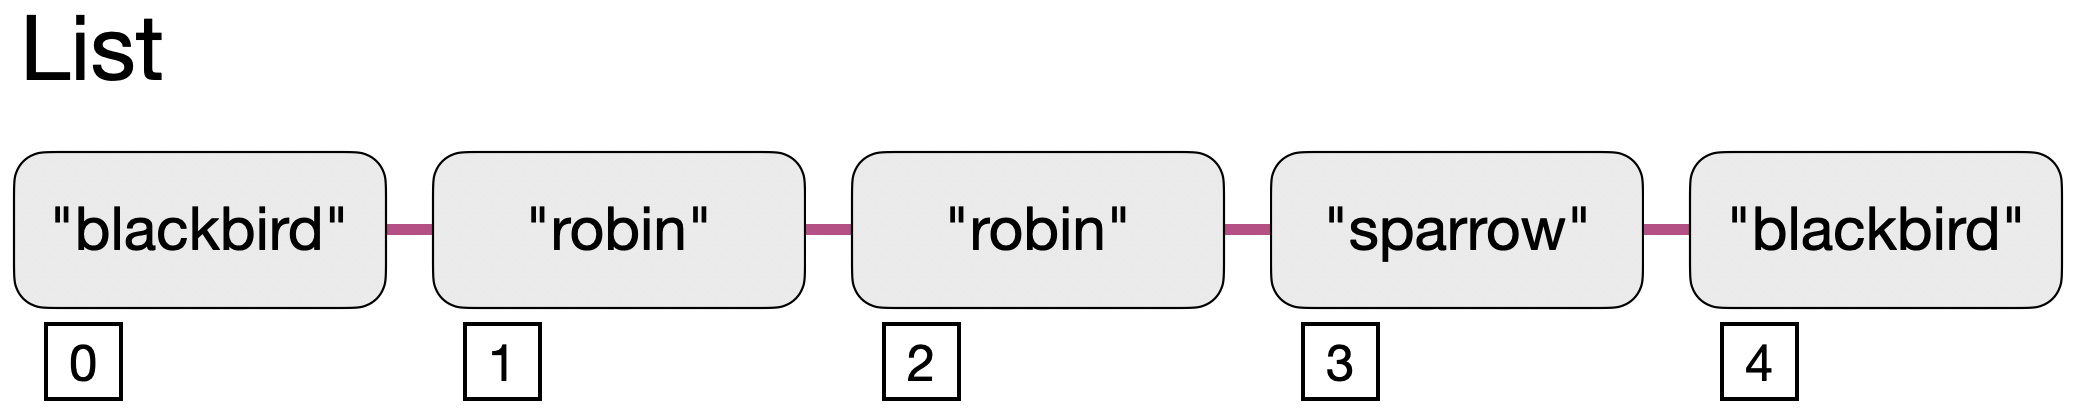
A list is an ordered collection of flexible length. Elements are accessed by index.
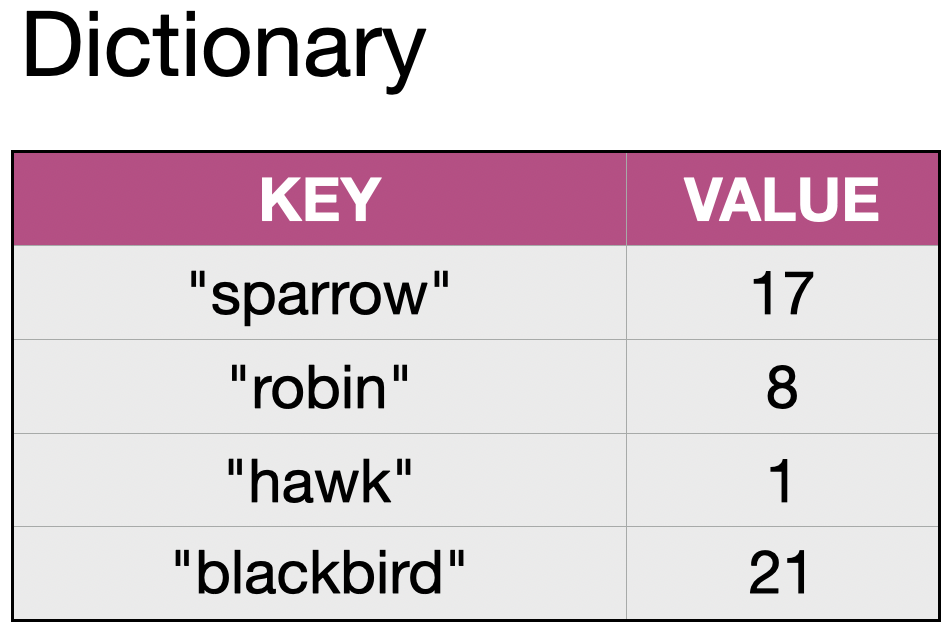
A dictionary (also known as dict) holds entries of key/value pairs. We can look up the value by providing the key.
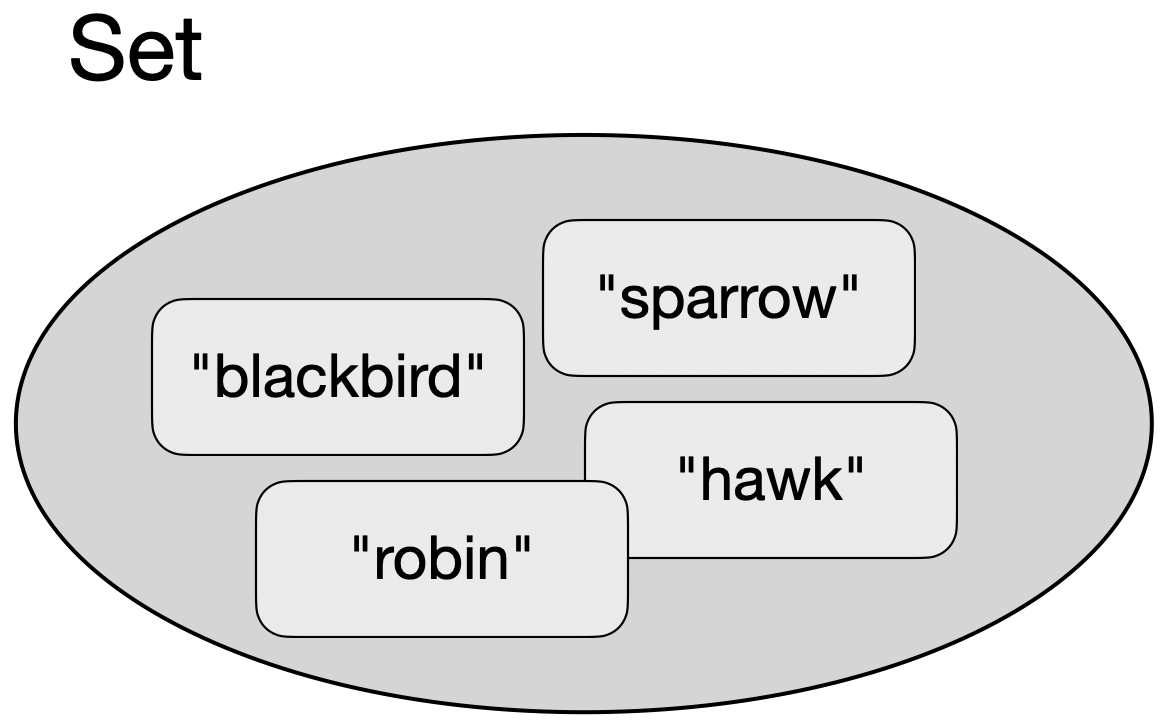
A set holds an unordered collection of its elements. Each element can occur only once.
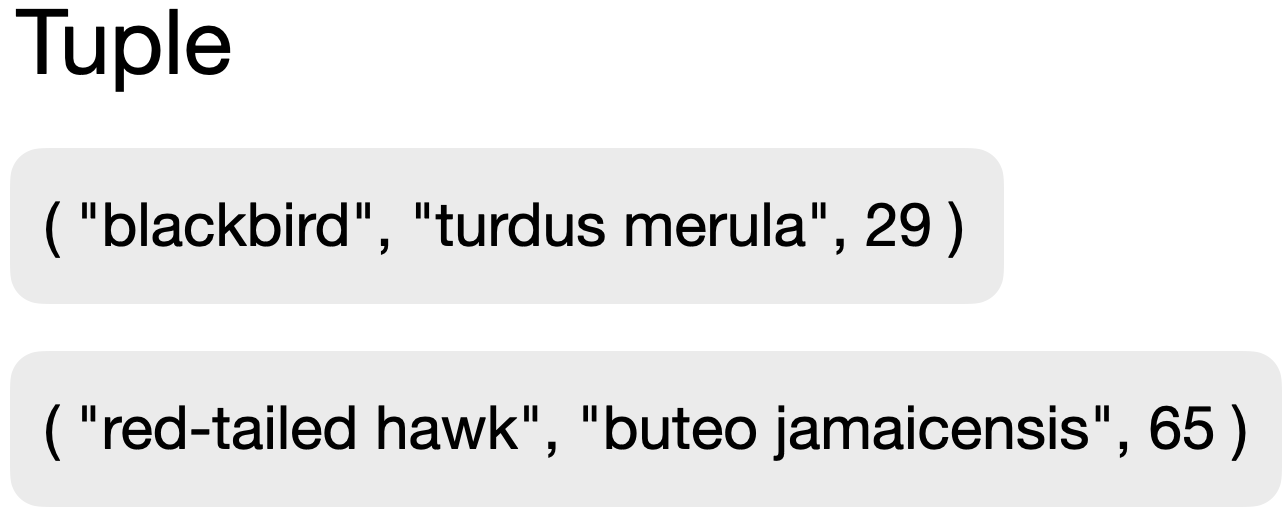
A tuple is a fixed, unchangeable grouping of several items of data into single item.
Below, we describe each of these classes and their characteristics and uses in more detail.
9.2. List
We have used the list class a few times in this book, and you hopefully have quite a good understanding already of what a list is and how it works.
We can represent a list graphically as a sequence of elements:
Syntax
In Python, lists are written using square brackets:

sightings = [ "blackbird", "robin", "robin", "sparrow", "blackbird" ]An empty list is created by using the square brackets on their own:

empty = [ ]We can access individual list elements using their index:

element = sightings[2]List elements can be replaced. The following code will replace the second sighting with a different one:

sightings[1] = "hawk"Example
Assume we are programming a bird watching app, and we would like to record sightings of birds on a given day. The diagram above shows how each individual sighting can be appended to a list. With each new sighting, we could append a new entry at the end of the list (using its append() method), and the list would keep a record of all the sightings of the day.
Since the length of the list is flexible, we can record any number of sightings, and the order of the sightings would be maintained (we could later retrieve the information in which order we saw each bird).
The list class also allows us to insert elements at arbitrary positions in the middle of the list, delete individual elements, or access elements by index.
We can iterate over the list to receive the elements one by one, in the order in which they are stored.
While lists allow elements of different types to be mixed – we could, for example, have a list where some elements are strings and some are integers – this is rarely useful. Most of the time, we use lists where all elements are of the same type.
Characteristics
A list has the following characteristics:
|
Maintains the order of elements as they were inserted. |
|
Elements can appear multiple times. |
|
The size of the list can grow and shrink as needed. |
|
Elements can be replaced. |
Methods
To find details of the following methods, look them up online. Each of these methods may have required and optional parameters.
| Method name | Description |
|---|---|
|
Add an element to the end of the list. |
|
Remove all elements from the list. |
|
Return a copy of this list. |
|
Return the number of elements with a specific value. |
|
Add multiple elements from another collection to the end of this list. |
|
Find the index of an element with a specific value. |
|
Insert an element at a specific position. |
|
Remove and return the element at a specific position. |
|
Remove an element with a specific value. |
|
Reverse the order of the elements in the list. |
|
Sort the elements in this list. |
A list is an ordered collection of flexible length. It allows duplicates, and elements may be replaced.
9.3. Dictionary
A dictionary is a mapping from a key to a value. We can think of it as a table with two columns. Each entry in the dictionary is a new row. We can then look up entries by providing the key and receiving the associated value.
Syntax
Internally, Python calls the dictionary class "dict". Dictionaries are written using curly brackets and colon-separated key: value pairs.

sightings = { "sparrow": 17, "robin": 8, "hawk": 1, "blackbird": 21}The statement above creates a dictionary with four entries, where each entry is a key:value pair.
An empty dictionary is created by using the curly brackets on their own:

empty = { }To access elements, we can use the get method with the key as a parameter, and the dictionary will return the associated value. For example:

number = sightings.get("robin")
print(number)
This will print the number 8 (assuming we have a dictionary as shown above.)
An alternative syntax allows us to use square brackets instead of the get method:

number = sightings["robin"]This achieves a similar result. In general, however, the get method should be preferred: If the key used in the get call is not present in the dictionary, it will return None. We can then check the result to see whether we did receive a value. If we do the same with the square bracket syntax (look up a non-existent key), this causes an immediate error, and we do not get the opportunity to check the result. Therefore, the square bracket syntax can only be used if we are certain that the entry exists.
Example
In our bird watching app, we might not be interested in the exact order in which we sighted each bird, but only in the number of each type of bird we have seen. In this case, a dictionary is an ideal collection to use. The example above illustrates how we can create a dictionary that uses the name of the bird species as a key and uses the value to store the number of sightings for that kind of bird.
When we later wish to add a sighting to our data, we need to carefully distinguish the case where we already have an entry for the bird species from the one where the bird does not yet exist. If the species is not in the dictionary, we will add a new entry. If it exists already, we need to read the current value, increment it by one, and write it back:
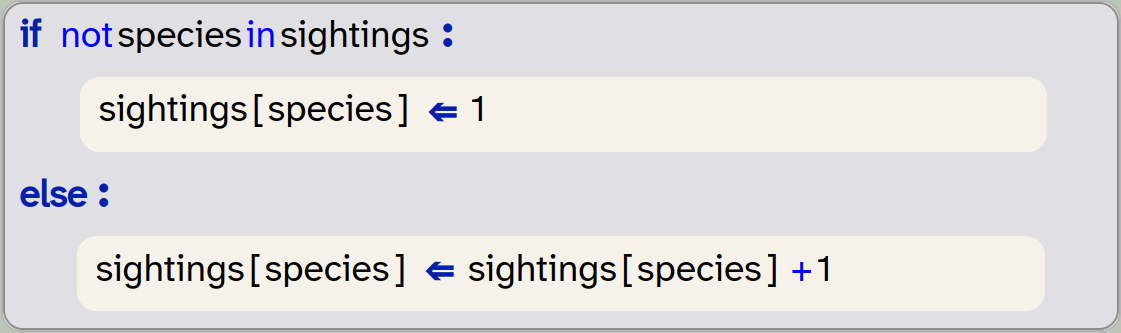
if not species in sightings:
    sightings[species] = 1
else:
    sightings[species] = sightings[species] + 1
Note that using the square brackets to access the value is safe here, because we have checked that the entry exists.
We can safely omit the check for the existence of the entry by using the setdefault method:

sightings[species] = sightings.setdefault(species, 0) + 1This statement is worth studying carefully, since it can be confusing at first. The reason for the confusion is the puzzling name of the method. The method is more correctly described with a name such as get_value_or_set_default: What it does is this: If the first parameter (species) exists as a key, then it returns its value. If it does not exist, then it will create it, and use the second parameter (0) as its value.
Think this through with an existing and with a non-existent key: if the key exists, its value will be incremented. If it does not exist, it will be created and set to 1. Thus, this statement works in every case, without explicitly checking whether the entry existed.
We can also iterate over a dictionary in a very similar manner as we do with a list:
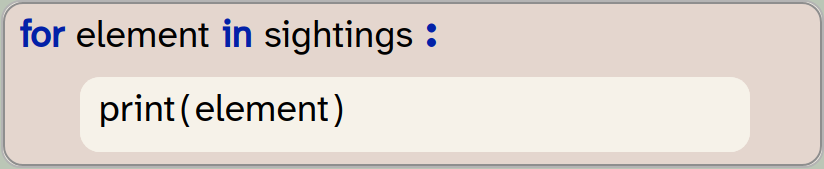
for element in sightings:
    print(element)
Be aware, though, that this pattern – where we use only a single loop variable, will just give us just the keys of the dictionary. To retrieve both the keys and the values, we can write a loop with two loop variables iterating over the dictionary’s items:
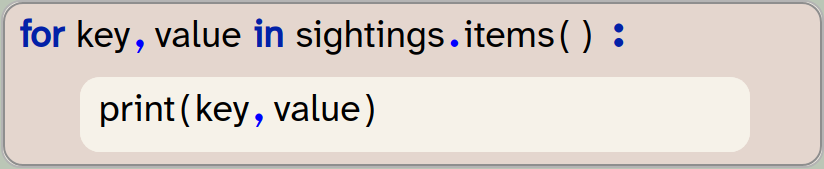
for key, value in sightings.items():
    print(key, value)
Characteristics
A dictionary has the following characteristics:
|
Entries are pairs of key and value. |
|
Maintains the order of entries. (This is not true for Python versions before version 3.7, but is true for Strype and all newer Python systems.) |
|
The same key cannot appear more than once. Assignments with an existing key will replace the entry for that key. |
|
The dictionary can grow and shrink as needed. |
|
Values for a given key can be replaced. |
Methods
The most important set methods are listed here. There are more methods available; you can find details online.
| Method name | Description |
|---|---|
|
Remove all entries from the dictionary. |
|
Return a copy of the dictionary. |
|
Return the value of a given key. |
|
If a given key exists, return its value. If it does not exist, set it to a specified value. |
|
Return a list of all items. Each element in the list will be a |
|
Return a list of all keys. |
|
Remove the entry with the given key. |
|
Remove the entry last added to the dictionary |
|
Return a list of all values. |
A dictionary is a collection of flexible length that holds key:value pairs. It is ordered and does not permit duplicate keys. Entries may be replaced.
9.4. Set
A set is a collection we have not encountered in this book before. It is, however, quite easy to understand: a set is an unordered collection that stores each element at most once. We can represent it graphically like this:
Syntax
Sets in Python are written using curly brackets:

sightings = { "blackbird", "robin", "robin", "sparrow" }Note that with this example, the sightings set would hold only three elements. We inserted a "robin" twice – this is not an error, but since the robin was already included before, the second adding of a robin has no effect.
Note also that the set uses the same symbol (curly brackets) as the dictionary. When writing literals, we can distinguish them by their elements: if the elements are pairs, we are creating a dictionary, if the elements are single values, then we create a set.
We cannot, however, create an empty set by just writing a pair of curly brackets ({ }), because this creates a dictionary. To create an empty set, we use the set() function instead:

empty_set = set()We cannot access the elements individually (there is no index provided). When we iterate over a set, we will receive all the elements, but they will be provided in an unspecified order. The order in which they are inserted is not maintained, and it may change at any time.
Example
Thinking about our bird watching app again, we might use a set if we are only interested in the kinds of birds we spotted that day. If we do not care about the number of birds we saw, or in which order, then a set provides a much simpler and faster data structure to store this information.
We would still add an element each time we see a bird, and the set would automatically ignore duplicate entries. The size of the set is flexible as well, so an arbitrary number of species can be stored.
Elements in a set cannot be replaced. We can add and remove elements, but we cannot directly replace an element with another, as we can in a list.
As with lists, sets containing elements of different types are possible, but rarely useful. When mixing different types of elements, we also have to be aware of details of equality. For example, the values True and 0 are considered equal in Python, so in a set they would be considered duplicates. A set that contains the value False will therefore ignore the addition of a 0. This can be confusing, and sets with different element types are best avoided.
Characteristics
A set has the following characteristics:
|
Does not maintain the order of elements. |
|
The same value cannot appear more than once. |
|
The set can grow and shrink as needed. |
|
Individual elements cannot be changed. You can, however, remove and add elements. |
Methods
The most important set methods are listed here. There are more methods available; you can find details online.
| Method name | Description |
|---|---|
|
Add an element to the set. |
|
Remove all elements from the set. |
|
Return a copy of this set. |
|
Return a set containing the difference between two sets. |
|
Remove an element from this set. |
|
Return a set containing the intersection between two sets. |
|
Remove and return an element from the set. |
|
Remove an element with a specific value. |
|
Reverse the order of the elements in the list. |
A set is an unordered collection that does not allow duplicates. Elements can be added or removed, but existing elements cannot be changed.
9.5. Tuple
A tuple is a grouping of number of different data items into a single, fixed group. The following example shows two tuples which we may use for our bird watching app. In these tuples, we combine three pieces of data: the common name of the bird, the scientific name, and the maximum size (in cm).
Tuples are used to combine items of data that logically belong together and should be handled (created, stored, processed) as a single unit. The individual data items may be of different types. Once a tuple has been created, it is unchangeable: neither can the values in it be modified, nor can it be extended. It will remain as it is.
Syntax
Tuples are written using round brackets (parentheses):

bird = ( "blackbird", "turdus merula", 29 )In theory, we can create an empty tuple by writing just a pair of parentheses: ( ), but in practice this is not really useful. Since tuples cannot change later, this particular tuple does not hold any interesting information.
To access elements from the tuple, we can either use indices (in the same way as we do in a list):

size = bird[2]or we can iterate over the tuple using a for-loop.
Example
Examples of tuples may include the representation of playing cards: ("diamonds", "7"), information about a person: ("Sam", "Smith", 21, 3, 2011, "f"), or information about a font style used in a text document: ("Courier", "Bold", 12, RED). In any situation in which different pieces of information belong together, they can be grouped in a tuple.
In the context of our bird watching app, let us assume that birds are actually captured, measured, recorded, and then released. Then we might want to record each sighting individually, including the recorded measurements. For this purpose, we might use a tuple to store the details:

sighting = ( species, size, weight, time, location)When we store the sightings, we might then use a set or a list of these tuples, instead of storing just a list of strings.
Pairs
Sometimes we want to store two data items that belong together – this is often called a pair. Examples might be coordinates in a cartesian coordinate system (x, y), or the description of a musical note (frequency, amplitude).
While we may talk about a "pair" as a logical data structure, in Python it is not a separate type. A pair is simply shortcut name for a tuple with two elements.
Characteristics
A tuple has the following characteristics:
|
Maintain the order of elements. |
|
The same value can appear more than once. |
|
Elements cannot be added or removed. |
|
Existing elements cannot be changed. |
Methods
The tuple class has two built-in methods.
| Method name | Description |
|---|---|
|
Returns the number of times a value appears in this tuple. |
|
Returns the first index of the given value in the tuple. |
A tuple is a fixed collection that groups a set of data items together. Once created, it cannot be changed.
A pair is another name for a tuple with two elements. It is not a separate type in Python.
9.6. Combining collections
The last – and most powerful – aspect of collections is this: collections can be combined.
Collection classes themselves are types of data, and collections can hold elements of any type, so a collection can hold other collections.
In the last section above, we have already mentioned the possibility of a list of tuples. Equally, we could have a list of lists, or a dictionary where each value is a set. The depth of these nestings can be even deeper: There is nothing stopping us from creating a list of sets of dictionaries, in which the values are tuples.
This may sound complicated at first, but is in fact quite common, and not that hard to understand. Think, for example, of a contacts app on your phone or computer. At the top level, it might hold a dictionary with the name of a person as the key. The value – the information stored under the key – however, is not a simple type, but a tuple holding various pieces of data (phone number, address details, email address, picture, etc.). If we look at this even more carefully, we might realise that a person may have multiple email addresses, or multiple phone numbers. We do not know how many there are, so this should probably be a list. So we now have a dictionary holding tuples, in which some items are lists.
Constructs like these are common in computing, and we will see an example of this in action in the next chapter.
Collections can be combined. A collections can hold elements which themselves are collections. This can be nested to arbitrary depth.
9.7. Summary
Python has four main collection types: list, set, dictionary and tuple.
It is important for a good programmer to become familiar with these types. Each has different characteristics – some can grow, some cannot, some are ordered, other are not, etc. – and we need to be able to choose an appropriate collection for a task.
Collections are often combined – collections can hold instances of other collections – and this is useful for storing structured data.
-
A list is an ordered collection of flexible length. It allows duplicates, and elements may be replaced.
-
A dictionary is a collection of flexible length that holds key:value pairs. It is ordered and does not permit duplicate keys. Entries may be replaced.
-
A set is an unordered collection that does not allow duplicates. Elements can be added or removed, but existing elements cannot be changed.
-
A tuple is a fixed collection that groups a set of data items together. Once created, it cannot be changed.
-
A pair is another name for a tuple with two elements. It is not a separate type in Python.
-
Collections can be combined. A collections can hold elements which themselves are collections. This can be nested to arbitrary depth.
Now that we have taken a bit of a pause to reflect on and summarise some of the things we have learned, we can also come back to some more graphical examples. Here is a project suggestion that lets you use some of the collections discussed in this chapter if you choose to implement them.
Platformer
 This project implements the beginnings of a classic platform jumper game. So far, nothing very interesting happens in the game, but if shows how you can implement the jumping from platform to platform (platform-v1).
There is also a second version of the same project (platform-v2), in which the game character is animated to show a walking effect.
Extending the game to make it interesting and playable will let you practice many of the concepts you have learned so far.
Smoke
 In some games, it is not only the functionality that matters, but also the visuals: What does it look like? How nice are the graphics?
In addition to just making and choosing nice graphics for your projects, you can also implement visual effects. This project shows an example: it is called smoke, and it demonstrates a smoke effect. We start with the breakout project we have seen earlier, but now we add an effect of green smoke to the ball. It makes no difference to the game play, but it looks nice.
Chapter 10. Language models: Generating text
In Chapters 5 and 8, we used computing power to analyse text. First, in Chapter 5, we calculated some statistics, such as the number of words and reading complexity, and then, in Chapter 8, we looked at the content of the text. In this chapter, we will go a step further: we will generate text – using the computer to actually produce some new writing.
Text generation is used in various different programs. One example you may be familiar with is "predictive text" on your mobile phone. When you type "hope you have a good" in a chat app, then it often suggests words such as "day" as the next word, saving you to type it in yourself.
Another, more interesting example is found in large language models (LLMs). These models are used as the basis of AI chat systems, and they are very good at producing English language. You can, for example, ask them to write a short story, and they will do so amazingly well.
In this chapter’s project, we will write a system that can generate text. We will not nearly reach the abilities of modern LLMs, but we will implement a simple technique that is the basis of LLMs. This algorithm is able to produce words that look deceptively like meaningful English sentences, and this will give us a basic understanding of the internal workings of LLMs.
10.1. Bigrams
So how can we predict what the next word in a sentence may be? The obvious idea is to look at the preceding words, and then try to figure out what next word might fit to continue a sentence.
At its most basic, we can look at only the one word immediately before the next one. This will not be terribly good at producing sensible text, but it’s a start. So let us try to do that first.
How can we know what word might work to follow another word? Again, the basic idea here is simple: We look at a good amount of existing text, and look what words follow other words there.
Let us investigate an example by looking at an English sentence:
I read the news today, oh, boy.
In this sentence, we can see that the word "I" can be followed by the word "read", the word "read" can be followed by the word "the", and so on.
We can now write down all the pairs of words that we can see may follow each other:
(I, read)
(read, the)
(the, news)
(news, today)
(today, oh)
(oh, boy)
These pairs of consecutive words from a text are called bigrams. The list of pairs above are all the bigrams from our sentence.
A bigram is a pair of two adjacent elements from a list, such as two consecutive words in a text.
Now, doing this with just a short sentence is not very useful, but doing the same with a very large body of text – say, a whole library – gives us very interesting information. It will tell us all the words that may follow a given other word, and it will also hold information about the likelihood of one word appearing after another. Pairs of words that appear frequently together will appear more often in our list of bigrams.
To experiment with this, let us write a program that can produce a list of bigrams from a text.
Exercise 10.1 Open the starter project text-generation-v1 from the Chapter10 folder of the book projects. You will see that it contains just one helper method to read in a text file (read_file), and a sample text. In this project, create a new function called make_bigrams that takes one parameter (the text to use for the bigrams).
10.1.1. The zip function
Python has a standard function called zip, which can combine elements from two lists into a list of pairs. It will pair the first elements from each list, and the second elements, and the third elements, and so on. Let us look at this with an example.
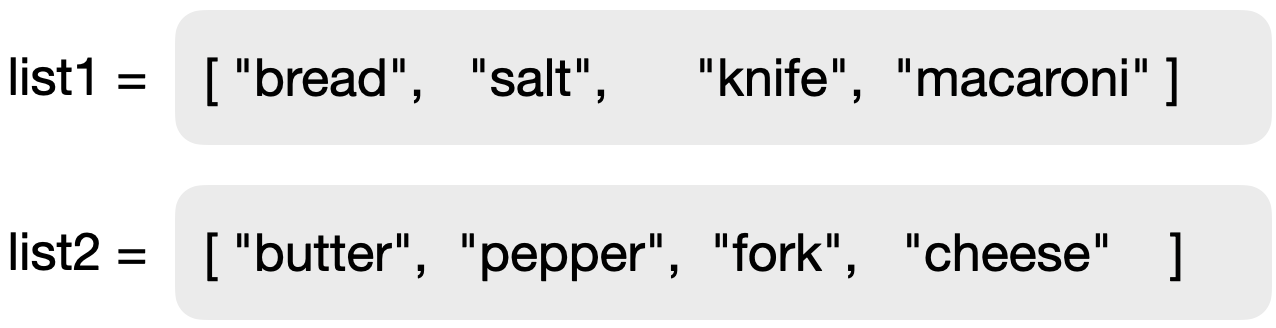
Figure 10.1 shows two lists of strings. We can take these two lists and merge them with the zip function:

pairs = zip(list1, list2)The zip function will pair up the elements of the two lists as shown in Figure 10.2. A pair is simply another name for a tuple of length 2, so what the zip function actually creates is a sequence of tuples with two elements each.
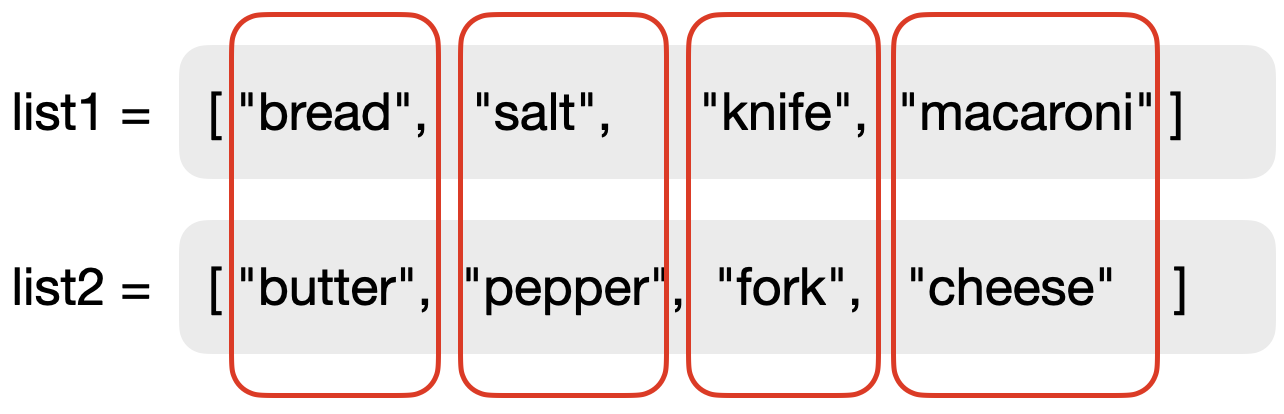
zip functionThe zip function does not return a collection itself, but a special object called an iterator. This object represents a sequence of elements that can then be turned into a collection of our choice. We can turn it into a list by writing:

result = list(pairs)We could also have chosen to turn it into another type of collection. The resulting list in this case is shown in Figure 10.3.

The zip function merges two lists into a single list of tuples, pairing the elements of each list.
Exercise 10.2 Write some test code that creates two lists and then merges them into one list of pairs, as discussed above. Print out your resulting list.
Exercise 10.3 What happens when the two original lists are of different length? Try this out and describe your observation.
So the question now is: How can we use the zip function to create our bigrams from our text?
The solution lies in the idea to take the list of words in the text, and then to match this with a list that is shifted by one word. We create this shift by just leaving out the first word in the second copy of the list. (Remember you can create a copy of a list without the first element by using the slice list[1:].) This is illustrated in Figure 10.4.
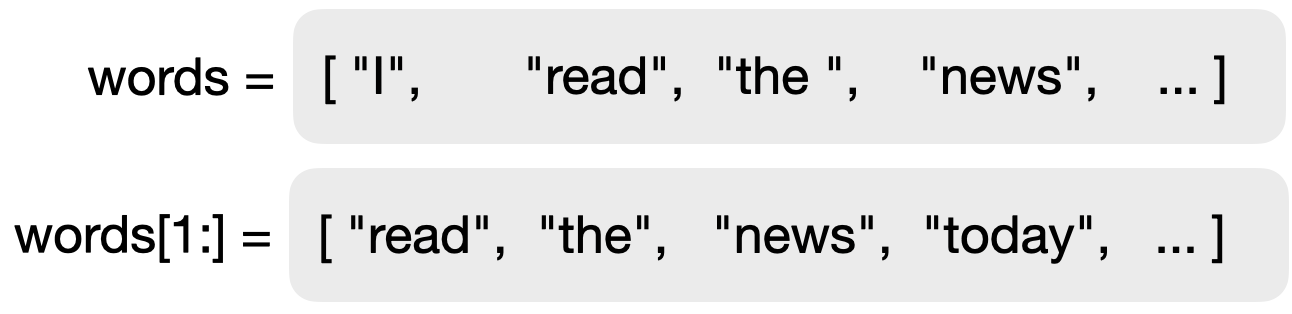
If we merge these lists as we did previously, we will get our list of bigrams.
Exercise 10.4 In your program, implement the make_bigrams function. This function should take a text (a single string) as a parameter, and it should return a list of bigrams of that text.
Exercise 10.5 Test your function with a single sentence. Check whether the output is what you expected.
Exercise 10.6 Test your function with a long text, such as a whole book. A statement that reads in a book is provided in your starter project. You can enable it for this test.
Exercise 10.7 After your tests, you can remove the printing of the list of bigrams, but keep the list stored in a variable for further use.
The text that we use to create our bigrams is the training text. We can use different texts to train our system, leading to different output.
10.2. Predicting the next word
Now that we can generate a list of bigrams for any given text, we can use this to predict the next word. The idea is now straightforward: First, we look at the previous word. From the list of bigrams, we select just those where the first word of the bigram matches our previous word. For example, if our previous word was "It", then the list of matching bigrams might start with
("It", "sets")
("It", "is")
("It", "seems")
("It", "is")
("It", "is")
("It", "has")
("It", "was")
("It", "is")
...
From this, we can make a list with all the second words, and then randomly select a word from that list. Since words that more frequently follow our previous word occur more often in that list, they will have a higher change of being selected as our next word. In other words: the frequency of a word appearing as the second word determines its probability to be selected. (For predictive text, we would select the most frequent word. For creative writing, we will randomly select one of the list.)
Exercise 10.8 Make a new function with two parameters, called generate_next_word (prev_word, bigrams). The first parameter will receive the previous word, and the second the list of bigrams from our training text.
Exercise 10.9 In this function, create a new empty list called following, which will hold all the words that can follow the previous word (the second words from the matching bigrams). Then write a for-loop that iterates over the list of bigrams. Remember that the list contains pairs, so the loop should have two loop variables:
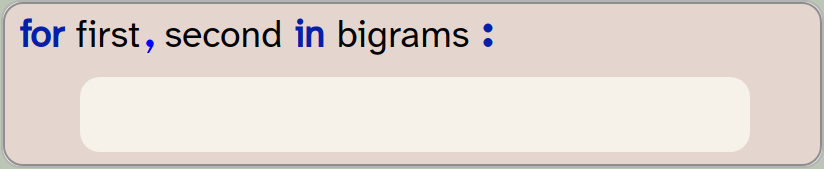
for first, second in bigrams:
    pass
Inside this loop, check whether the first word is the same as our previous word. If it is, add the second word of the bigram to the following list. For a first test, print the 'following' list. Test it with several words as previous words. Does it look plausible?
Exercise 10.10 Extend your code so that your generate_next_word function randomly selects and returns a single word from the following list. Your project already contains an import statement for the random library. This library includes a function called choice, which takes a collection as a parameter and returns one randomly selected element. Thus, you can return a random word from your following list using this statement:
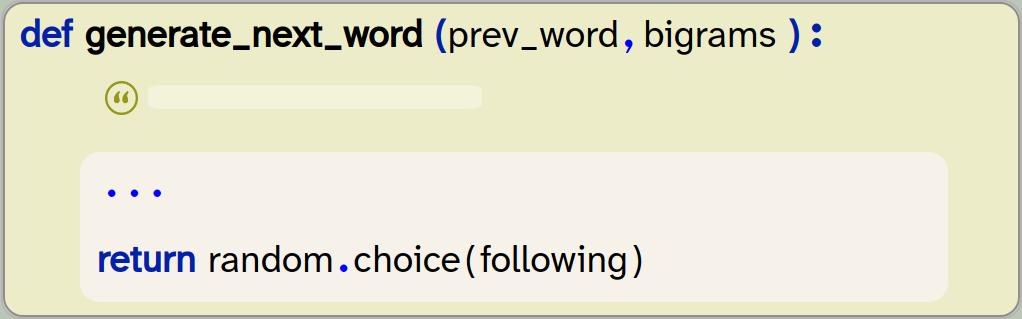
def generate_next_word (prev_word, bigrams):
    ...
    return random.choice(following)
Exercise 10.11 It is possible that the following list is empty, even after searching all the bigrams. In that case, the choice function will fail with an error: it cannot choose an element if there are no elements.
Extend you code so that it checks for this case, and returns any random second word from your bigrams if the following list is empty.
Exercise 10.12 Test your function first by calling it once with a given word and printing out the generated next word. Test multiple times with the same test word. Does it always return the same next word, or different ones? Explain what you observe.
Exercise 10.13 Put your call to the generate_next_word function in a loop, so that it generates 50 words. At first, use the word "It" as the start word, and make sure that you use the generated word as the previous word in the next loop iteration. Print out each word as you run through the loop.
Exercise 10.14 Initially, your words may be printed on separate lines, one word per line. This is because the print function automatically ends each output with a line break. You can change this by specifying what should be printed at the end of the output by using the end parameter:

print(word, end=" ")In this example, we have specified that a space should be printed after each word instead of a line break, so all words will appear in the same line. Change your code to do the same.
The choice(list) function from the random library randomly selects an element from the given list. Import random to use this function.
A copy of the project with all this functionality implemented is in the book projects as text-generation-v2. Feel free to compare your own code to the one in that version.
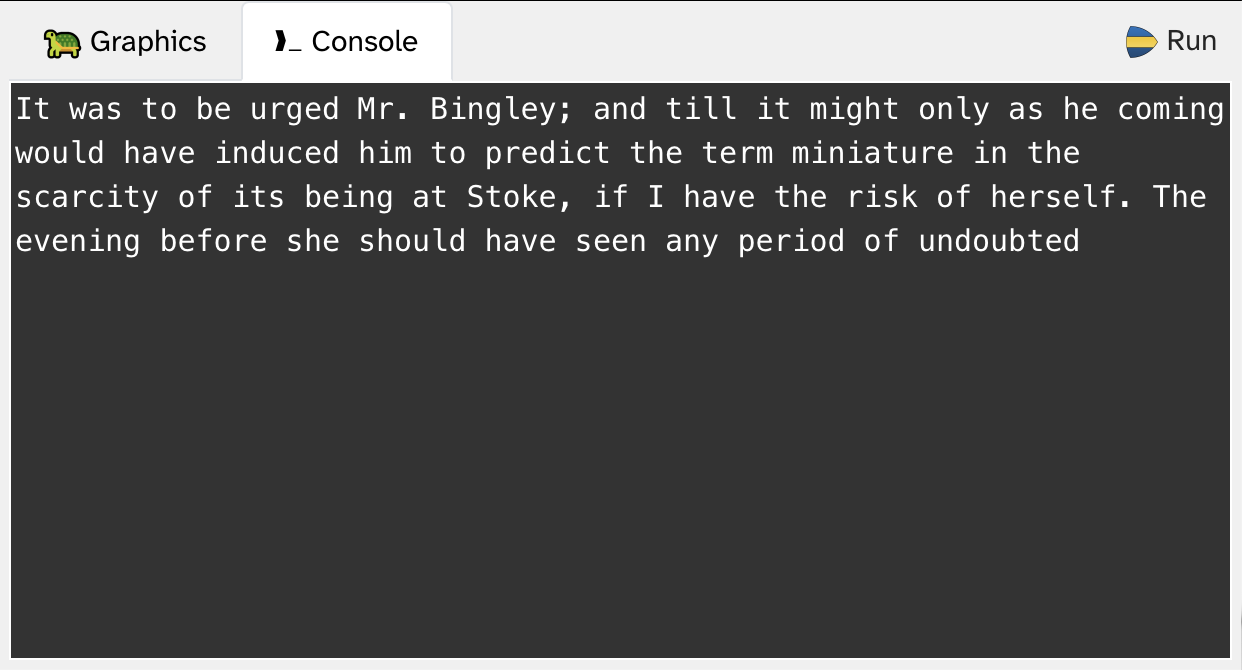
So what have we achieved so far?
We can now read in a training text that generates a list of bigrams. The bigram-list is our "model" – this is what is used to generate text later on. We "train our model" by reading in text. The kind of text documents we train our model on determines the kind of language our system produces. If you train your model using a different text, it will produce different language. (Try it out!)
Of course, we could read in not just a single book, but a whole stack of books. The more text we use to train our model, the closer our system will follow normal English speech patterns.
When we look at the output (for example, in Figure 10.5), we can see that the result so far is somewhat entertaining, but not very impressive. Very superficially, it looks like English, but there is no recognisable grammar, and this output is not fooling anyone. We will improve this in the next section.
Another observation worth pointing out: This time, we have not stripped out punctuation when we split the text into words. As a result, punctuation is still included in the bigrams, and thus in the output. The words "it" and "it," are just considered different words, and handled separately, each with their own following words. This makes the resulting text look more natural.
10.3. Improving the model
The next idea to improve our model is again quite simple: instead of looking at only one previous word to generate the next one, we look at two previous words. In our model, we do not use bigrams, but instead we use trigrams – tuples of length 3 with all the three-word sequences form our original text.
Generating the trigrams is quite straightforward, since the built-in zip function can also merge together three lists (or any number of lists). In our program, generating the trigrams looks like this:

trigrams = zip(words,words[1:],words[2:])Change your entire program to work with trigrams now, using the following list of exercises.
Exercise 10.15 Change your make_bigrams function to make_trigrams. Adapt the parameter list, and make sure that you generate and return a list of trigrams. (Make sure to update the function comment.)
Exercise 10.16 Change your generate_next_word function so that it generates the next word from two previous words and your list of trigrams. Return the last word from a trigram where the two first words match the previous words.
Exercise 10.17 Adapt your test code in your "My code" section to set two start words, and then generate the next 50 words from there. It works well if you use fairly generic start words, such as "It" "was".
If you have done the exercises so far – how is your output now?
You will see that this simple improvement of our "model" – going from bigrams to trigrams – significantly improves the quality of the text it produces. Now the output looks almost like grammatically correct English! That is quite astonishing for such a simple algorithm.
Of course, the sentences are still gibberish – they don’t mean anything, and you cannot read any sense into them. We discuss below how real LLMs manage to do better than this.
But first of all, let us try to improve our training data.
10.4. Improving the data
There is a very simple change that we can make to improve the quality of our system: use more data.
In real LLMs, the models are trained on millions or billions of documents. Many of them are fed any text you can access on the Internet, and much more besides.
We will not use that amount of text, but we have two files available that contain just a bit more than a single book. The Strype file system folder includes a file called /books/fairy-tales.txt, which holds the full text of 65 fairy tales by the Brothers Grimm, and another file called /books/sherlock-holmes.txt, which has the text of 27 Sherlock Holmes stories (three books and 24 short stories). Try your program with these texts as the training data.
Exercise 10.18 Change the file you read in to build your trigrams. Use the file /books/fairy-tales.txt. Run your program. How is the output changed from before?
Exercise 10.19 Do the same again with the file /books/sherlock-holmes.txt as the training data. How does the output differ now?
A version of the project with these changes is in the book projects as text-generation-v3.
If you did these experiments yourself, you will have noticed two things: Firstly, using longer texts to "train our model" improves the quality of the output. The more text we feed in, the more closely the output resembles actual language. We have not, in fact, used very much data. Even the "sherlock-holmes" file contains only about 330,000 words. This is miniscule in the context of large language models, but it already starts to deliver quite surprising results.
And secondly, the content of the text we feed into the model determines the language and style of the text that is produced.
These two observations lead to two very significant issues: Firstly, with the aim to be able to produce any kind of output, large AI companies have been scanning all writing they could get access to. This includes, for example, millions of published books. For the performance of the system, this is great: you can tell your AI system to write a short story in the style of Stephen King, and it will very competently do this. It has read in all existing Stephen King stories, and so it can copy the style amazingly well.
The problem is that these stories are under copyright, the AI companies have not legally licensed them, and Stephen King has not given his permission.
So, is this legal?
Currently, this is an undecided question. The AI companies argue that it falls under the "Fair use" clause in copyright law, since the source works are not reproduced directly. Many authors argue that this is copyright theft, since their own original hard work is being used – and being commercially exploited for profit – by other companies without their permission.
The second problem is the sheer amount of data involved, and the amount of processing power and electricity required to process it. Reading and transforming the "sherlock-holmes" file is trivial, and a standard laptop can easily do it. But processing the amount of data involved in real LLMs – more text than the content of all the libraries in the world combined – requires so much processing power that the environmental impact is immense. Power is not only needed to train the model (this is only done infrequently), but for every single question that an AI system is asked to answer. Even the most trivial query requires huge processing power and consumes large amounts of energy.
To cope with this, AI companies are building huge data centres in many areas of the world, full of processors which only serve AI queries from users. A single data centre can consume as much energy as a city of a million people. For the environment, this is a disaster; it creates significant new problems for the goal of reducing the environmental damage which we cause.
Exercise 10.20 Research "fair use" in copyright law. What is it? What does it allow, and what does it not allow?
Exercise 10.21 Do you think AI companies should be allowed to use copyrighted books without the author’s permission? Name some arguments for both sides of this argument. What about films or TV programs? What about using the likeness of a famous person?
Exercise 10.22 Try to find out where the nearest data centre is to the place where you live. Try to find some information about the amount of energy a data centre consumes. If you can, try to find this information for the data centre nearest to you.
Exercise 10.23 Try training the system with some of your own writing. Find as many pieces of text you have written, copy them together into a single plain text document (there is no need to maintain formatting), and then see what your system produces from your own words. (Again, refer to the Strype tip in Section 5.5 for information how to access your own files.)
10.5. Large Language Models
We have seen that our model does not come close to the abilities of current AI systems, and there are many reasons for this.
Firstly, there is room to improve our current system. One idea is again simple: use longer chains of words. We have used bigrams and trigrams. More generic systems use n-grams – sequences of larger and variable length.
An n-gram is a sequence of n consecutive tokens from a list, such as n words from a text.
Using more contextual words does indeed improve the performance of these systems. And the project that we investigated in this chapter does indeed give a glimpse into the history of text processing.
Until the mid-2010s, n-gram-based systems were considered the state of the art in text processing. They were successfully used in simple auto-complete systems and speech recognition.
After that, these systems evolved significantly, and modern LLMs have a number of important differences that make them more effective:
-
While n-grams use a fixed size window of the last n-1 words, LLMs use flexible and much larger windows – often thousands or millions of tokens. Doing this, they can make long-range connections, important for staying on a topic, making arguments, and so on.
-
N-gram systems typically work with lists of words. In LLMs, each word is represented not by its actual letters, but by a large, multidimensional vector that encodes many aspects of the word. This includes semantic and contextual information, which helps to make many more connections. For example, it may know that "cat" and "dog" are somewhat related words, even though their letters are entirely different. This helps the model to generalise and transfer knowledge between related concepts.
-
LLMs are trained not by simply counting or storing the words and probabilities, but using neural networks, which expose much deeper connections between words. They also implicitly learn about grammatical structure and language patterns.
The resulting systems are known as generative pre-trained transformers (GPT). The full details of these are more complex than what we can discuss here. But ultimately, they are generalisations of the simple system we have built here. Or in other words: An n-gram model is a special, extremely limited case of what a GPT transformer can represent.
N-gram systems, however, are not obsolete. They continue to be useful in predictive text, spell checking, and in document retrieval systems.
While our project here does not allow us to understand fully how LLMs work, it does give an insight into the core of the idea that underlies LLM-based AI systems. Perhaps most importantly: It is still the case that LLMs have no real understanding of the content and meaning of the text they produce, and are ultimately based on clever manipulation and prediction of language. These systems may state an entirely invented "fact" with the same confidence as an obvious truth.
AI companies are working hard to improve the reliability of LLMs. This tension, however, between our desire of trust and these systems, which ultimately just manipulate language, will remain at the core of the issue of reliability in AI systems for some time.
-
A bigram is a pair of two adjacent elements from a list, such as two consecutive words in a text.
-
The
zipfunction merges two lists into a single list of tuples, pairing the elements of each list. -
The
choice(list)function from the random library randomly selects an element from the given list. Importrandomto use this function. -
An n-gram is a sequence of n consecutive tokens from a list, such as n words from a text.
Advanced syntax
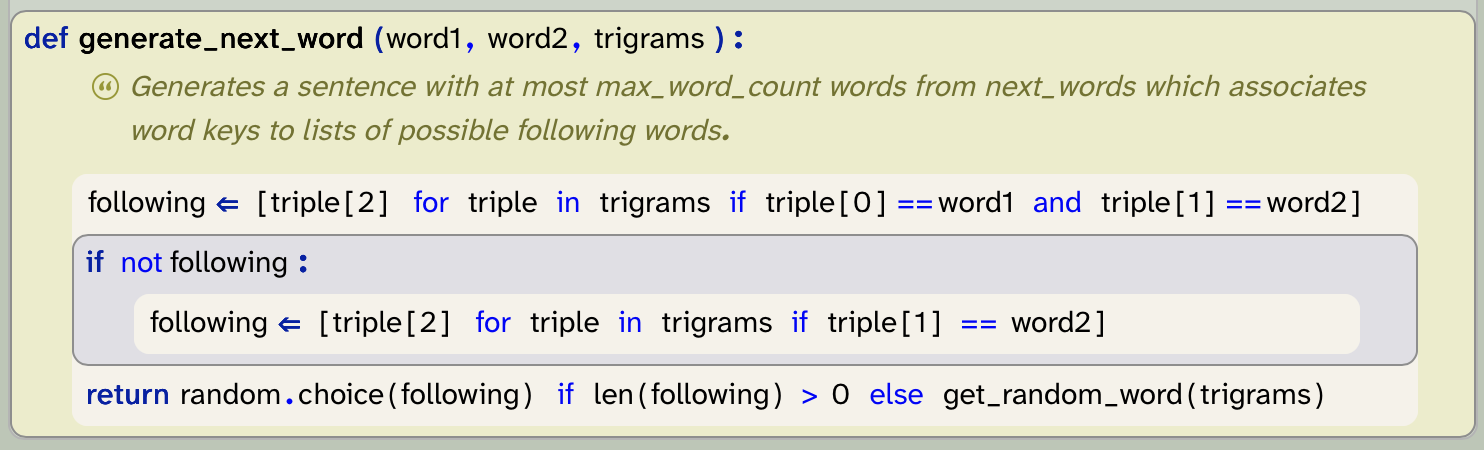 This time, the project provided here does not implement any new functionality. In fact, the project – text-generation-advanced – provides exactly the same functionality as the last version we have discussed in this chapter.
The reason this version is called "advanced" is not new functionality – it is a new way in which the code is written. In this version, we have rewritten the generate_next_word function to use list comprehensions. This is a Python construct we have not previously seen, and it provides an alternative version to writing loops to select parts of lists.
Knowing this syntax is not essential – you can safely skip it, and achieve the same functionality by writing your code the way we have done so far. But if you are curious about more Python constructs, or want to become a more expert Python programmer, you can do a web search for "python list comprehension" and study this project.
Chapter 11. Putting it all together
Throughout this book, we have introduced a large number of new concepts. In Chapter 1, we started from the very beginning, reading and writing our first lines of Python code. We advanced quite rapidly through a long list of constructs. These included assignments, variables, conditionals, loops, functions, and more.
In the later chapters, we have introduced and experimented with the collection classes – lists, dictionaries, etc – which are equally important to know for a good programmer.
In this chapter, we will work with a new project – a game – that lets us use all of these constructs again and put them all together. We will introduce a few new techniques, but not many. You know most of the important constructs and concepts now, but there are still interesting new ways to combine them to create more interesting outcomes. One particular thing we will do here is to combine various collections in more interesting ways.
We are also progressing in another way: In this chapter, we will provide less explanation of the details than we have done before. You are now expected to fill in larger parts yourself. We will discuss the core ideas and structure of this game in some detail, but then leave many of the tasks that make this game interesting for you to complete, invent and implement.
11.1. Haunted Mansion
The game we will work on in this chapter is a text-based adventure game named Haunted Mansion (Figure 11.1). Games like these have a long tradition in computing. Using purely text-based output looks quite old-school, but you will see how you can build really fun games with this idea. And we will look at adding graphics and sound towards the end of this chapter.
Our Haunted Mansion game is modeled on the original "Adventure" game that was developed in the early 1970s by Will Crowther and expanded by Don Woods. The original game is also sometimes known as the Colossal Cave Adventure. It was am amzingly interesting and sophisticated game for its time, and involved various tasks of finding your way through a cave system, collecting treasure, using secret words and various other mysteries, all in an effort to score the maximum number of points. You can read more about it at sites such as https://rickadams.org/adventure, or try doing a web search for “Colossal Cave Adventure.”
11.1.1. Exploring the game
To start this project, we will use a partially developed version of this game. You can find it in the Chapter 11 folder as haunted-mansion. Once you open this project, you can see that there is already a good amount of code there, so our first task will be to analyse and understand the existing code. This is a valuable skill: When you work with programming, it will happen much more often that you make extensions and improvement to an existing software system than starting your own new project from scratch. Code reading is almost always at the start of a new project.
So let us get stuck in and find out what this project can do so far.
Exercise 11.1 Open and explore the haunted-mansion project. Play the game to find out what it does, and then describe what you found. Include the following:
-
Describe the story that it presents to you.
-
What are the valid command words in the game?
-
What happens when you use a command word that the game does not understand?
-
How many rooms are there in the game?
Draw a map of all the rooms in the game, indicating how they connect to each other.
The exercise above has shown you that the game, at this stage, does not do very much, and is certainly not interesting to play. It will be our task in this project to change that.
Before we jump in and make improvements, however, let us try to understand how the code works that is already there. You can make a start on this by working through the next set of exercises.
Exercise 11.2 How many functions are defined in this program? Make a list of all the functions and for each, describe (in one or two sentences) what it does.
Exercise 11.3 What are the parameters of the process_command function? What expectations are there for these parameters?
Exercise 11.4 What does the process_command function return?
Exercise 11.5 What happens when you use the 'go' command without a second word? Where in the code is this handled?
Exercise 11.6 What happens when you use the 'help' command with a second word? Explain, with reference to the code, why this is.
11.1.2. Creating your own game idea
From this initial exploration, we can see that there is some useful code already in the project. It gives us a good starting point for a game of this type, but it does not implement a game as such. Nothing interesting is happening.
Throughout this chapter, we will work on improving this game and making it into something that is actually fun to play. However, as a first task, you should invent your own game idea. You do not need to make yours a game set in a haunted mansion, you can invent your own story, your own setting, and your own challenges.
This project works very well as a pair or group project. If you have a friend who also like to program, or if you are in a class with other students, it can be great fun to pair up in teams of two or three and work on this project together. Especially the next set of exercises, which are all about developing ideas, is more fun when done with others.
Exercise 11.7 Invent your own story line for your game. Think creatively! It does not need to be a haunted mansion, it can be any other location. Perhaps your own school, or a dungeon underground with trolls and other monsters, or a Harry-Potter-style scenery.
You can also think much more widely: The locations in the game are called "Rooms" in the program, but they do not need to be actual rooms. They can be any type of location. Maybe you are moving through your city, from place to place, or even from city to city (where each game location is s different city). You can go even bigger: you could make it a space game where each location is another planet. Or go small: maybe the player is travelling through a human’s body via their blood stream to find and eradicate a disease.
In short: don’t be constrained in your ideas by what is there at the moment. Invent a new and interesting scenario for your game.
Exercise 11.8 Invent a story line for the player. This should set the task of the game (what does the player try to achieve), and define an end to the game: How can we win?
Exercise 11.9 Invent as many interesting challenges as you can think of that the player might encounter during this game. Puzzles? Traps? Helpful characters you can meet? Mazes, teleporters? Anything that fits your theme and adds interest. Do not worry at this stage about how your ideas may be implemented. This exercise is about ideas and imagination, not about technology. As many ideas as you can, as crazy as you like.
Exercise 11.10 From the exercise above, select a number of ideas and try to turn them into a game story. Make an initial plan what your game may look like.
For the rest of this chapter, we will continue with our haunted mansion theme, but you should instead work on your own game version.
11.2. Analysing the code
From the exercises above, you will have gained an initial understanding of the structure of the code. There are, however, a number of details which will probably not yet be clear (that is normal), and it is worth investigating a bit deeper.
One way to become more familiar with existing code is to try to make small changes, and see whether your initial assumptions and guesses are correct. The existing code is actually quite well written: There are well chosen function names, functions all have comments, and the variable names give us good clues what they are used for. All this is a great help. Imagine the same code with no comments and bad naming – it would be a nightmare to untangle! (This shows you the importance of good naming and good documentation: when you need to read other people’s code, you appreciate when this is well done.)
Because of the clear naming, we can probably make some changes quite easily without understanding the whole structure. Let us try to make some changes of this kind.
Exercise 11.11 Change the names and description of the rooms. Internally, they can still be called Room at this stage, even if they are not technically rooms in your version. You can see that each room has two descriptions, a shorter and a longer one. (The longer one is provided currently only for the first room; it is missing for the other rooms.) The longer description is currently not used. It is here in preparation for a later extension, where we expect that we can inspect the location in more detail.
Run your program, and make sure you see your new location descriptions.
Exercise 11.12 Change the intro text for the game.
Exercise 11.13 Add a new command to the game: look. Make sure that the game recognises when the player types "look". Make a new function to handle the implemementation of the look command. When this command is used, initially just print out "You do not see anything." (Later, we will make this command print out the long description of the current room. Also, you may have noticed that there are various items mentioned in the game code – a candle, a bottle, etc. – which we cannot yet see in the game. These should also be shown at some stage.)
These exercises should have shown you that some changes are quite straightforward. So far so good.
The next step is to make our own map: add some more rooms and connect them, so that you can move in and out of each location. Looking at our code, we can see that creating rooms is easy. There are statements at the beginning of the setup function that create each room, and it is not hard to copy those and make more rooms. These statements, however, use a mechanism we have not seen before: a named tuple. We need to look at this more closely in a moment.
The other challenge is setting the exits. Linking the rooms together to move from one to the other looks a little more mysterious. It is worth investigating this part of the code more closely as well. Let us look at these two issues next.
11.2.1. Named tuples
To store the information for each room, we would like to store two strings: a short description (a single line) and a longer description, where we can provide a more extensive text.
We have previously seen that we can use a tuple to store two bits of related data together in one variable. We could now make a tuple with these two strings to store the room information:

outside = ("on an overgrown lawn, in front of a big old building.", "You look around. There is a big mansion, crumbling in some places, sinister looking, with gargoyles on the facade. The door is slightly ajar.")This works well to store the data we need.
When we later want to use this data (let’s say, we want to print out the long description), then we can access the elements in the tuple using an index. For example

print(outside[1])would print the long description. This works, but it is not nice. When we see the expression outside[1], it is not clear what gets printed. We would have to look up (or memorise) what is stored at index 1 to know what is going on. The code is correct, but not very readable.
To improve this situation, Python has an additional construct: named tuples. Named tuples are tuples like any other, but in addition to storing the data, we can give a name to each component, and to the tuple itself.
The original tuple stores only the data:

We can see that it automatically assigns an index, which allows us to access each component.
A named tuple stores the same data, but it allows us to attach a name to the tuple, and a name to each component:

If we do this, then we can use the name (instead of the index) to access a component:

print(outside.long_description)We can immediately see that this code is more readable. Without needing to memorise the details of the tuple, the code tells us exactly what is printed out here.
To use a named tuple instead of a standard tuple for our rooms, we have to do three things. First, we have to add an import statement to make the named-tuple functionality available in our program:

from collections import namedtupleSecondly, we create a description of our named tuple:

Room = namedtuple("Room", ["description", "long_description"])As we can see, this is an assignment. On the left hand side of the assignment is the type name of the named tuple we are creating. On the right hand side is a call to the namedtuple function (which creates the named tuple) with two parameters: The first parameter is a readable name for the tuple overall, and the second parameter is a list of strings with a name for each component. This creates the names which we can later use to access the components.
The third and last part is the creation of the tuple itself. It looks similar to the original creation of the tuple, but we now write the type name of the named tuple in front of the parentheses:

outside = Room("on an overgrown lawn, in front of a big old building.", "You look around. There is a big mansion, crumbling in some places, sinister looking, with gargoyles on the facade. The door is slightly ajar.")This turns our standard tuple into a named tuple. It does not store any more or less data, but it makes the resulting code much more readable.
A named tuple is a tuple with attached names for each of the elements. It allows us to access the elements by name (instead of by index), making our code more readable.
11.2.2. Exits: A dictionary of dictionaries
The other interesting aspect to investigate more closely in this example is how the exits are stored. Figure 11.2 shows the map we wish to represent for our game. So, how can we store this information?
In our setup function, we see these lines:

exits = {outside:{"north":entrance},entrance:{"south":outside,"west":sitting_room,"east":library},sitting_room:{"east":entrance},library:{"west":entrance,"north":study},study:{"south":library}}We should now be able to recognise that this is a dictionary: It is written with curly brackets, and the colons separate the keys from the values.
Exercise 11.14 What is the type of the keys of the exits dictionary? What is the type of the values?
Looking carefully at the exits dictionary, we can see that the first entry is outside : {"north" : entrance}. This is the key:value pair that makes up each entry in a dictionary. Let us look carefully at the types and values used here.
On the left of the colon is the key. It is outside, which is a variable holding a room. So the type of the key is Room. On the right side of the first colon is the expression { "north" : entrance }. This is itself another dictionary! So the value of the entries in our dictonary is another dictionary.
To fully understand this structure, it helps to draw diagram. Figure 11.3 shows the data structure we are constructing here to store the information. It is worth spending some time studying this, and comparing it to the map in Figure 11.2, until you understand how this stores all the information about the exits.
Some observations are worth noting here:
-
We are not using anything here we have not seen before. We already encountered dictionaries earlier in the book, so the concept itself is not new. But we are putting things together in more complex ways: where we before used integers or strings as keys and values, we now used a dictionary of dictionaries. Over time, you will see more of this: As you become more practiced at programming, you will not see as many new constructs anymore (after some time, you will know them all), but you will continue to put your constructs together in more interesting and powerful ways.
-
Using collections that hold other collections is not unusual. You will get used to this idea. We will see another example of this a bit later in this chapter.
-
If you look carefully, you will see that each direction of an exit is stored separately. For example, we store the information that north of the library is the study, and separately that south of the study is the library. We can use this to build special effects in our game. For example, if we had one of these entries, but not the other, then we can go one way, but not back. (A trap door? A hidden exit?) Or if we connect the rooms differently, so that the way back leads to a different room, then we can build really confusing labyrinths that it is hard to get out of…
Exercise 11.15 Make a map for your own game. Decide how your locations connect, and them implement this in your project. (We would recommend not to make it too big at this stage. Perhaps no more than a dozen locations for now.)
Exercise 11.16 The exit dictionaries are used when the player moves through the game. More specifically, they are accesses in the go_room function, which implements moving to a different room. Study this function carefully and explain how it works.
11.2.3. Items: A dictionary of lists
If you have read the code in this project carefully, you will have seen that it creates a number of items, which are placed into the rooms. When we walk through the rooms, however, the items are currently not shown. Let us fix this now.
Exercise 11.17 Items are defined using a named tuple, similar to the rooms. Find the place in the code where they are created, and answer these questions:
-
How many items are created in the program? What are they?
-
What information is stored about each item?
-
In which room is the candle?
Exercise 11.18 To store the information where items are located, the program uses the global variable items. This is again a dictionary, using the rooms as the key for the entries. But what is the type of the value of each entry? And what does it store?
Exercise 11.19 Draw a diagram of the data structure stored in the items variable.
Exercise 11.20 Create another item and place it outside.
We have seen here that items are created and correctly placed in the rooms. What is missing is telling the player about htese items as they walk around. Let us do that now.
Exercise 11.21 Make sure that all items in a room are displayed on screen when a player enters a room. You can do this in the show_room_description function. This function already shows the room description and its exits. Add to this the display of the names of all the items in the room (see Figure 11.4).
Exercise 11.22 Implement a command "look" that may or may not take a second word. If no second word is provided, the it prints out the long description of the current room. If a second word is provided, and it is the name of an item (e.g. "look candle") then it prints out the description of this item.
These last exercises are getting quite tricky. Do not be discouraged if you find them difficult at first. It may help to discuss them with others if you have people nearby who you can work together with. If you can solve those tasks, and fully understand how they work, then you have reached a good level of understanding of data structures!
If you like to check your code against ours, you can find a version of the project with the 'look' command implemented in the book projects as haunted-mansion-v2.
11.3. Building your game
From here on, it is really up to you. We will not discuss much additional functionality in detail, but leave it to you to invent and implement more ideas to make your game more interesting and more fun to play. The constructs we have discussed so far enable you to achieve many varied things.
Here are some ideas what you might add to your game. But there are just this: ideas. You are free to add them to your own game, vary them, or do something different entirely.
-
Add a command called "take" to pick up an item. The player carries items around with them.
-
Add a command "inventory" to show what the player is currently carrying.
-
Add a command "drop" to drop an item in the current room.
-
Restrict the weight a player can carry. Every item has a weight, and the player can only carry items up to a certain total weight. Some items cannot be picked up at all.
-
Add an action that the player can do only if they have a specific item.
-
Add other characters to the game. Characters are in rooms. When the player encounters a character, they may say something.
-
Make a character react to the player. For example, when the player says something, the character responds. They might give you some valuable information.
-
Make a character help you only if you give them a specific item.
-
Add food to the game. With every move you get hungrier. If you get too hungy, you starve and lose the game. You must find food to eat. (Obviously, you need an "eat" command.)
-
Add a time limit for a specific task. Maybe the task only starts when you encounter something specific. From then on, it counts your moves, and if you do not complete the task in time, you lose.
-
Add a transporter room. When you enter it, it beams you to a random other place. (Or maybe a transporter gadget? Use it to transport somewhere else?)
-
Add a "use" command. It lets you use an item. Some items do something when you use them.
Of course, there are many other possibilities here. Invent some functionality of your own and implement it.
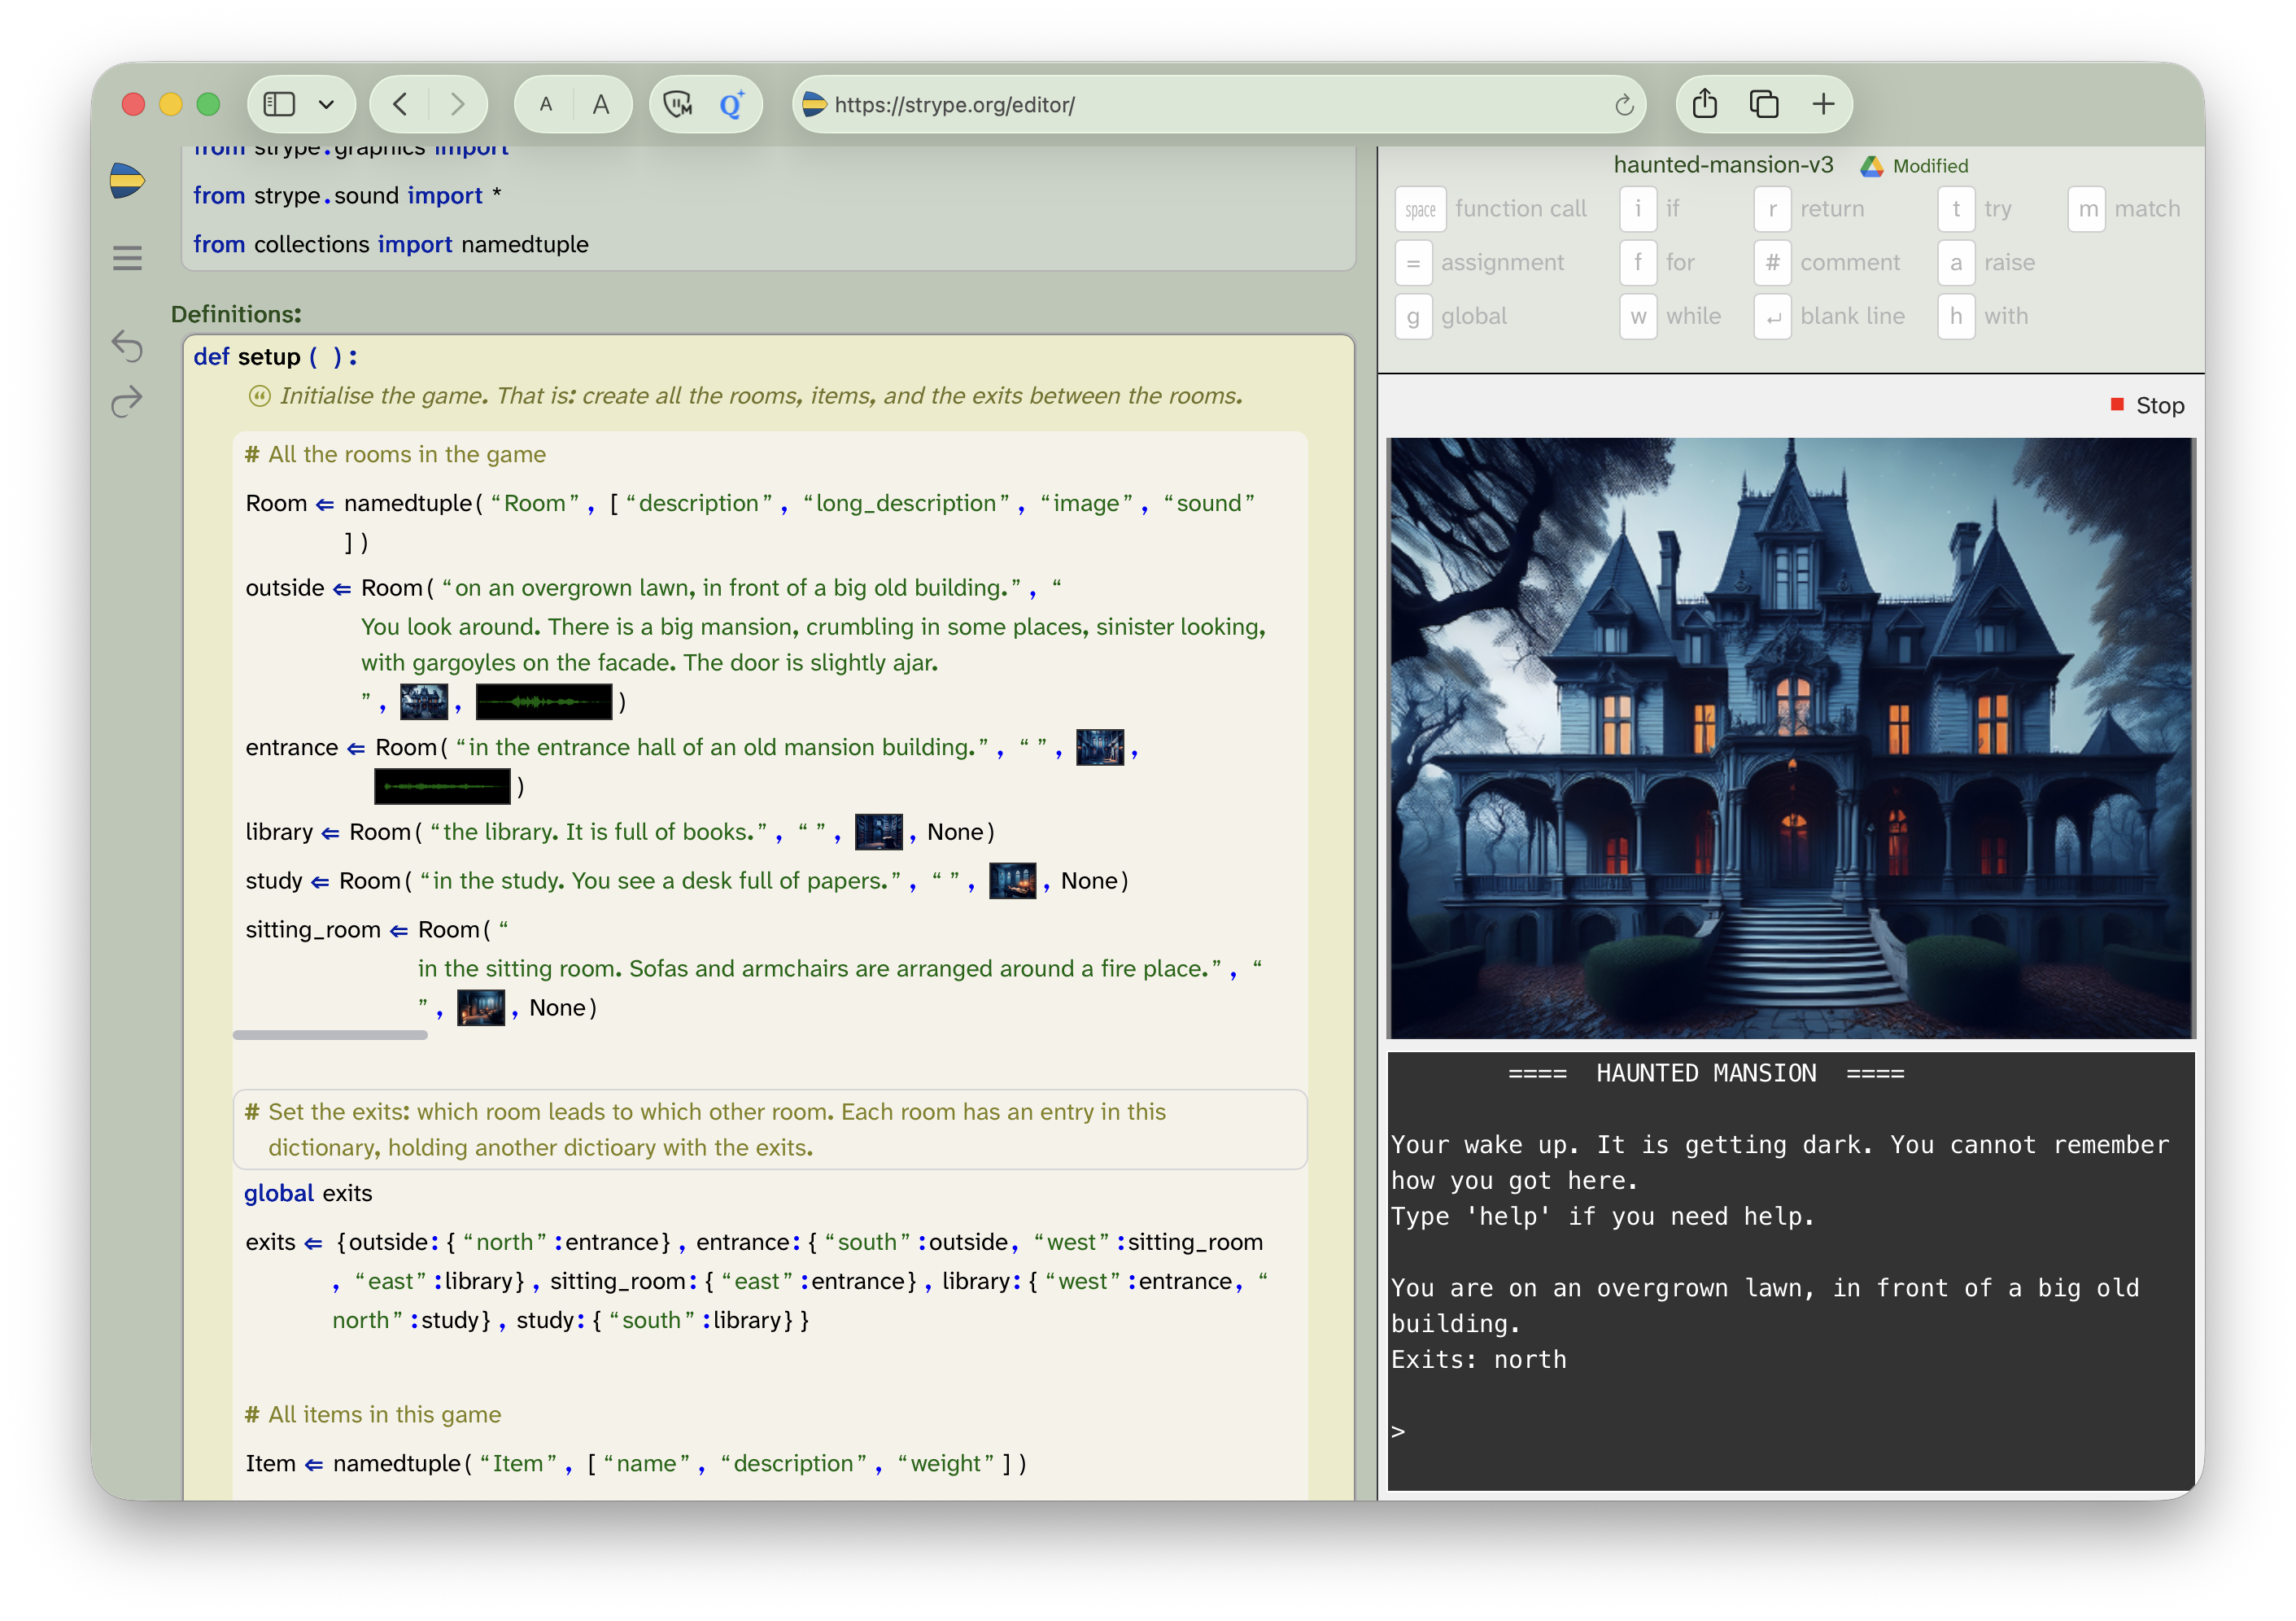
11.4. Adding graphics and sound
One last thing that we will suggest and briefly discuss here is addition of some images and sound to our game. The most straightforward way to do this is to leave the game with text-based input, but show an image – and possibly play a sound – when you enter a room (or when something else happens in the game).
The project version haunted-mansion-v3 shows a demonstration how this might be done. Open this project and run it to see what it looks like. To do something similar in your own game, you can do the following:
-
Set the Strype view so that you see both the text console and the graphics world at the same time (Figure 11.5).
-
In your named tuple for the room, add an image and a sound component to the room. Then add an image (and possibly a sound) to each room.
-
When you enter a room, show the room’s image as the world background. If the room has a sound, play it.
That is all that this version of the project does. You could, of course, also add images for items, or attach sounds to other events. It is all up to you. We leave you to finish the game on your own from here. You now know enough to be able to turn this into something exciting.
11.5. Summary
In this chapter, we have mostly applied what we have learned before, but we have done so with somewhat more complex data structures. We have introduced one new construct (the named tuple), but mostly we have just put together what we already knew in novel and more interesting ways.
We have seen that we can put collections into other collections, and that we can build useful data structures this way.
Programming will increasingly be like this from here onwards: You will encounter new constructs less often, and you will increasingly work by putting what you know together in more interesting ways. There are still some constructs to discover – we have not shown you all of Python yet – but not many; you now know all the important ones.
The next and last chapter just lists some more project ideas, without further discussion. We leave you with those half-baked projects and hope that they spark some ideas, that you choose to continue to write programs, and that it brings you joy.
-
A named tuple is a tuple with attached names for each of the elements. It allows us to access the elements by name (instead of by index), making our code more readable.
Adventure
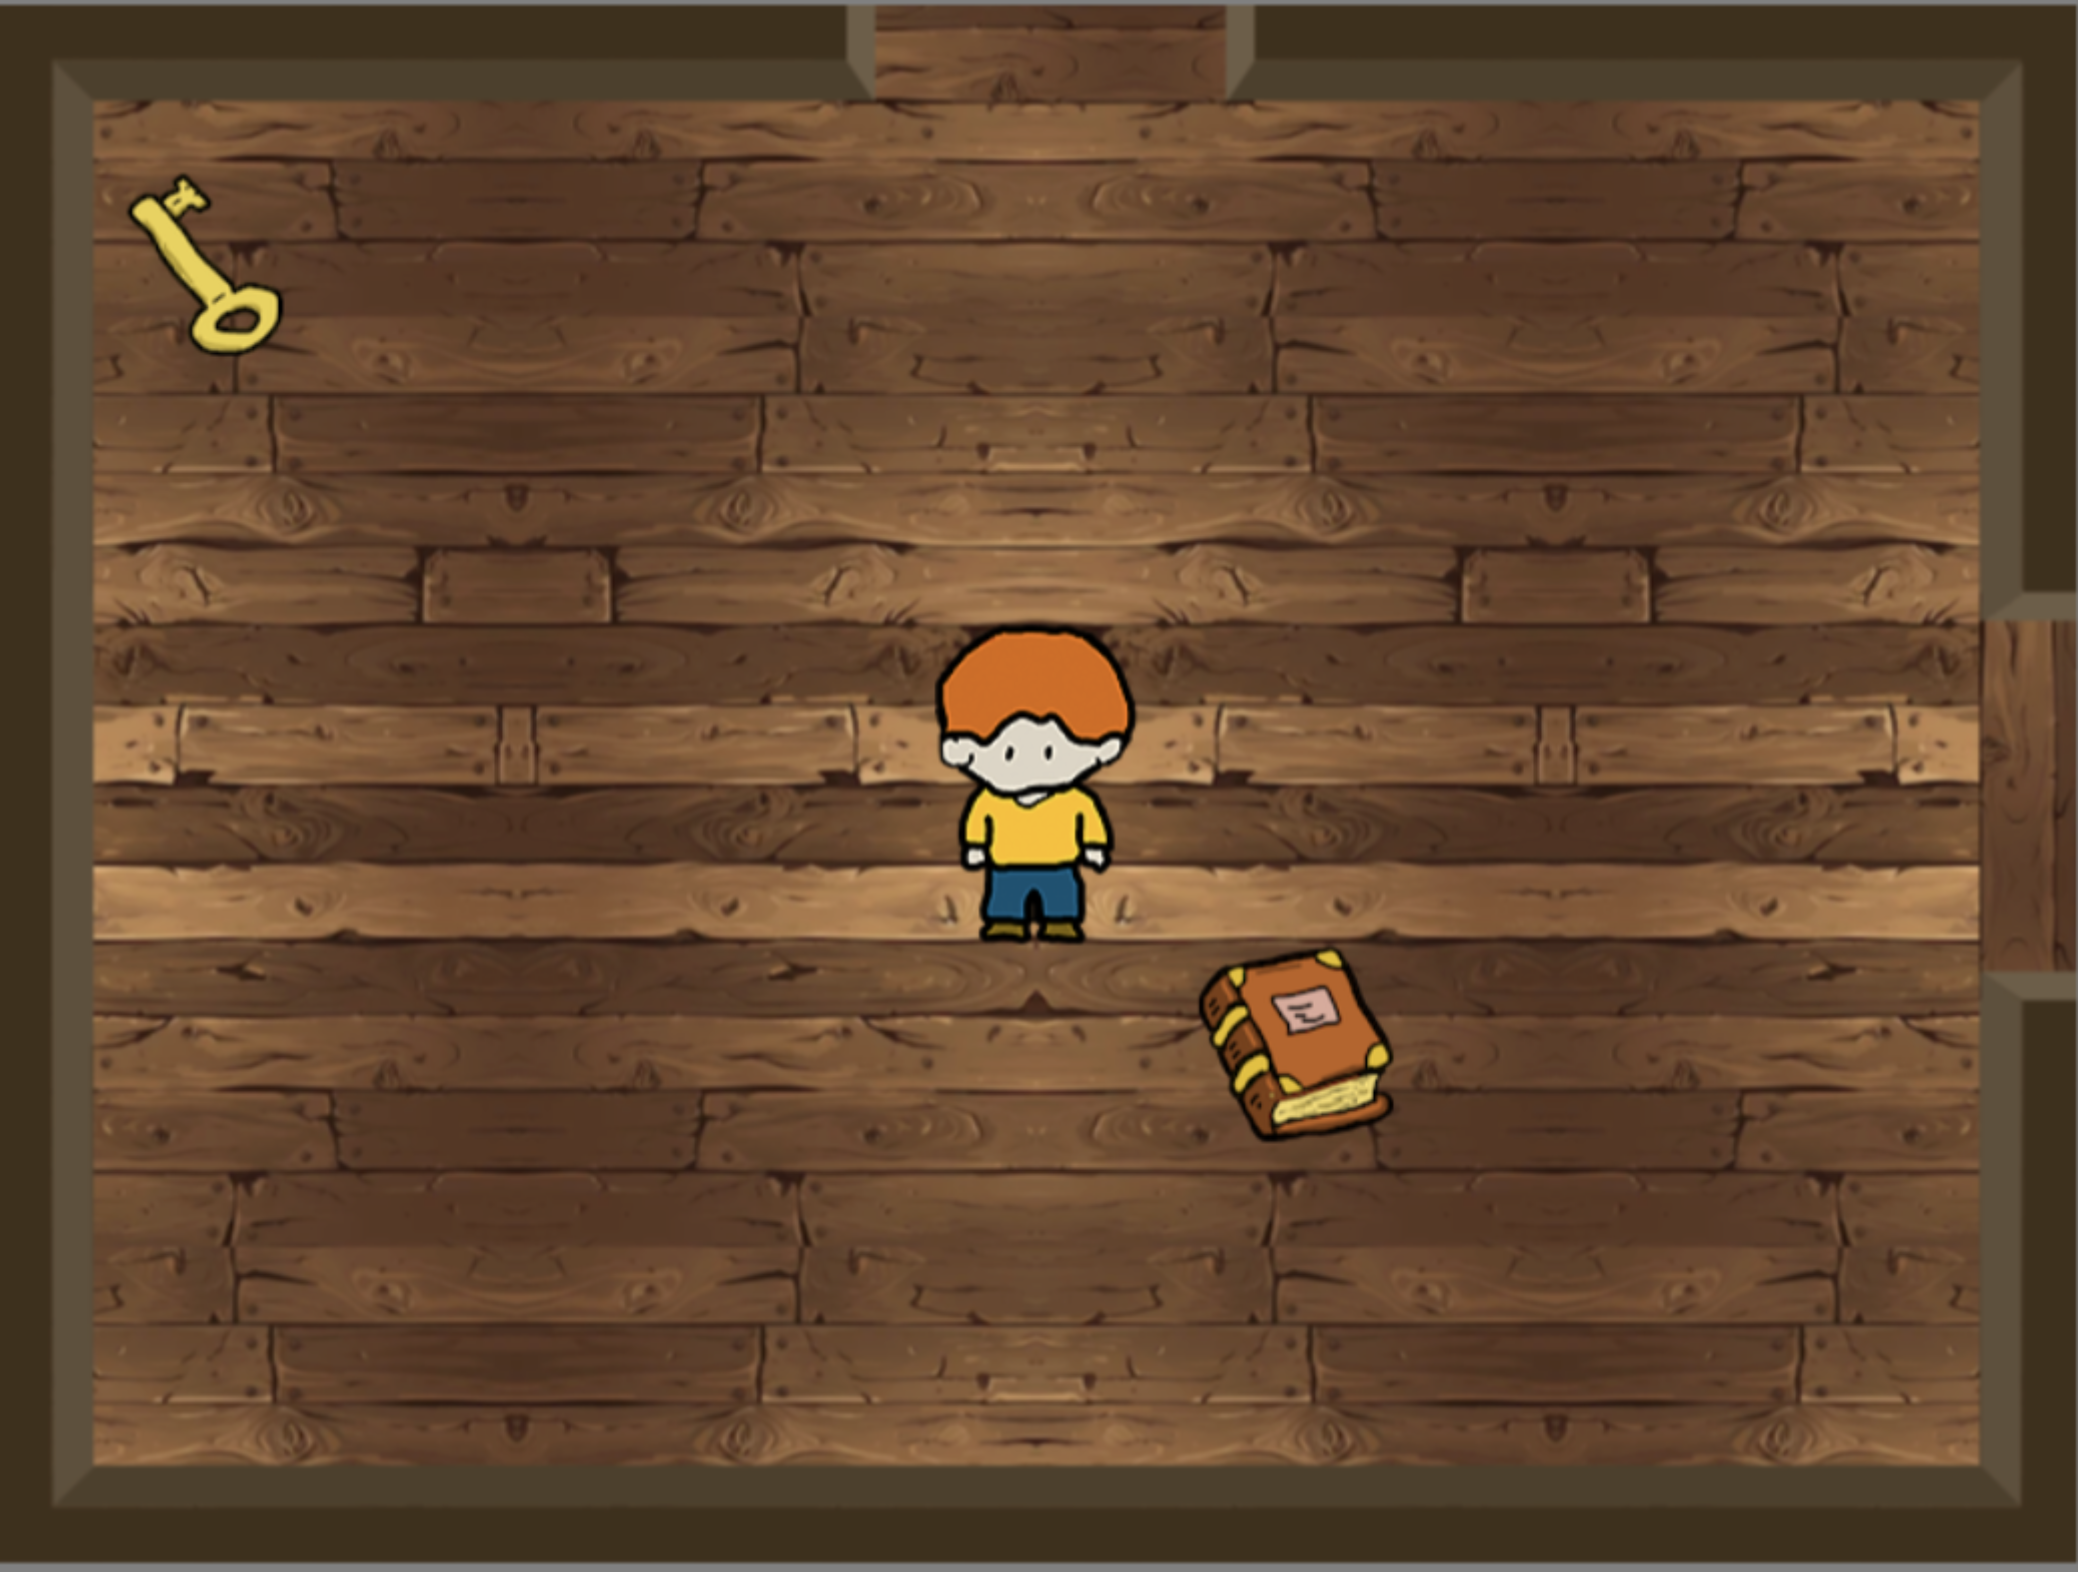 The game discussed in this chapter added some graphics at the end, but it remains, in essence, a text-based game. Commands are typed as text, and the whole interaction is text-based.
Turning this into a graphical adventure game, in the same spirit, but with a player-controlled graphical character that actually moves across the screen, is possible, but it is quite a bit more work. The project shown here, called adventure, shows you how it can be done.
This version is not necessarily much more difficult in principle, but if you try to extend it, you will see that making the graphics you need for it takes some time and skill. Doing so can be fun, though! So have a go if you like.
Chapter 12. Additional project ideas
In this chapter, we will not discuss any more new material, but instead present a few project ideas. Some of the Strype project provided are functional – they do something reasonable – while others are barely started. All can be extended.
The purpose is to give you some ideas what else you could do, to provide some inspiration, and to give you some sample code to study and learn from. Look at them, run them, and take them wherever your imagination takes you.
12.1. Visual effect: Explosion
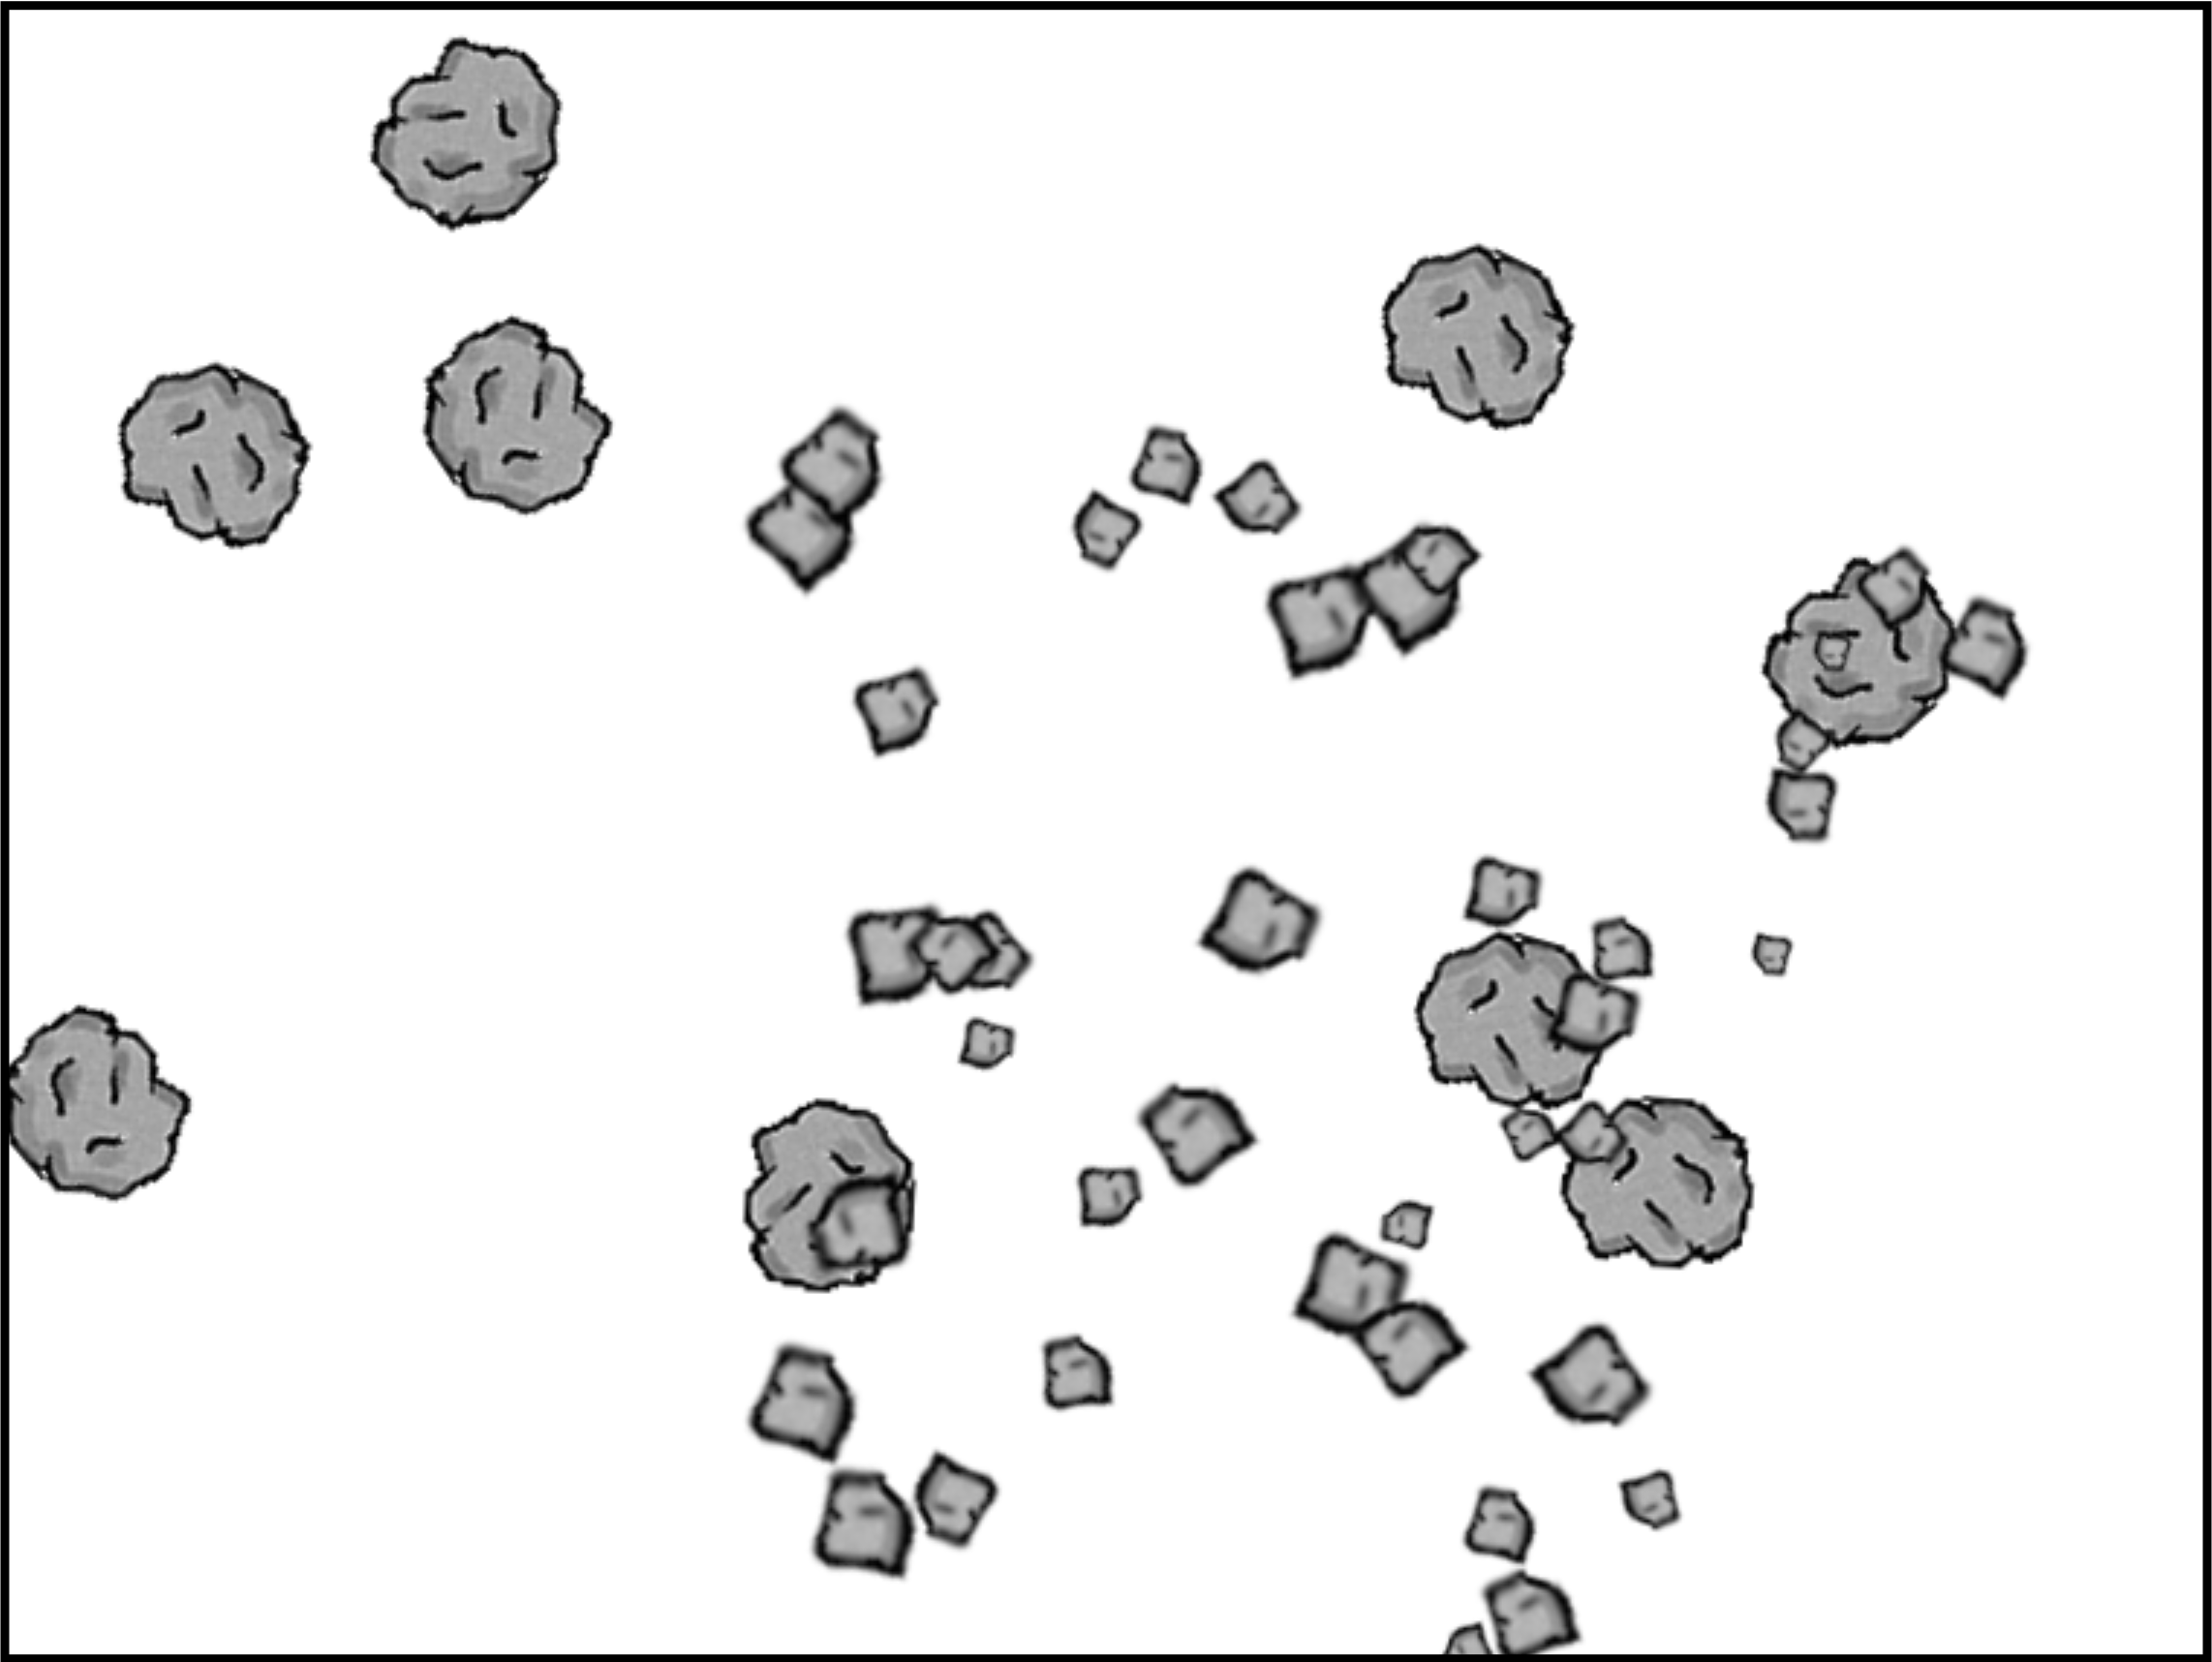
This project does not implement any stand-alone functionality, but a visual effect: an explosion.
It starts off with some rocks. Press a key on the keyboard to set off an explosion, and sit back and watch.
The explosion is implemented by replacing a rock on screen with 40 smaller parts of rock fragments (of random size), and giving each of these fragments a random initial speed and direction of movement. The inherent movement speed is stored as a dx/dy value pair – the distance with which the fragment will travel in the horizontal and vertical direction at each step.
We can then easily apply gravity: At each animation step, we change the vertical movement speed (dy) by subtracting a gravity constant. This will make dy a larger and larger negative number, increasing the speed downwards at each step.
12.2. Flocking behaviour: School of fish

This project implements flocking behaviour.
Flocking is a natural animal behaviour exhibited by various groups of animals. The name flocking is taken from flocks of birds (such as starlings) which are famous for this phenomenon. With schools of fish, it is called "shoaling". Swarms of insects or herds of land animals can also show this behaviour.
In a flock, each individual’s motion is influenced by several factors: the desire to stay near to others, the intent to travel in the same direction as everyone else, and goal not to bump into each other, and so on.
If you are interested, do a web search to find out more.
12.3. Object-oriented programming: Little Crab
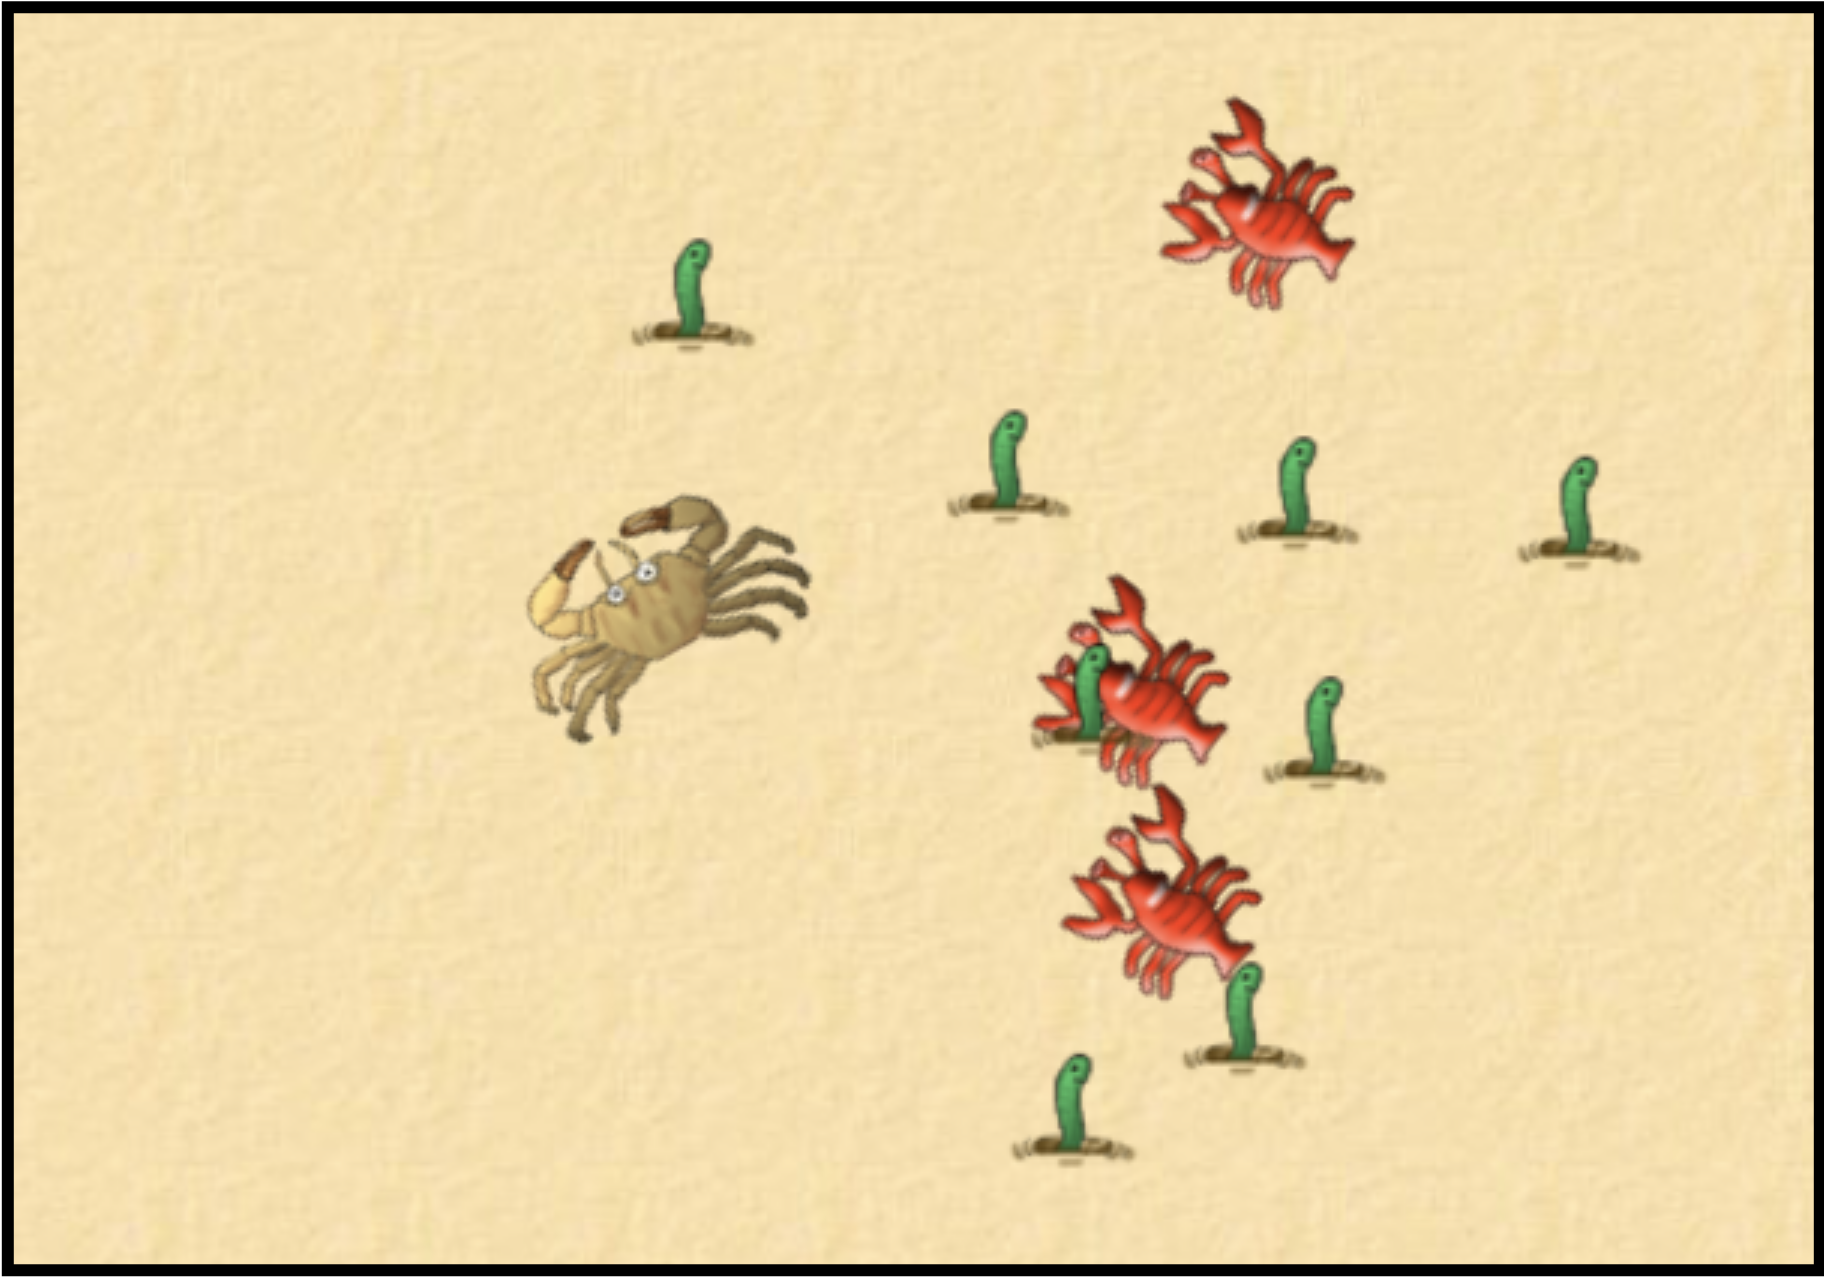
This is an implementation of an old game, first written for the Greenfoot environment in Java, and here translated to Python.
It is essentially the same game as the Yellow-Fish project, which we discussed in the first chapters of this book. The main difference (apart from the use of different images) is that this version was implemented using classes and objects.
It serves here as an example of object-oriented programming. In a way, using objects results in cleaner, more structured code, that can be easier to understand and maintain. If you would like to study object-orientation in Python, have a close look here.
12.4. Sophisticated motion: Cheese
"Cheese" is a fully implemented, playable game. You fly your wedge of cheese through the game, shooting blobs of ketchup at meatballs.
This is quite a sophisticated program, implemented using classes and objects, including a reusable Vector class. Various constants allow you to make the game easier or harder, such as the number of meatballs, the speed of the cheese, or the rate of firing.
The game is based on the classic arcade game "asteroids" (do a web search!), and there is also an asteroid-themed version of the game available here.
12.5. Data analysis: Renewables
If you would like to investigate data analysis (and data science in general) a bit more, then you will eventually move on from writing your own loops to sift through the data, and instead use custom-made libraries that make this functionality easier and more convenient to access. The main libraries that Python provides for this kind of project are pandas, numpy and matlibplot (which includes pyplot).
You may have seen a first example of pyplot in the temperature-plot project at the end of Chapter 6, and an example of the use of pandas to read and analyse csv files at the end of Chapter 8 (in the top-10-songs project).
Here is a new project that combines use of pandas, numpy and pyplot to do a bit more sophisticated analysis. It reads in a csv file with detailed data about renewable energy creation (and example of a datset provided on kaggle.com) and produces several graphs of different types. It can also save images of those graphs as PNG image files.
The project is called renewables; to make the writing of image files work, you need to store it in a could file system where you have write access. (You can copy both renewables.spy file and the data file to your own file store.)
Appendix A: Frame-based editing – the basics
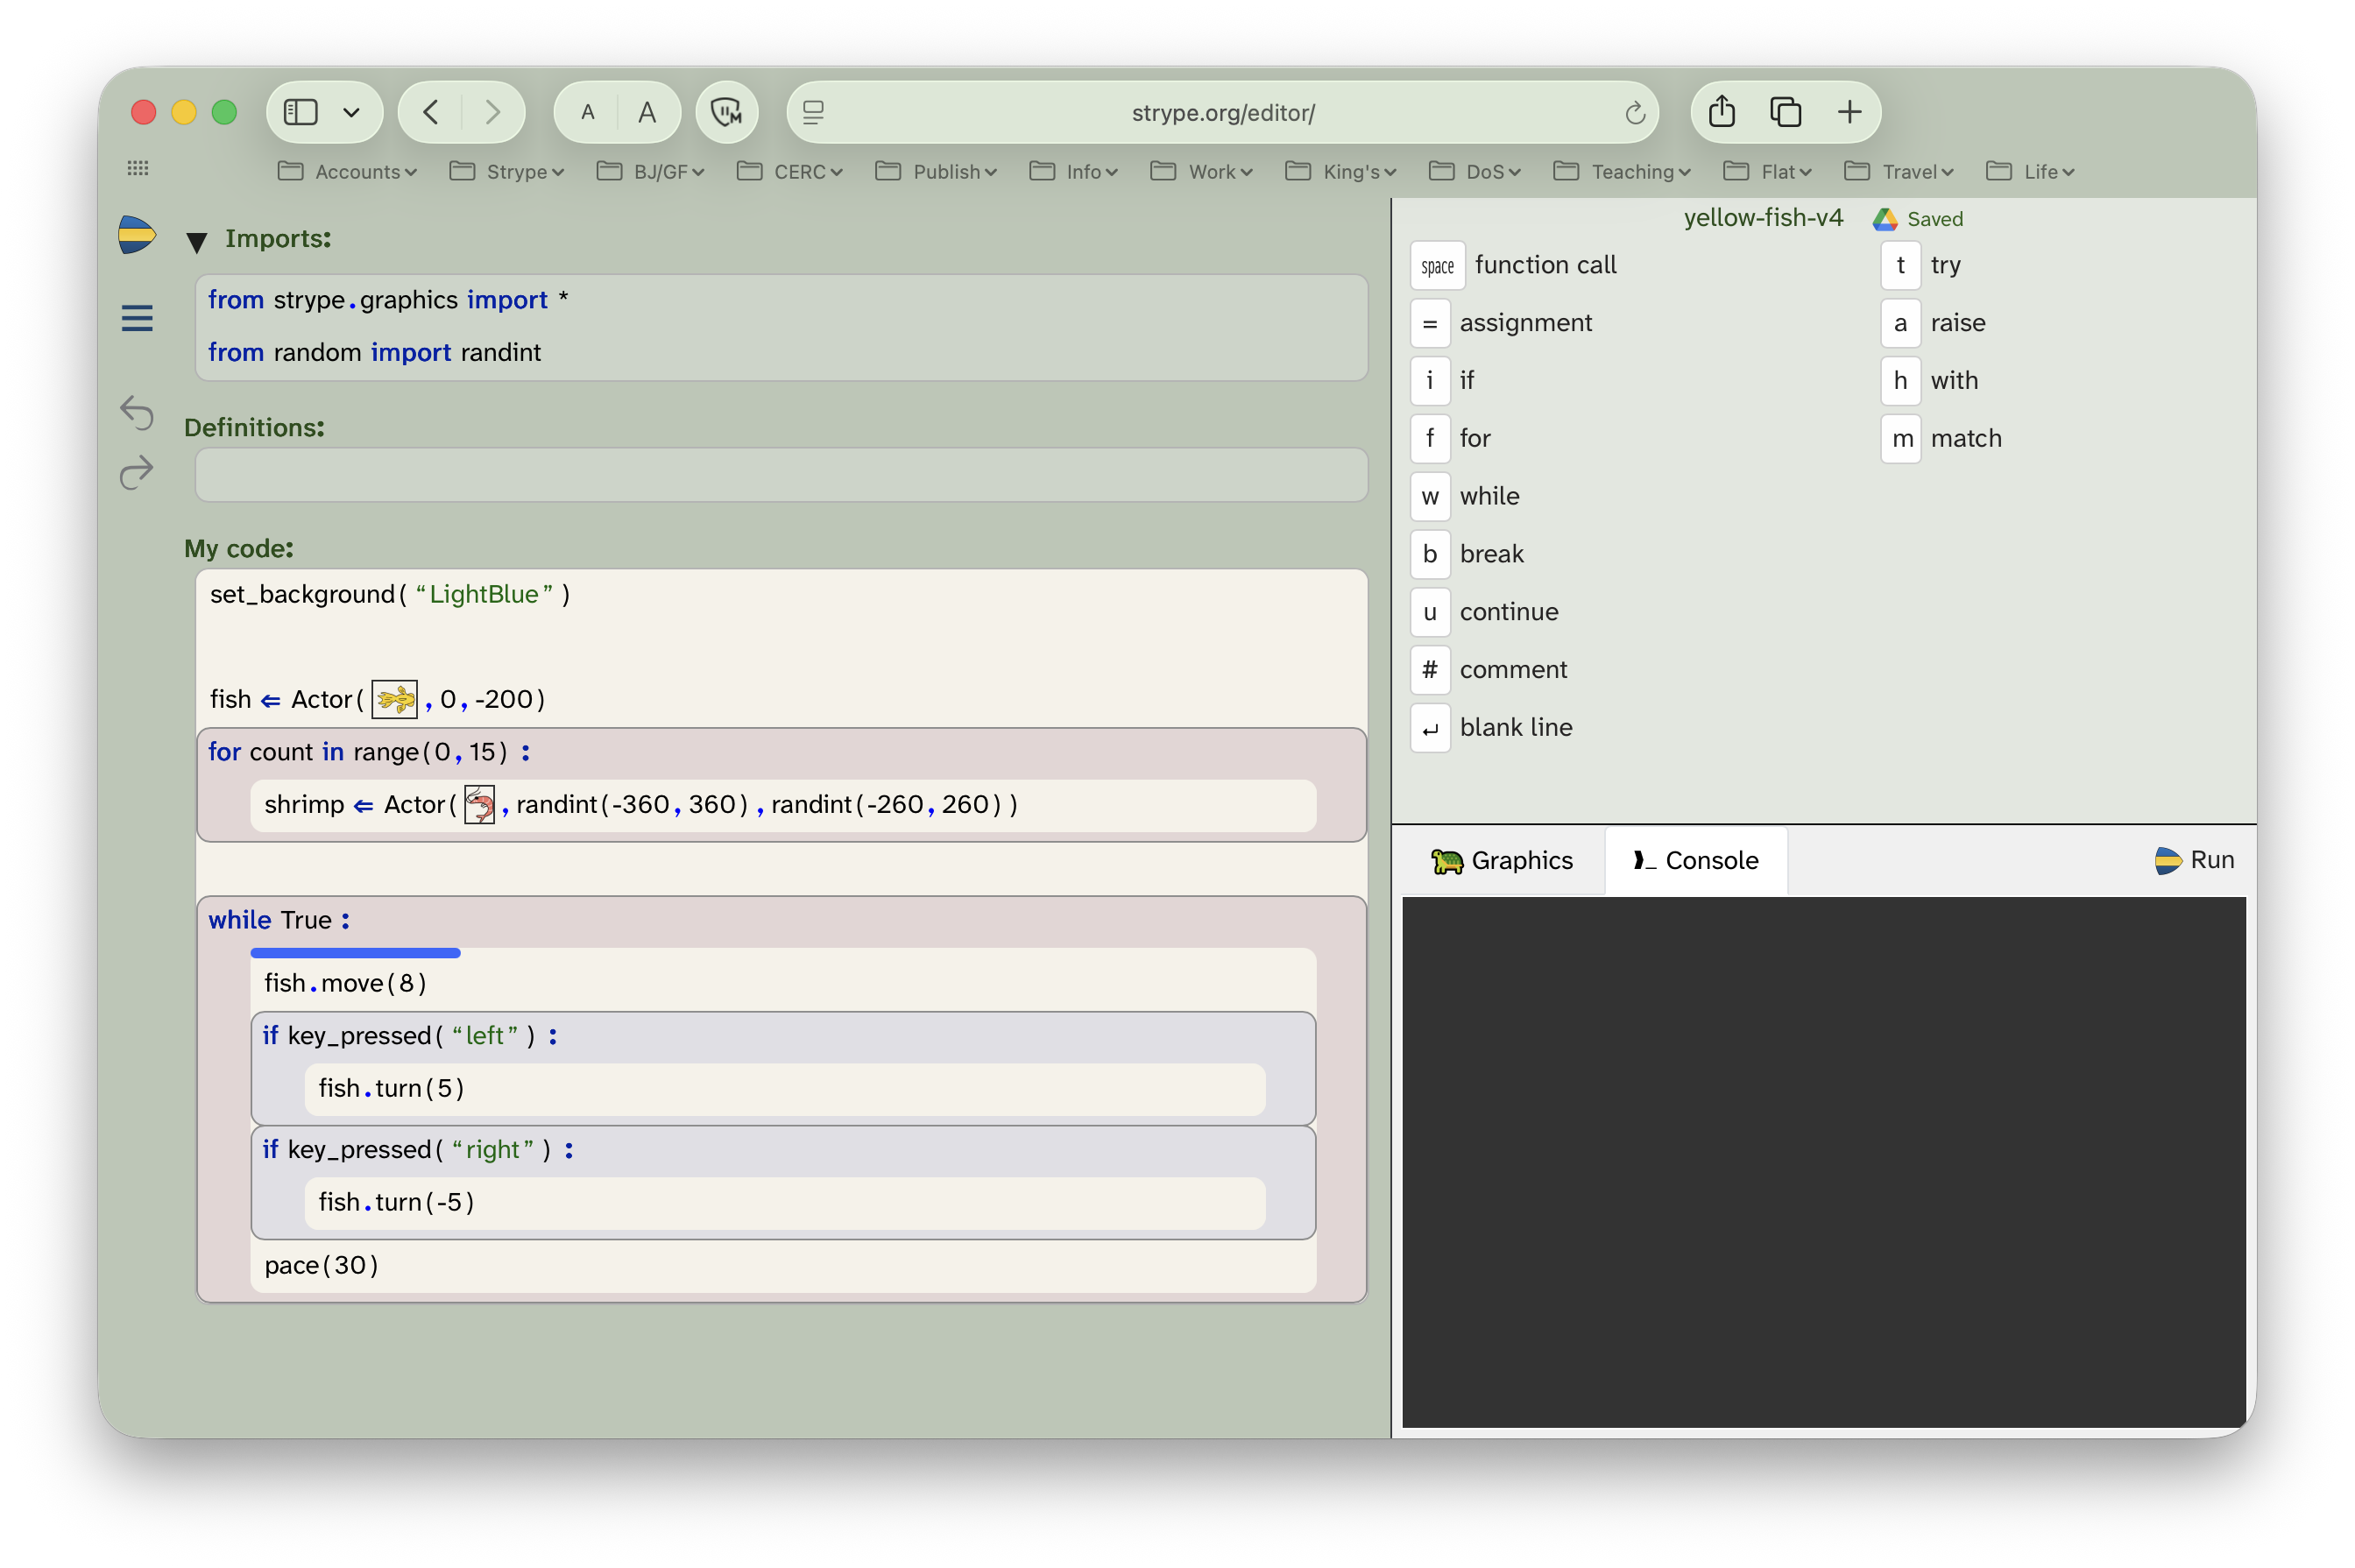
A.1. Basic editing
The Strype editor allows the creation and manipulation of Python programs using the mouse or keyboard. All editing can be achieved with keyboard commands.
Frames
In Strype, program statements are represented by frames – coloured boxes which may be nested within each other (shown under the "My code" heading in Figure A.1). Each Python statement is represented by a frame.
Some frames have a distinctive background colour. Simple frames (such as assignments or function calls) have the same colour as the code background, and no visible outline. They are still frames, and can be manipulated like all other frames.
Frames have slots – areas that must be filled in to complete the frame. Text slots are used for expressions and accept textual input. Frame slots hold nested frames. In an if-statement, for example, the condition is held in a text slot, while the body is held in a frame slot.
Inserting frames
Strype has a frame cursor (the blue bar in Figure A.1) that indicates the current editing position.
A panel in the top right of the main interface (the frame palette) shows all available frames which may be inserted at the current cursor position (see Figure A.1).
A frame can be inserted at the current position in one of three ways:
-
You can click on the frame in the frame palette with the mouse.
-
You can press
SpaceorTABto move focus to the frame palette and then press the shortcut key shown there. For example, pressingSpace–wwill insert a while-loop, orSpace–cwill insert a function call. -
You can just start typing a Python statement at the frame cursor. As soon as it is clear what kind of statement you want, Strype will convert your input into the appropriate frame. For example, if you type
"if "(with the space character at the end), Strype will insert an if-frame. If you type"=", you will get an assignment frame.
Tip: Several frames can be inserted without first typing the Space or TAB key. They are a comment, an assignment, and a blank line. This is because they can be immediately converted: when you insert them as text, it is immediately clear what type of frame you want, and you will instantly see the right frame.
Cursor movement and selection
The frame cursor is moved using the cursor keys, which can also be used to select one of more frames.
| Key | Function |
|---|---|
|
Move the frame cursor one line up or down. |
|
Enter the next/previous text slot. |
|
Select text in the current text slot. |
|
Move the frame cursor up/down at the current frame level (MacOS). |
|
Move the frame cursor up/down at the current frame level (Windows). |
|
Select the frame(s) above/below the cursor. Use repeatedly to select multiple frames. |
Surrounding frames
You can wrap existing frames in a surrounding control frame (such as a loop or conditional), by selecting the intended body frame(s), and then inserting the control frame.
For example, try selecting a few frames, and then press Space–i to insert an if-frame. This will place the selected frames inside an if-statement.
Surrounding text
Similar functionality exists in text slots. If you insert a symbol that is usually used as a pair, such as a bracket, parenthesis, or quote, the matching closing symbol is automatically added as well.
If you wish to add quotes or brackets to existing text, select the text to go inside the brackets first:
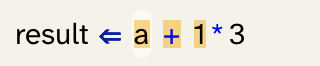
and then insert the surrounding character:
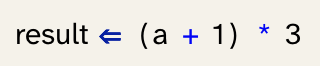
This applies to all paired characters, including all quotes and bracket types.
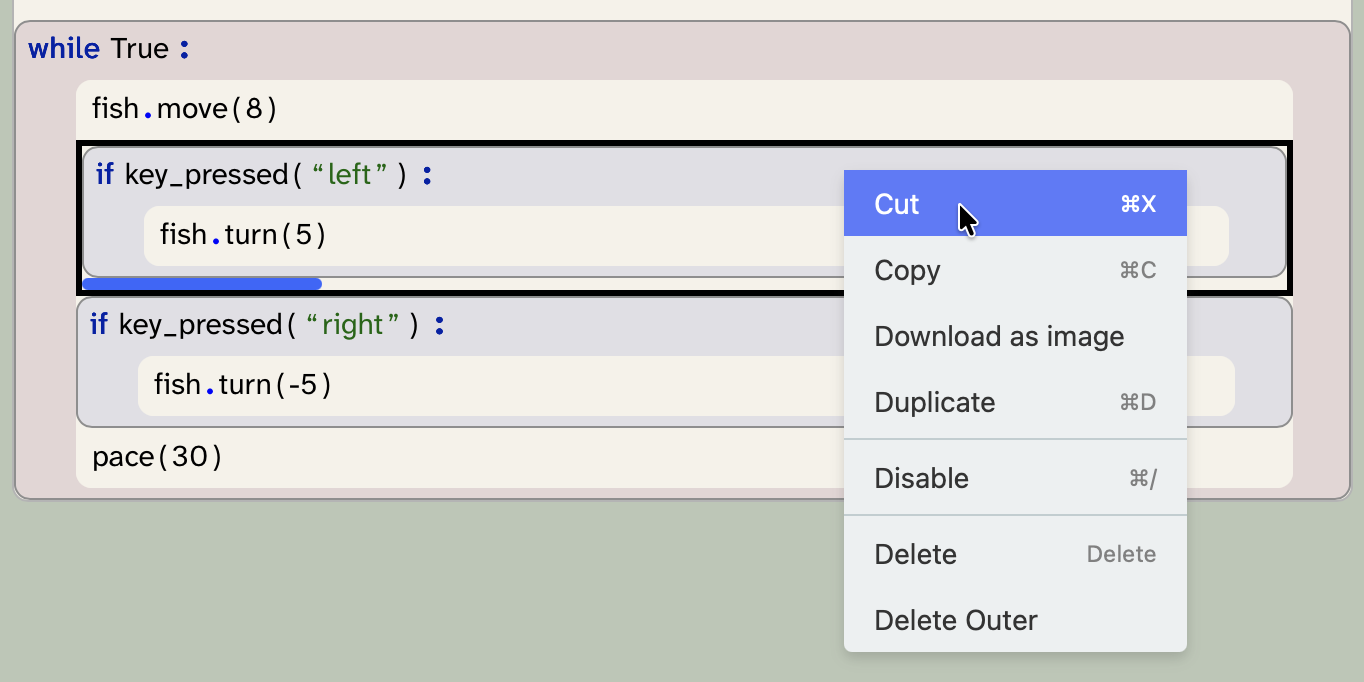
The context menu
Right-clicking a frame with the mouse displays its context menu (Figure A.2). The context menu offers some useful functions for frames.
Context menu functions can be applied to multiple frames at the same time by first creating a multi-frame selection, and then using the context menu.
Some context menu functions can be applied using keyboard shortcuts; these are shown in the context menu.
Deleting frames
Frames can be deleted using the backspace and delete keys.
For a compound frame (such as an if-statement or a loop), the entire frame can be deleted (including children), or the outer frame can be deleted, leaving the body intact.
To delete the entire frame, place the cursor after the frame and use backspace.
To delete just the outer frame, place the cursor after the frame header and use backspace.
These functions can also be applied via the context menu.
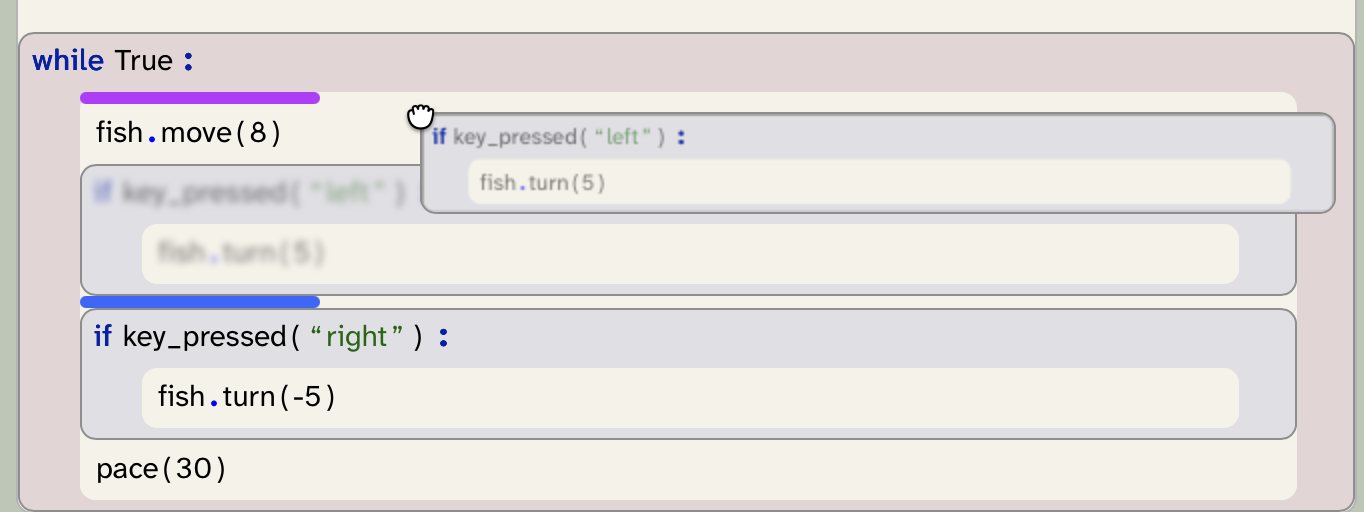
Moving frames
To move a frame, drag it with the mouse pointer to the desired location (Figure A.3). The purple frame cursor indicates the potential target location. Note that you will need to drag from an area with the frame background as dragging text will select it; we find it easiest to drag the right-hand end of the frames where often there is no text.
Frames can also be moved using the keyboard with frame selection, followed by cut/paste operations.
A.2. Convenience functions
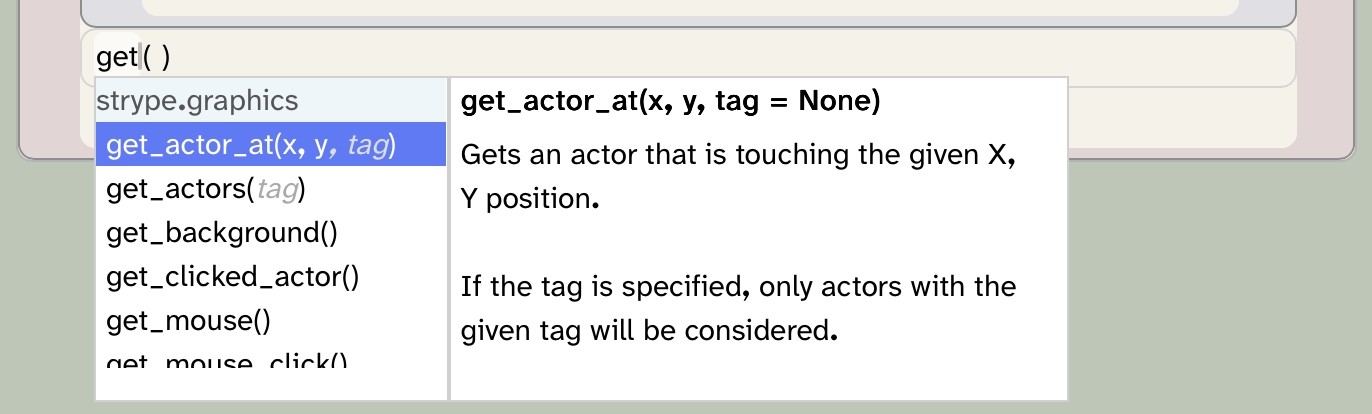
Auto-completion
When inserting function calls or assignments, auto-completion can offer available identifiers. To activate auto-completion, use Ctrl-Space. This displays the auto-complete dialogue (Figure A.4); typing a prefix narrows the offered selection. Use the arrow keys and Enter to select an offered choice.
Instant auto-complete
If, with the frame cursor visible, you activate auto-completion (Ctrl-Space), a function call frame will be inserted and auto-complete activated in one action. There is no need to insert the function call frame separately first.
Auto-completion for strings
If you use auto-completion (Ctrl-Space) while the cursor is inside a string, the auto-completion dialogue will offer all file names for file available in Strype’s built-in, read-only file system.
Disabling frames
Frames can be temporarily disabled without a need to delete them. Disabling is used in Strype instead of "commenting out" code. Disabled frames are shown with a blurred appearance.
Frames can be disabled using the context menu, or the keyboard shortcut shown in the menu.
If multiple frames are selected when the Disable keyboard shortcut is used, the state of each frame is toggled. This can be used to alternate between two different test statements: If one test statement is enabled and the other is disabled, select both frames and invoke the 'Disable' toggle. This will alternately activate each statement.
Appendix B: Working with Strype - Tips and tricks
B.1. Display options
Pane layout
Strype offers four different layout options. These will determine how the text console and graphics world are displayed in the interface.
By default, the graphics and text output areas are displayed in a tabbed pane, allowing viewing of one of them at a time. Using the other options, these two output areas may be displayed at the same time.
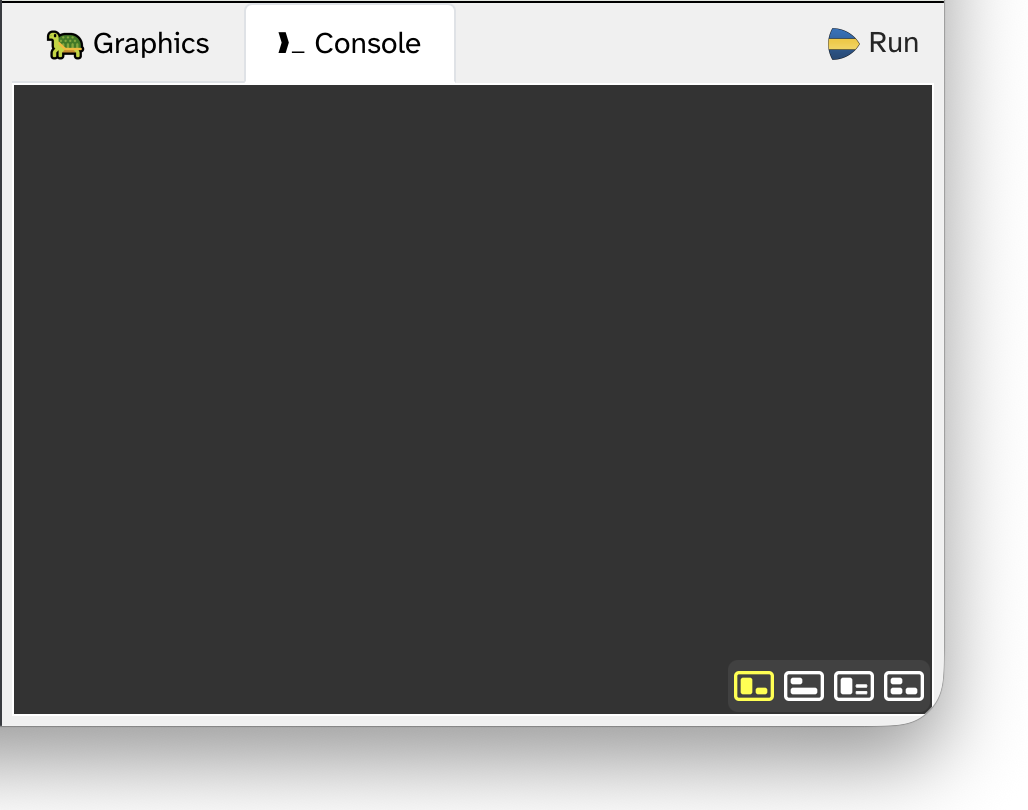
The options can be selected using the icons in the bottom right corner of the main Strype window (Figure B.1). Note that the icons are only visible when hovering over the output area.
The size of the output areas can be adjusted by dragging the horizontal or vertical divider line around the console (Figure B.2).
The interface layout is saved with the project. When saving and sharing a project, the interface will be restored to the same arrangement as it was when the project was saved.
Folding functions and classes
Functions may be folded in to streamline how they are displayed in the editor. This is achieved by using the folding control in the top right of the function frame (Figure B.3). Note that this control is only visible when the mouse hovers over the frame, or when the function is folded.

Folding a function cycles through three states:
-
All code
-
Header only
-
Header and comment
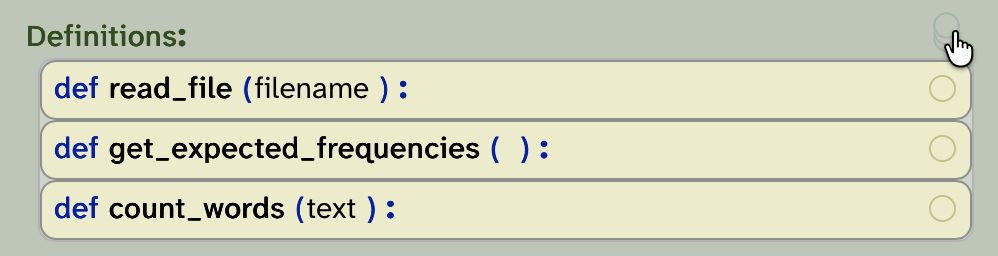
A global folding control is available at the top of the definitions area (Figure B.4). Using this control, all functions can be folded into the same state.
In addition to folding of functions, folding is also available for classes (Figure B.5).
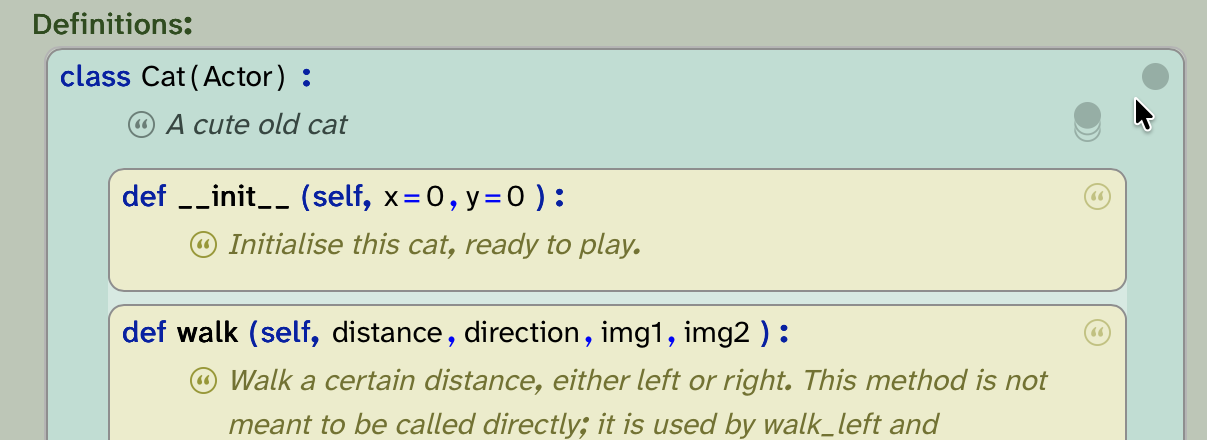
For classes, two folding controls are available: one for folding all methods within the class, and one for folding the class itself. By making good use of these options, classes can be either entirely collapsed, or they can be displayed with a listing of their method headers (with or without documentation). The best way to understand these options is to try them out.
Making good use of Strype’s folding functions can help navigating a project and concentrating on the segments of code currently under construction.
Freezing functions and classes
In addition to folding, functions and classes can be frozen. Freezing is available via the right-click context menu. When a function of class frame is frozen, it is displayed with a small snowflake icon in its top right corner (Figure B.6).
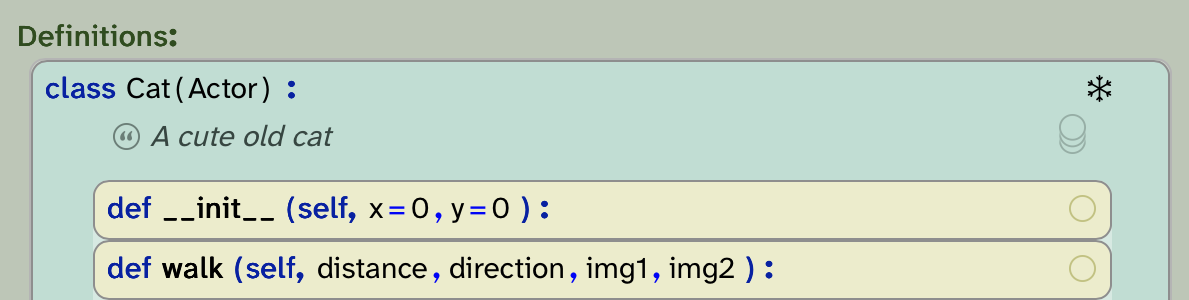
A frame is typically frozen in a project to indicate to the programmer that this part of the program is finished in its implementation, and is not intended to be further modified.
A typical case is a project provided to students with some helper functions implemented, which the students are expected to use, but not modify. Freezing these functions sends the signal that students are not expected to modify or understand the implementations, but can use them as library functions.
When frames are frozen, the folding control toggles only between the two header options (with or without comment). The implementation will not be displayed.
Note that freezing sends just a hint to the student how they are expected to use this code. It does not prevent the function from being modified. Any user can, at any time, unfreeze a function to study or modify its implementation. Thus, freezing provides an aid to viewing and using a project, not a security feature.
B.2. Project and file storage
Open and save
You can save Strype programs to your local filesystem, or to a cloud storage system. Currently, two cloud stores are supported: Google Drive and Microsoft OneDrive.
Strype does not manage or access your user data on those platforms. To use a could drive, you must have an account with one of those providers and access it in the usual manner. Strype never sees your account details or password and stores no user data.
File access: Local device vs cloud
Saving systems to your local computer may be easier, since it does not require an account with a cloud provider. However, if you would like to work on the same project across different computers (for example, in a school lab), then saving to the cloud can be more convenient.
Another reason to save your project to the cloud is data file access: For security reasons, web browsers are not allowed to access your local filesystem (without an explicit file open dialogue). Because of this, your Strype programs cannot read data files from your local file store, and programs that attempt to access local files will fail.
To work with your own data files, store your project in a could file system, and then place the data file into the same folder as your program. The program can then access the file without a full path (using just the file name).
B.3. Export / import
Opening Python programs
You can open many standard Python programs directly from within Strype. To do so, just use the standard 'Open' function and select a Python source file (.py suffix).
Not all Python programs can be opened. Firstly, Strype will attempt to re-order code in the file to move all imports to the top, and all definitions above any free-standing code. This is necessary to conform to Strype’s restrictions. Secondly, some (rarely used, advanced) Python constructs are not supported, and programs using them cannot be opened. The great majority of Python programs, however, will work with Strype.
Saving Python programs
Strype programs can be saved in standard Python format using the "Convert to Python file" function from the Strype menu. The resulting program will run in a standard Python runtime, as long as it does not use any of the Strype-specific libraries (imports starting with strype.).
Pasting python code
You can paste standard, text-based Python code directly into the Strype editor. For this to work, you should copy complete Python statements (one or more). Pasting will fail if the paste buffer does not hold complete statements.
Download as image
A selection of Strype frames can be downloaded to your local file system as a PNG image. This can be useful for creating documents (e.g. teaching material) including Strype code snippets.
To do so, select the desired frames, then use "Download as image" from the frame’s context menu. The image will be downloaded to your default browser download location.
Similarly, you can download an image of the graphics output or text console via a right-click menu in the output area.
Project sharing
A copy of an existing program can be made available to others. This can be useful, for example, to make a starter project available to students, or to give a copy of your program to a friend. (The book projects in this book are make available in this manner.)
To share your project, use the "Share" function from Strype’s menu.
Two different sharing options are available:
Cloud link: To use a cloud link, your project must be saved in a cloud storage system (Google Drive or OneDrive), and it must be in a saved state. The cloud link dialogue will give you a link which you can then send to others (vie email, a web page, or any other means). Any user who clicks on the link will be taken to Strype, with a copy of your project loaded. They can then save their copy to their own storage; this will not affect your copy.
Cloud link provides a live copy: If you make and save changes to your program after sending the link, other users will see those changes when they later click the link.
Snapshot link: A snapshot link encodes the entire Strype program in a URL. Clicking this option places this link into your paste buffer, ready to be pasted elsewhere. The advantage over the cloud link is that no cloud storage is needed.
The link is static: it encodes the program at that moment; later changes will not affect the link. Note: Most browsers have a maximum URL length. This option will not work if the program is very long. Therefore, programs including images or sounds will often not work with this option (the image or sound file makes the program too big). For those programs, use a cloud link.
B.4. Other
Local language setting
Strype’s interface language can be changed using an option in the Strype menu. Currently, a limited set of languages are available.
If you are interested to contribute a new translation to a language you speak, please contact us at team@strype.org. We welcome volunteer contributions of interface translations.
The Strype Teachers' Lounge
The Strype Teachers' Lounge provides a community site for teachers who are interested in Strype. If you are a teacher at a school, you can request access. The forum provides discussion and resources that can help your teaching (project ideas, worksheets, etc.). A link to the Teachers' Lounge is available on the Strype website at strype.org.
Appendix C: Dealing with errors
Errors are an inherent part of programming. Everyone runs into errors in programming: from the most expert programmers, to the person writing their very first program. They are not a sign of deficiency; they are an expected part of the process. Indeed, programming can sometimes feel like the journey from one error message to the next!
Strype is specifically designed to eliminate some errors that you can get from Python, such as mismatched brackets, or incorrect indentation. Nevertheless, you will encounter errors in Strype. Each error arises from a unique situation so we cannot predict exactly how to fix each and every error, but this appendix is a brief guide on how to deal with errors.
Errors can occur while you are editing, or they may occur when you run your program. If you are in the middle of editing you may want to ignore some errors until you believe you have finished. For example, if you create an if-frame and don’t fill in the condition, an error will be displayed telling you that the condition is empty. But that is expected, and you may want to ignore the error until you are ready to fill in the condition.
Errors that occur during editing will prevent you from running the program and you will need to fix them first. Other errors may only occur when that particular piece of code is executed — or the error might even only happen based on what happened earlier in that particular execution of the code.
C.1. What to do when you get an error
First: stay calm. Errors are one of the ways in which the programming system communicates back to you, to tell you it has encountered a problem. Your role is to take that error and work out how to resolve it.
The next thing to do, which may sound obvious, is to read the error message. Sometimes error messages can be confusing, or full of jargon, but some people new to programming get scared of trying to read the message at all. It will be much harder to fix if you do not know what is wrong. But sometimes the error does not make sense, or will only make sense when you understand the problem.
The error message should pop-up in a bubble when it occurs. If you want to see it again later, you can move your mouse over the little exclamation mark (!) triangle on the right of the frame where the error occurred. Failing that, you can try running the program to try to make the error re-appear.
Check the code for spelling mistakes. It is easy to write "prnit" where you meant "print". This includes capitalisation. If you called your variable "myString" and then try to use it with "mystring", Python counts this as two different things, and you will get an error.
A further step which can help is to compare the code with an error to similar code without an error. For example, you might compare your code to code in this book (which should all be error free!), or to programs that you have previously written that worked. Pay close attention to punctuation like speech marks or brackets; often code errors arise from missing vital punctuation that is easy to overlook.
Finally, some errors, especially in larger programs, can actually be caused by mistakes earlier in the program. If the message does not make sense where it is displayed, look earlier in the program for possible related mistakes. Often the relation is the variables that are used on the line with the error.
C.2. Deciphering errors: example 1
Let us look at an example of deciphering an error. You might want to print the text Hello on the screen, so you write this:

print(Hello)At first glance, this looks reasonable. There is no spelling mistakes here. But if we click Run we get this error:
NameError: name 'Hello' is not defined
That is quite confusing. But let’s not just disregard it. Let us see what it is trying to tell us. It says the name Hello is not defined. But that is stupid: Hello is not meant to be a name. Maybe that gives you a hint, but maybe it is not enough. So let us compare to some similar, working code. Here is some code from earlier in the book:
print("This is a string")
print('This is also a string')
Let us compare our code very carefully to that code. Do you see the difference?
It is the quote characters around the string. We are missing the quotes! And with that, the error message makes more sense: because we did not have the quotes, Python thought Hello is the name of a variable and did not find such a variable. We can add the quotes to fix the error:

print("Hello") If you have some text in Strype where you forgot the quotes, the easiest way to add them is to first select the text in question (either with the mouse, or shift and left/right keys) then type a quote character. This will surround the selected text in quotes.
C.3. Deciphering errors: example 2
Let us look at another example, in a slightly longer program. This program is intended to time how long the user took to press enter:
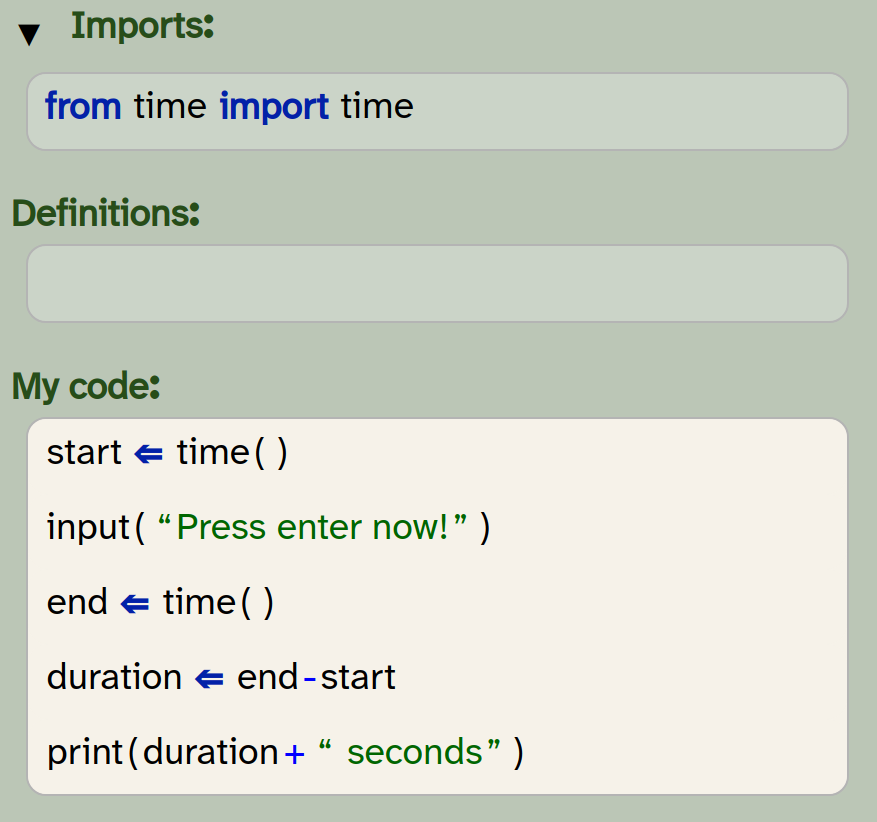
from time import time
start  = time()
input("Press enter now!")
end  = time()
duration  = end-start
print(duration+" seconds")
If you run this (and press enter) you will get an error on the last line which says:
TypeError: unsupported operand type(s) for +: 'float' and 'str'
You may well not know the word "operand" (we will define it for you in a moment, but for now let us assume we do not understand it). If you have reached Chapter 2, you will know that types refer to kinds of data, and you may recognise "float" and "str" as types. It is easy to mis-understand what this part means:
for +:
That just looks like a mistaken mess. But read carefully; it is saying the problems are the types for the "+", meaning the + in our code. So it is saying there is a type error on the +. The two types involved are float and str, and it does not like that.
Let us find some similar working code from earlier in the book. Here is some code from Chapter 5:
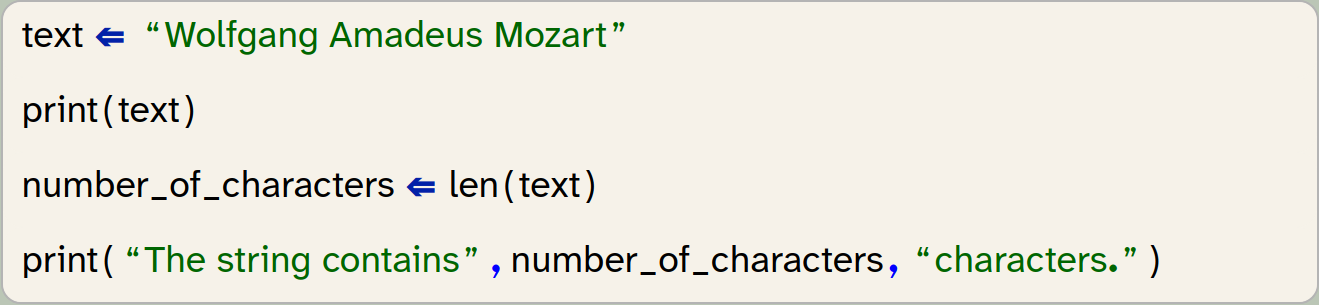
text = "Wolfgang Amadeus Mozart"
print (text)
number_of_characters = len(text)
print("The string contains", number_of_characters, "characters.")
In this code, the last line does not use "+" for this kind of mixed printing, it uses a comma. So one possible fix is to change our code to:

print(duration, "seconds")Another fix would be to convert the float into str, using the str function:

print(str(duration) + " seconds")It is often the case that there are multiple ways to solve an error in programming. In this case, both work just fine.
Finally, what is an operand? Well, an operand is something next to an operator; in the code 1+2, the operator is the plus, and the operands are 1 and 2.
C.4. Deciphering errors: example 3
Here is another short program which is intended to build up a list of numbers:
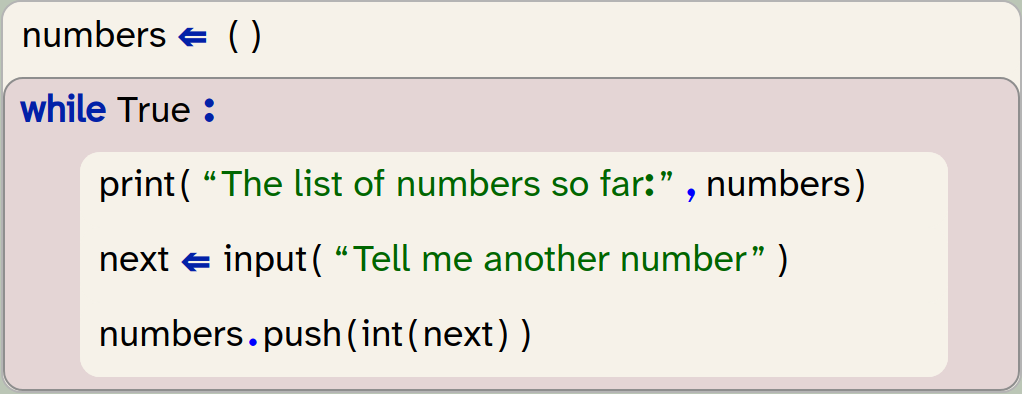
numbers  = ()
while True  :
    print("The list of numbers so far:",numbers)
    next  = input("Tell me another number")
    numbers.push(int(next))
If you run it, it will start out fine. Then, when you enter a number, you will get an error on the last line that says:
AttributeError: 'tuple' object has no attribute 'push'
So once again, you might not understand some of the terminology. If you are early in the book you might not know the term tuple (which we cover in Chapter 8). The message does not seem to relate to your program at all! It is complaining that it does not know about push – we can see push in our code, at least. So it is not finding push. But we know that lists have a push method – we have even double-checked this – so what is going on? The line with the error looks fine, no matter how much we stare at it.
Let us look back up the code at the variables involved. The variable next is assigned on the line before. That line looks okay; it is a function call, it has quotes around the string. So let us look at the variable numbers instead. This variable is assigned before the start of the loop. Can you see a problem there?
If you consult the chapter about lists, you will find that lists use square brackets, not round brackets. So that mistake actually caused an error several lines later! It just did not matter before the last line that it was not a list. So in this case we fix our error by editing elsewhere.
C.5. Welcome to the wonderful world of errors
When you program, you will encounter many more errors than these. We ourselves often encounter new errors we have not seen before, and we make use of similar techniques to find them. So remember:
-
Stay calm.
-
Read the error carefully for parts you do understand (and don’t worry if you do not understand it all).
-
Check the line with the error for obvious mistakes, especially spelling mistakes or punctuation problems.
-
Compare the code to other code which you know works; what are the differences and how might they explain the error?
-
Look at earlier code for possible causes, especially lines which involve the same variables as the line with the error.
-
You can also ask a friend, ask the teacher, or try searching the Internet for help.
Appendix D: Python operators
This appendix lists the Python operators you are likely to need, organised by category.
D.1. Arithmetic operators
| Precedence | Operator | Name | Description |
|---|---|---|---|
Highest |
|
Unary minus |
Negation |
High |
|
Multiplication |
Multiply values |
|
True division |
Floating-point division |
|
|
Floor division |
Integer division (floor) |
|
|
Modulo |
Remainder |
|
Normal |
|
Addition |
Add values |
|
Subtraction |
Subtract value |
D.2. Boolean operators
| Precedence | Operator | Name | Description |
|---|---|---|---|
Highest |
|
Logical NOT |
Inverts truth value |
High |
|
Logical AND |
True if both operands are true |
Normal |
|
Logical OR |
True if either operand is true |
D.3. Comparison operators
| Precedence | Operator | Name | Description |
|---|---|---|---|
Normal |
|
Ordering |
Relational comparisons |
|
Equality |
Value comparison |
|
|
Identity |
Object identity test |
|
|
Membership |
Membership test |
D.4. List operators
Note that + and * both also work on lists. If you "add" two lists, it returns the lists joined together, end to end. So [1, 2] + [3, 4] gives you [1, 2, 3, 4]. If you multiply a list by a number, it repeats it. So [1, 2] * 2 gives [1, 2, 1, 2].
Lists also have another kind of operator: slicing. There are several ways to slice. Imagine we have a list with all the letters of the alphabet: ["a", "b", "c", "d", … "z"] (that triple dots is not Python code, just to save us writing out the full alphabet).
-
letters[2:]would give the list from index 2 onwards. Since index 0 is the first position, index 2 is letter"c"so this will give the letters c to z. -
letters[:2]would give the list up to just before index 2. Since index 2 is letter c, this would just give["a", "b"]. -
letters[2:5]would give the list from index 2 to just before index 5. Therefore this is indexes 2, 3, and 4; letters c to e. -
letters[5:10:2]would give the list from index 5 to just before index 10, in steps of 2. Index 5 is letter f, so this will be["f", "h", "j"]. -
The final variants omit the start or the end:
letters[5::2]returns all letters from 5 onwards in steps of 2. Whereasletters[:5:2]returns all letters up to just before index 5, in steps of 2, so["a", "c", "e"].
D.5. More operators
In this appendix we have omitted some advanced operators. There is a full list of operators in the Python documentation.
Appendix E: Built-in functions
Python has many built-in functions. Built-in functions are automatically available for use in Python, without needing to import them. (There are other functions which are included in Python but need an import, such as the random number functions.)
This is a selective list of a few of the built-in functions that we think you might find particularly useful. You can find all the functions, plus more details on each, in the online Python documentation at https://docs.python.org/3/library/ Some functions can take extra optional parameters that we have omitted here for simplicity.
E.1. Miscellaneous functions
| Signature | Description |
|---|---|
abs(x) |
Returns the absolute value of |
min(a, b) |
Returns the lowest of |
max(a, b) |
Returns the highest of |
range(x) |
Creates a range of numbers. If you provide one actual parameter it gives the range from |
round(x) |
Rounds the number to the nearest whole number |
E.2. Type conversion functions
| Signature | Description |
|---|---|
bool(x) |
Converts |
chr(x) |
Converts an integer |
dict(x) |
Converts |
float(x) |
Converts |
int(x) |
Converts |
list(x) |
Converts |
set(x) |
Converts |
str(x) |
Converts |
type(x) |
Returns the type of |
E.3. Console functions
| Signature | Description |
|---|---|
input(prompt) |
Prints the prompt then returns the next string the user inputs (once they press enter). |
print(s) |
Prints |
E.4. List-related functions
| Signature | Description |
|---|---|
all(list) |
Returns True if all of the values in the list are True when converted to boolean. |
any(list) |
Returns True if any of the values in the list are True when converted to boolean. |
len(list) |
Returns the number of items in the given |
sorted(list) |
Returns a sorted copy of the given |
sum(list) |
Returns the sum of all the numbers in the given |
zip(list1, list2) |
Pairs the lists together into a list of pairs. So |
See the previous appendix on operators for a description of operators that work on lists, and slicing.
E.5. List methods
Lists have methods that can be called on a list object, using the syntax list_name.method_name(). We summarise some of the most important methods below:
| Signature | Description |
|---|---|
list.append(item) |
Adds the given single item to the end of the list. |
list.clear() |
Removes all items from the list. |
list.copy() |
Makes a copy of the list. |
list.count(x) |
Returns the number of times that |
list.extend(list2) |
Adds all the items from |
list.index(x) |
Returns the index of the first time that |
list.pop() |
Removes the last item from the list (and returns it). |
list.remove(x) |
Removes the first appearance of |
list.reverse() |
Reverses the list; the first element becomes the last and the last becomes the first and so on. |
list.sort() |
Sorts the list. (Unlike the |
There are more list methods, which you can find in the online documentation: https://docs.python.org/3/tutorial/datastructures.html#more-on-lists
Appendix F: Available colours
Strype allows you to specify colours as a hexadecimal string such as "#1098ee". The starting "#" indicates that this is a hexadecimal colour, and each pair of digits specifies the red, green and blue colour value (in that order, abbreviated RGB). So the colour above has "10" red, "98" green and "ee" blue. You can learn about hexadecimal numbers by searching online if you are not familiar with it.
If you would like to experiment more with hexadecimal colour values, do a web search for "hex color picker". You can find interactive websites that let you pick different colours and inspect their values.
You can alternatively use colour names, which can be easier if you are not familiar with RGB and hexadecimal. The table below shows all the available colours in Strype. Each row shows the string name you use for it, its hexadecimal value in case you want to then change to a similar but slightly different colour, and a column which shows what the colour looks like. (Colours may look a little different on screen, if you are reading this on paper.)
Strype ignores upper-case/lower-case for these colour names, so "AliceBlue" and "aliceblue" (or "aliceBlue") will all work as ways to use the "aliceblue" colour.
| Color name | Hex value | Sample |
|---|---|---|
"black" |
|
|
"dimgray" |
|
|
"dimgrey" |
|
|
"gray" |
|
|
"grey" |
|
|
"darkgray" |
|
|
"darkgrey" |
|
|
"silver" |
|
|
"lightgray" |
|
|
"lightgrey" |
|
|
"gainsboro" |
|
|
"whitesmoke" |
|
|
"white" |
|
|
"rebeccapurple" |
|
|
"blueviolet" |
|
|
"indigo" |
|
|
"darkorchid" |
|
|
"darkviolet" |
|
|
"darkmagenta" |
|
|
"fuchsia" |
|
|
"magenta" |
|
|
"purple" |
|
|
"mediumvioletred" |
|
|
"deeppink" |
|
|
"crimson" |
|
|
"brown" |
|
|
"darkred" |
|
|
"firebrick" |
|
|
"maroon" |
|
|
"red" |
|
|
"orangered" |
|
|
"sienna" |
|
|
"saddlebrown" |
|
|
"darkolivegreen" |
|
|
"darkgreen" |
|
|
"forestgreen" |
|
|
"green" |
|
|
"darkcyan" |
|
|
"darkslategray" |
|
|
"darkslategrey" |
|
|
"teal" |
|
|
"royalblue" |
|
|
"blue" |
|
|
"darkblue" |
|
|
"mediumblue" |
|
|
"midnightblue" |
|
|
"navy" |
|
|
"slateblue" |
|
|
"darkslateblue" |
|
|
"mediumpurple" |
|
|
"mediumorchid" |
|
|
"plum" |
|
|
"violet" |
|
|
"orchid" |
|
|
"hotpink" |
|
|
"palevioletred" |
|
|
"indianred " |
|
|
"lightcoral" |
|
|
"rosybrown" |
|
|
"salmon" |
|
|
"tomato" |
|
|
"darksalmon" |
|
|
"coral" |
|
|
"lightsalmon" |
|
|
"chocolate" |
|
|
"sandybrown" |
|
|
"peru" |
|
|
"darkorange" |
|
|
"orange" |
|
|
"darkgoldenrod" |
|
|
"goldenrod" |
|
|
"olive" |
|
|
"olivedrab" |
|
|
"darkseagreen" |
|
|
"limegreen" |
|
|
"seagreen" |
|
|
"mediumseagreen" |
|
|
"lightseagreen" |
|
|
"darkturquoise" |
|
|
"cadetblue" |
|
|
"deepskyblue" |
|
|
"steelblue" |
|
|
"dodgerblue" |
|
|
"lightslategray" |
|
|
"lightslategrey" |
|
|
"slategray" |
|
|
"cornflowerblue" |
|
|
"mediumslateblue" |
|
|
"thistle" |
|
|
"pink" |
|
|
"lightpink" |
|
|
"peachpuff" |
|
|
"burlywood" |
|
|
"tan" |
|
|
"navajowhite" |
|
|
"wheat" |
|
|
"gold" |
|
|
"khaki" |
|
|
"palegoldenrod" |
|
|
"darkkhaki" |
|
|
"yellowgreen" |
|
|
"greenyellow" |
|
|
"chartreuse" |
|
|
"lawngreen" |
|
|
"lightgreen" |
|
|
"lime" |
|
|
"palegreen" |
|
|
"springgreen" |
|
|
"mediumspringgreen" |
|
|
"mediumaquamarine" |
|
|
"aquamarine" |
|
|
"turquoise" |
|
|
"mediumturquoise" |
|
|
"aqua" |
|
|
"cyan" |
|
|
"paleturquoise" |
|
|
"powderblue" |
|
|
"lightblue" |
|
|
"skyblue" |
|
|
"lightskyblue" |
|
|
"lightsteelblue" |
|
|
"lavenderblush" |
|
|
"snow" |
|
|
"mistyrose" |
|
|
"seashell" |
|
|
"linen" |
|
|
"bisque" |
|
|
"antiquewhite" |
|
|
"blanchedalmond" |
|
|
"papayawhip" |
|
|
"moccasin" |
|
|
"oldlace" |
|
|
"floralwhite" |
|
|
"cornsilk" |
|
|
"lemonchiffon" |
|
|
"beige" |
|
|
"ivory" |
|
|
"lightgoldenrodyellow" |
|
|
"lightyellow" |
|
|
"yellow" |
|
|
"honeydew" |
|
|
"mintcream" |
|
|
"azure" |
|
|
"lightcyan" |
|
|
"aliceblue" |
|
|
"ghostwhite" |
|
|
"lavender" |
|